- Home
- About Us
-
Products
-
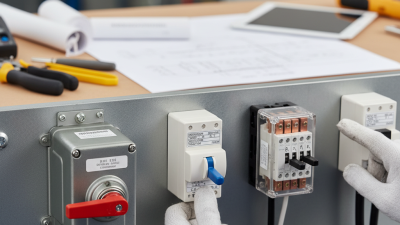
Terminal Power Distribution Electric
-
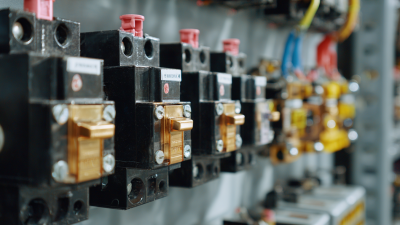
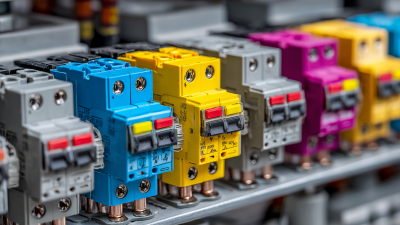
AC Miniature Circuit Breaker
-
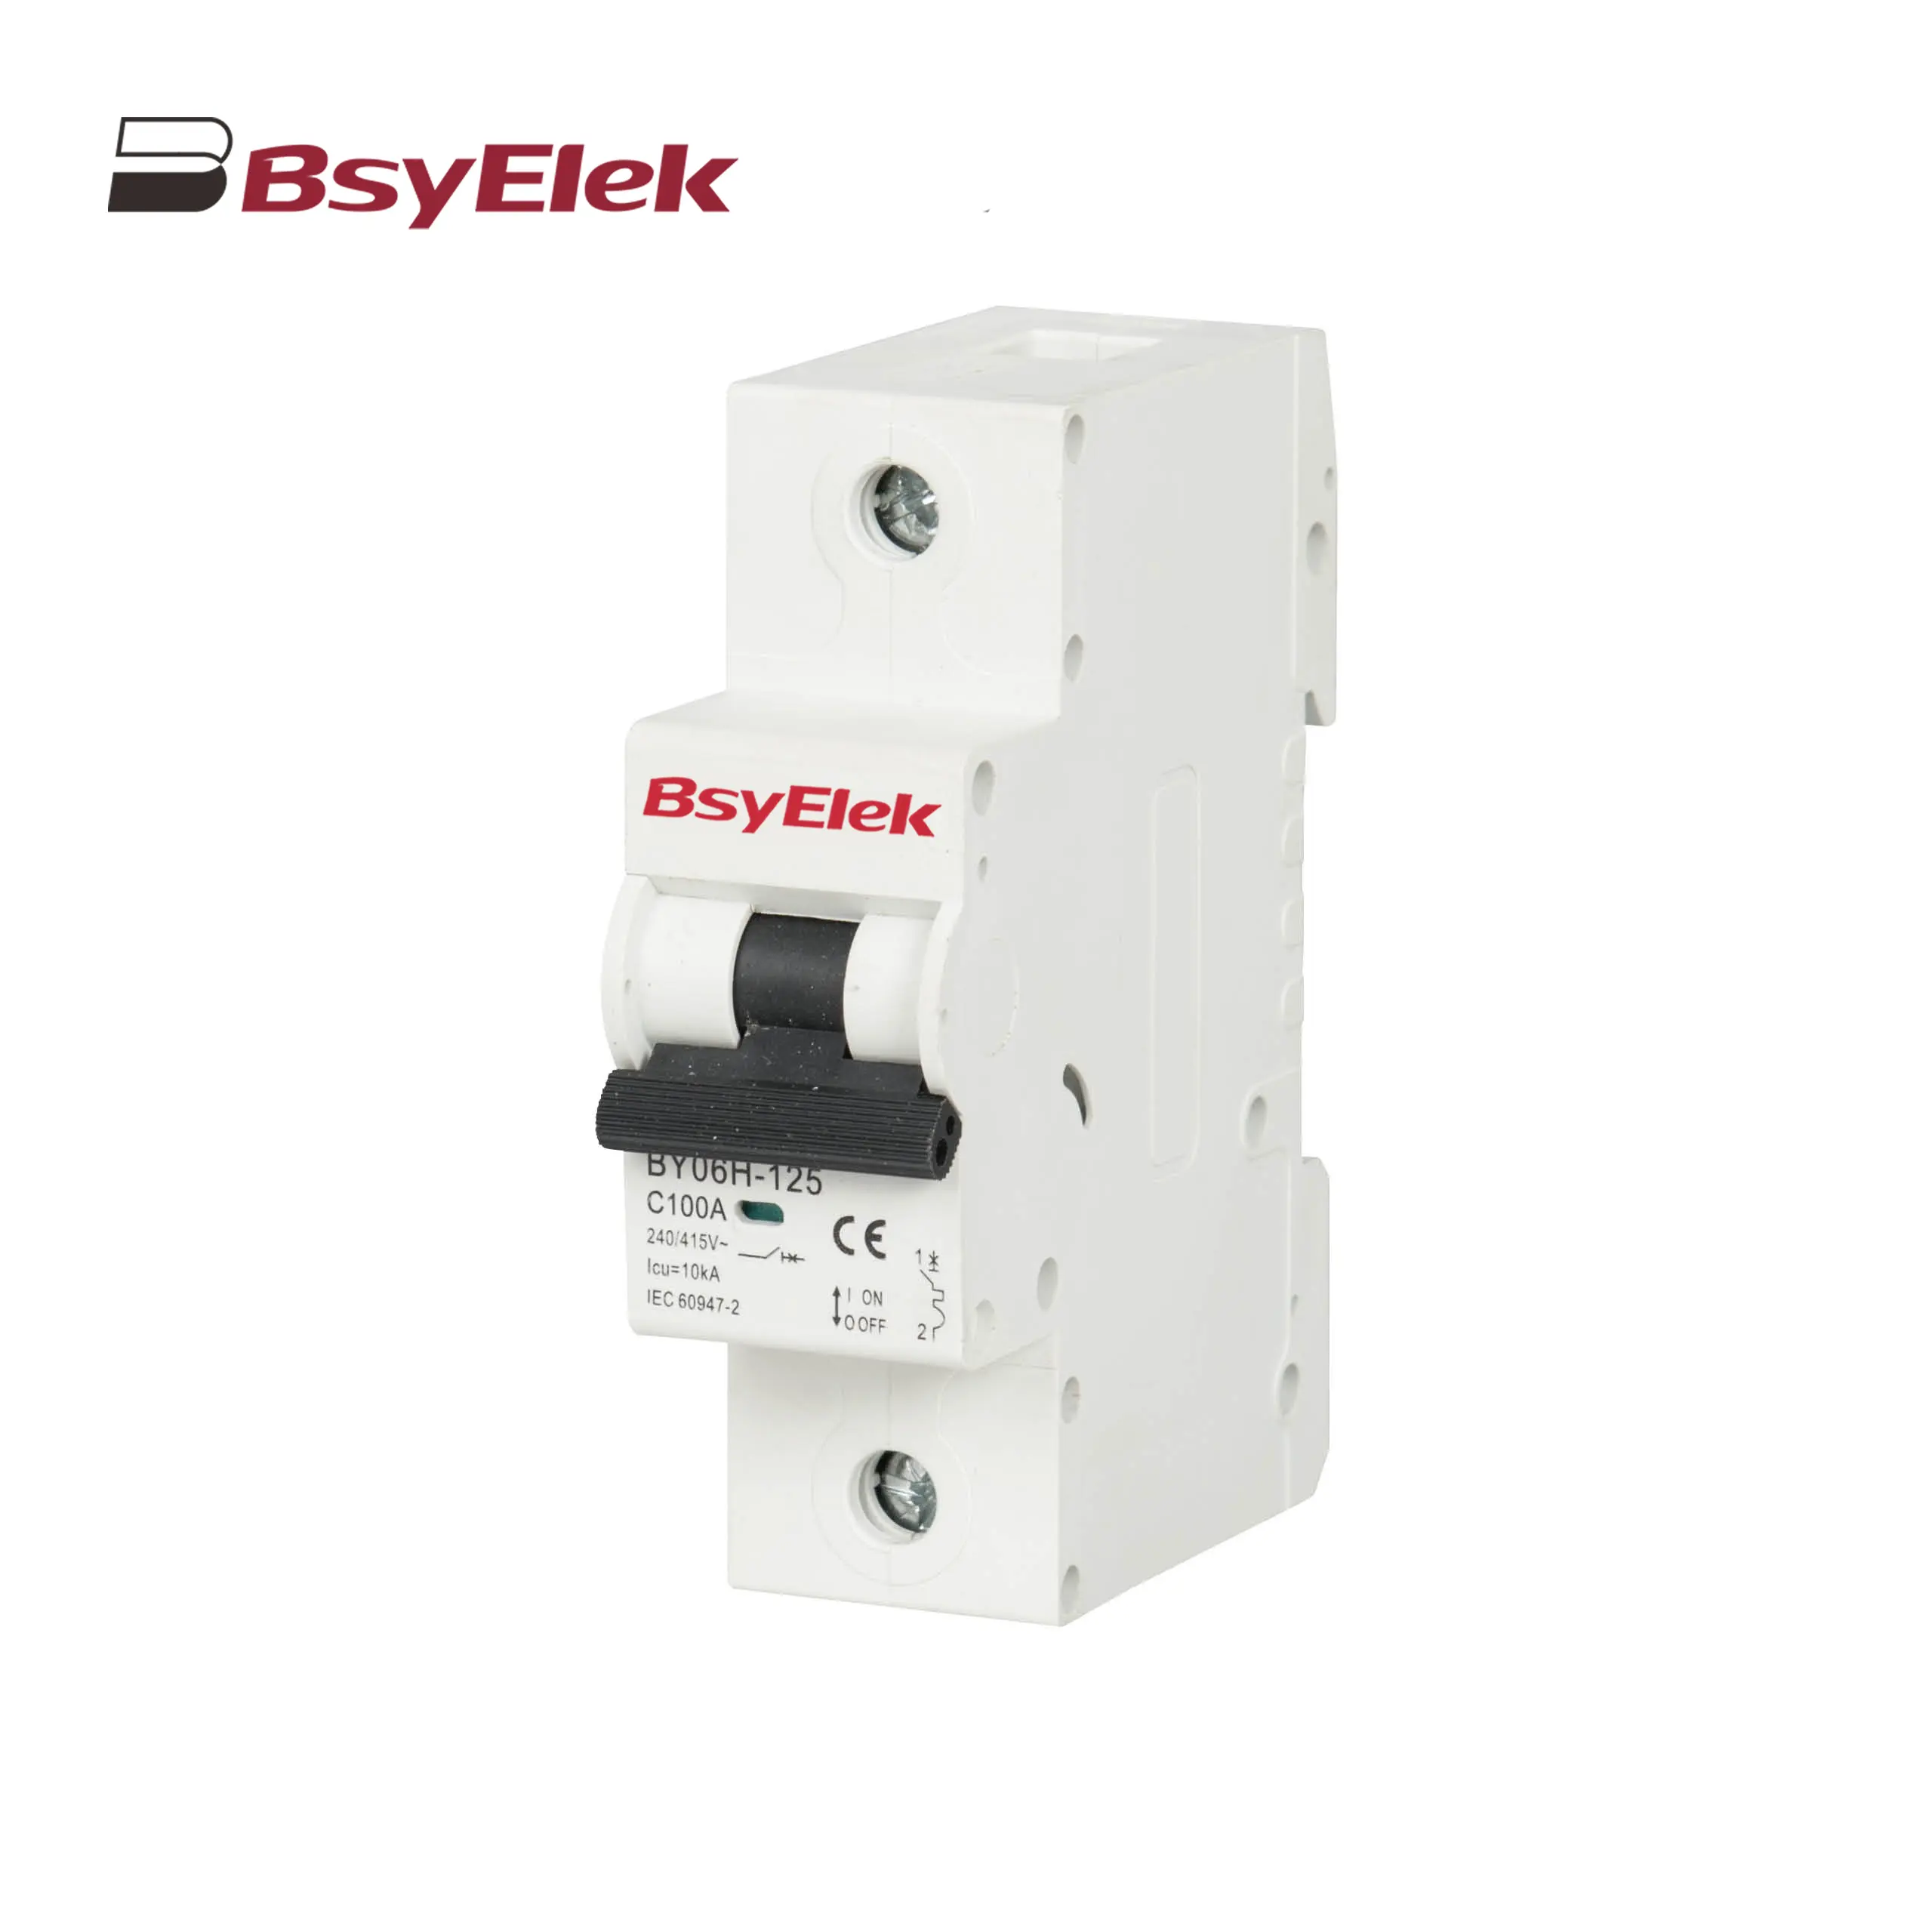 BY06H-125 MCB 10-15KA Miniature Circuit Breaker
-
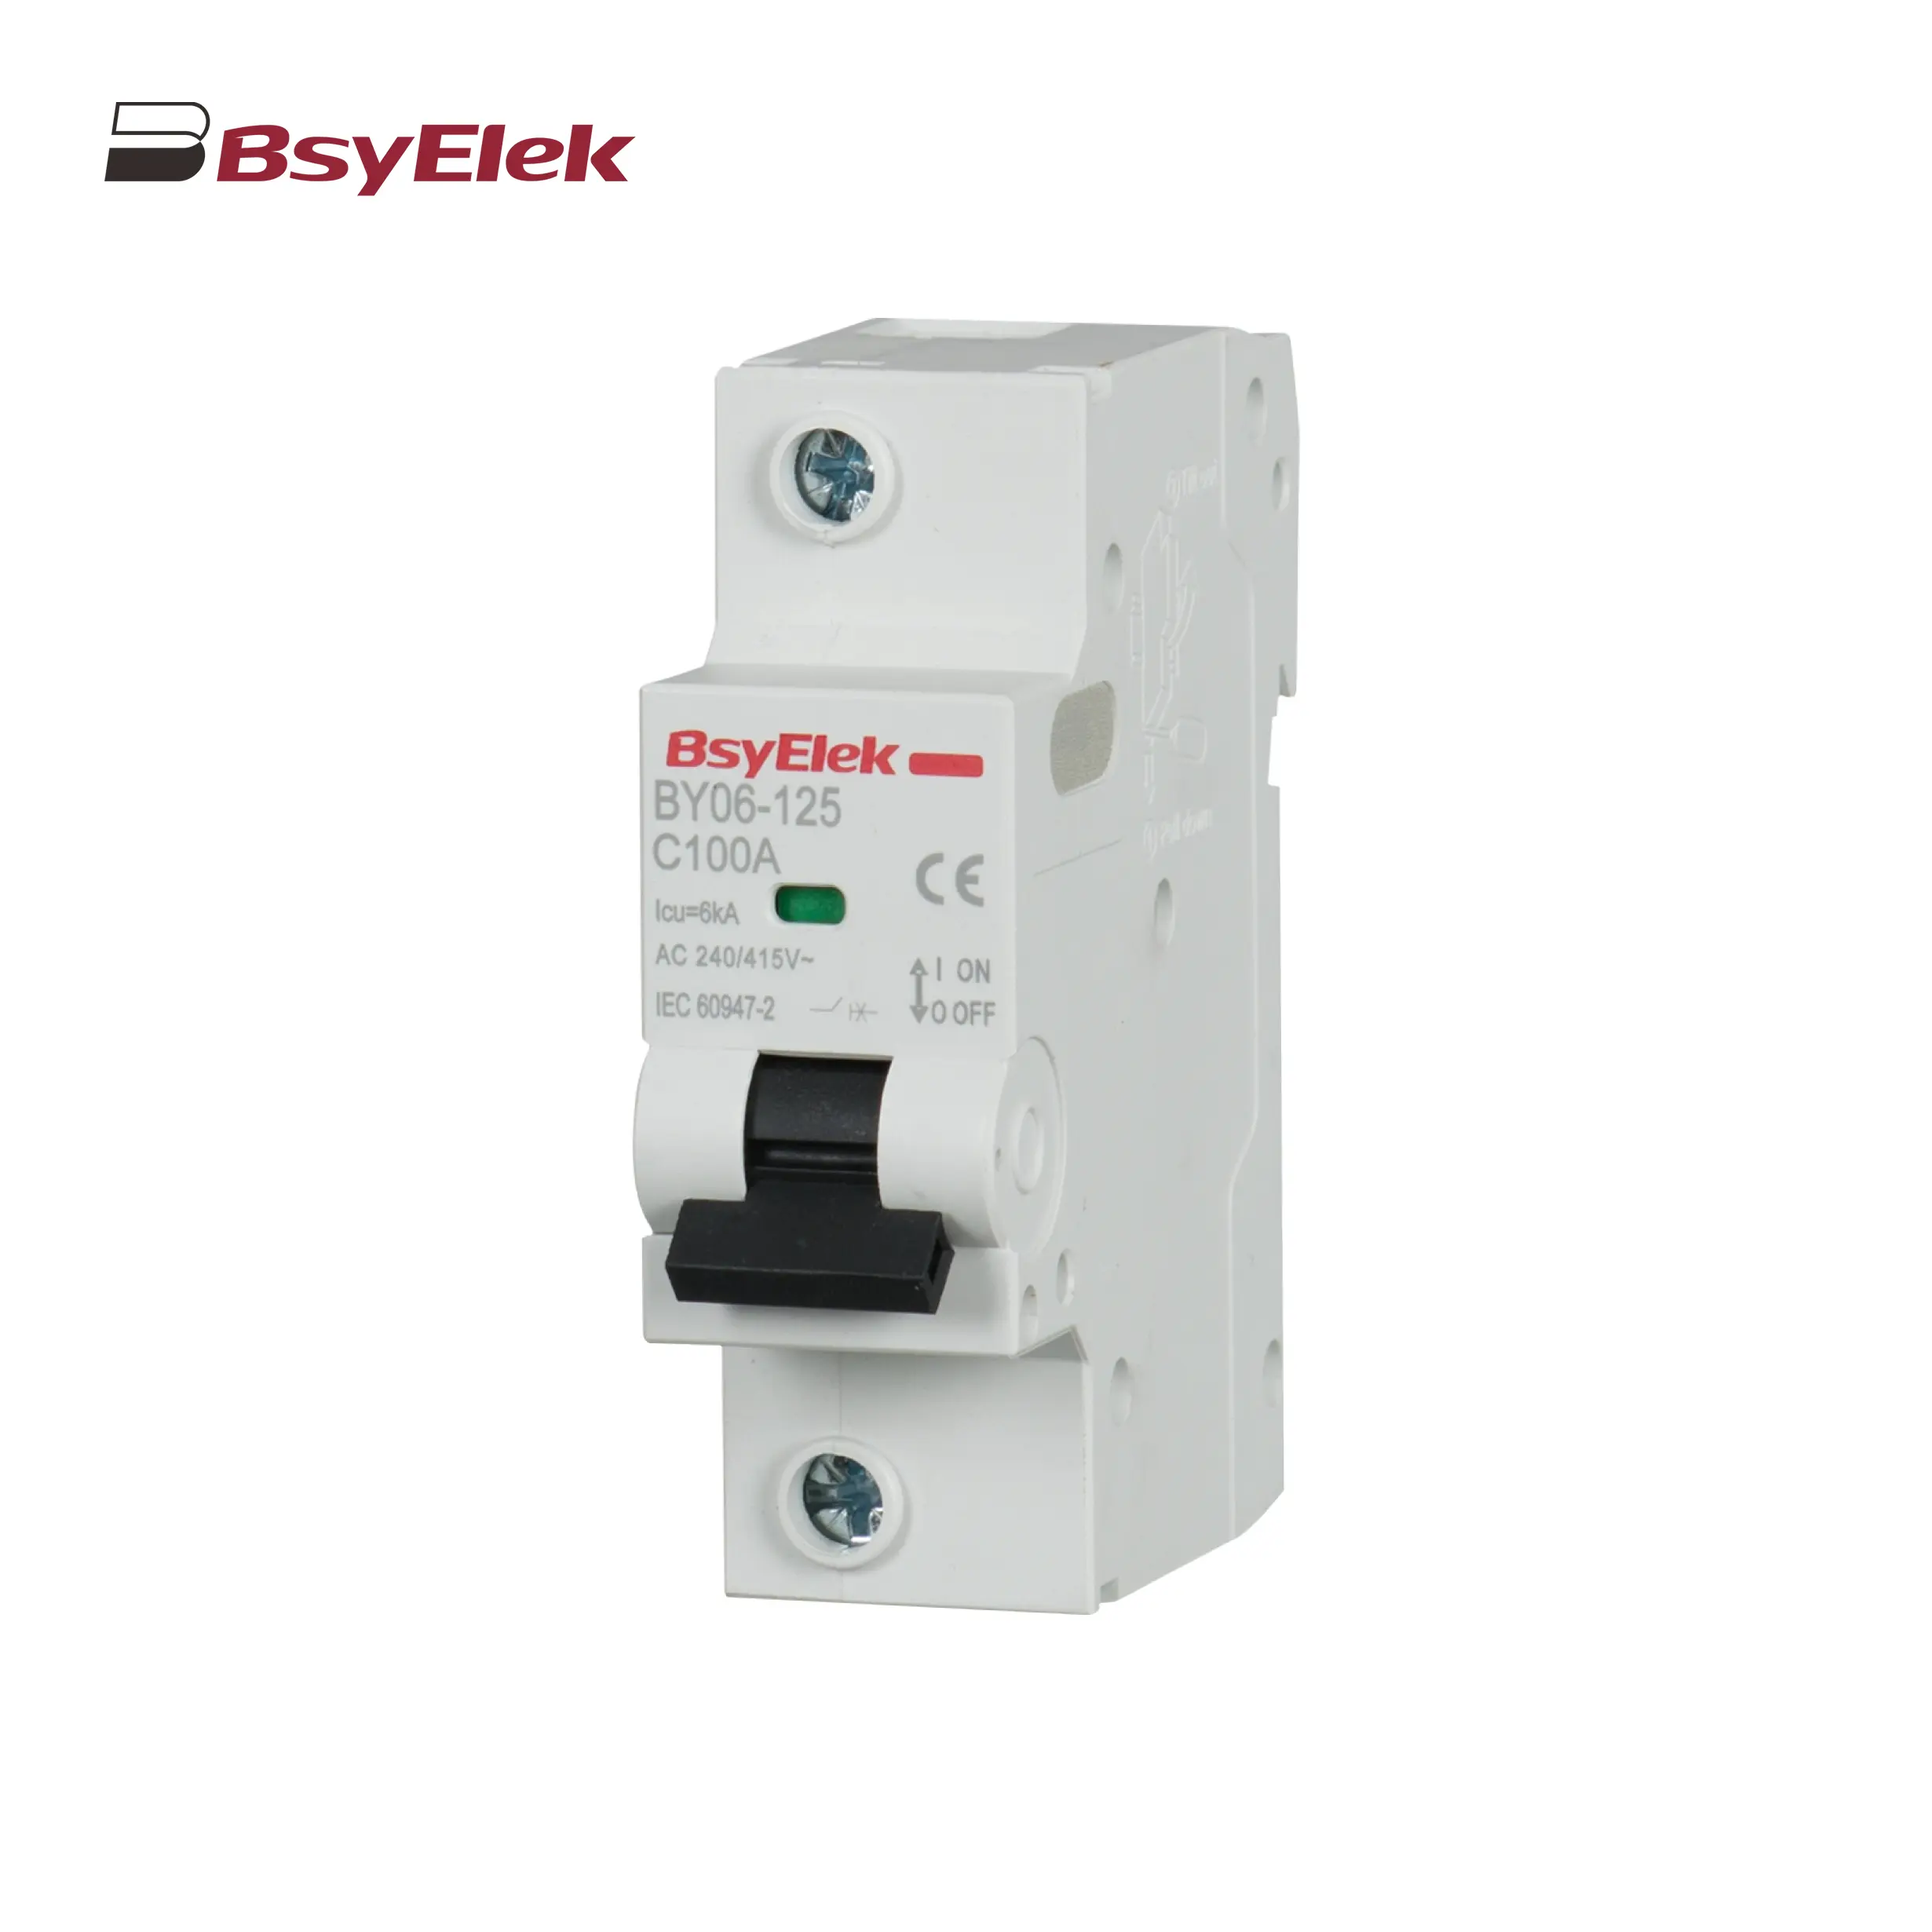 BY06-125 MCB 6KA Miniature Circuit Breaker
-
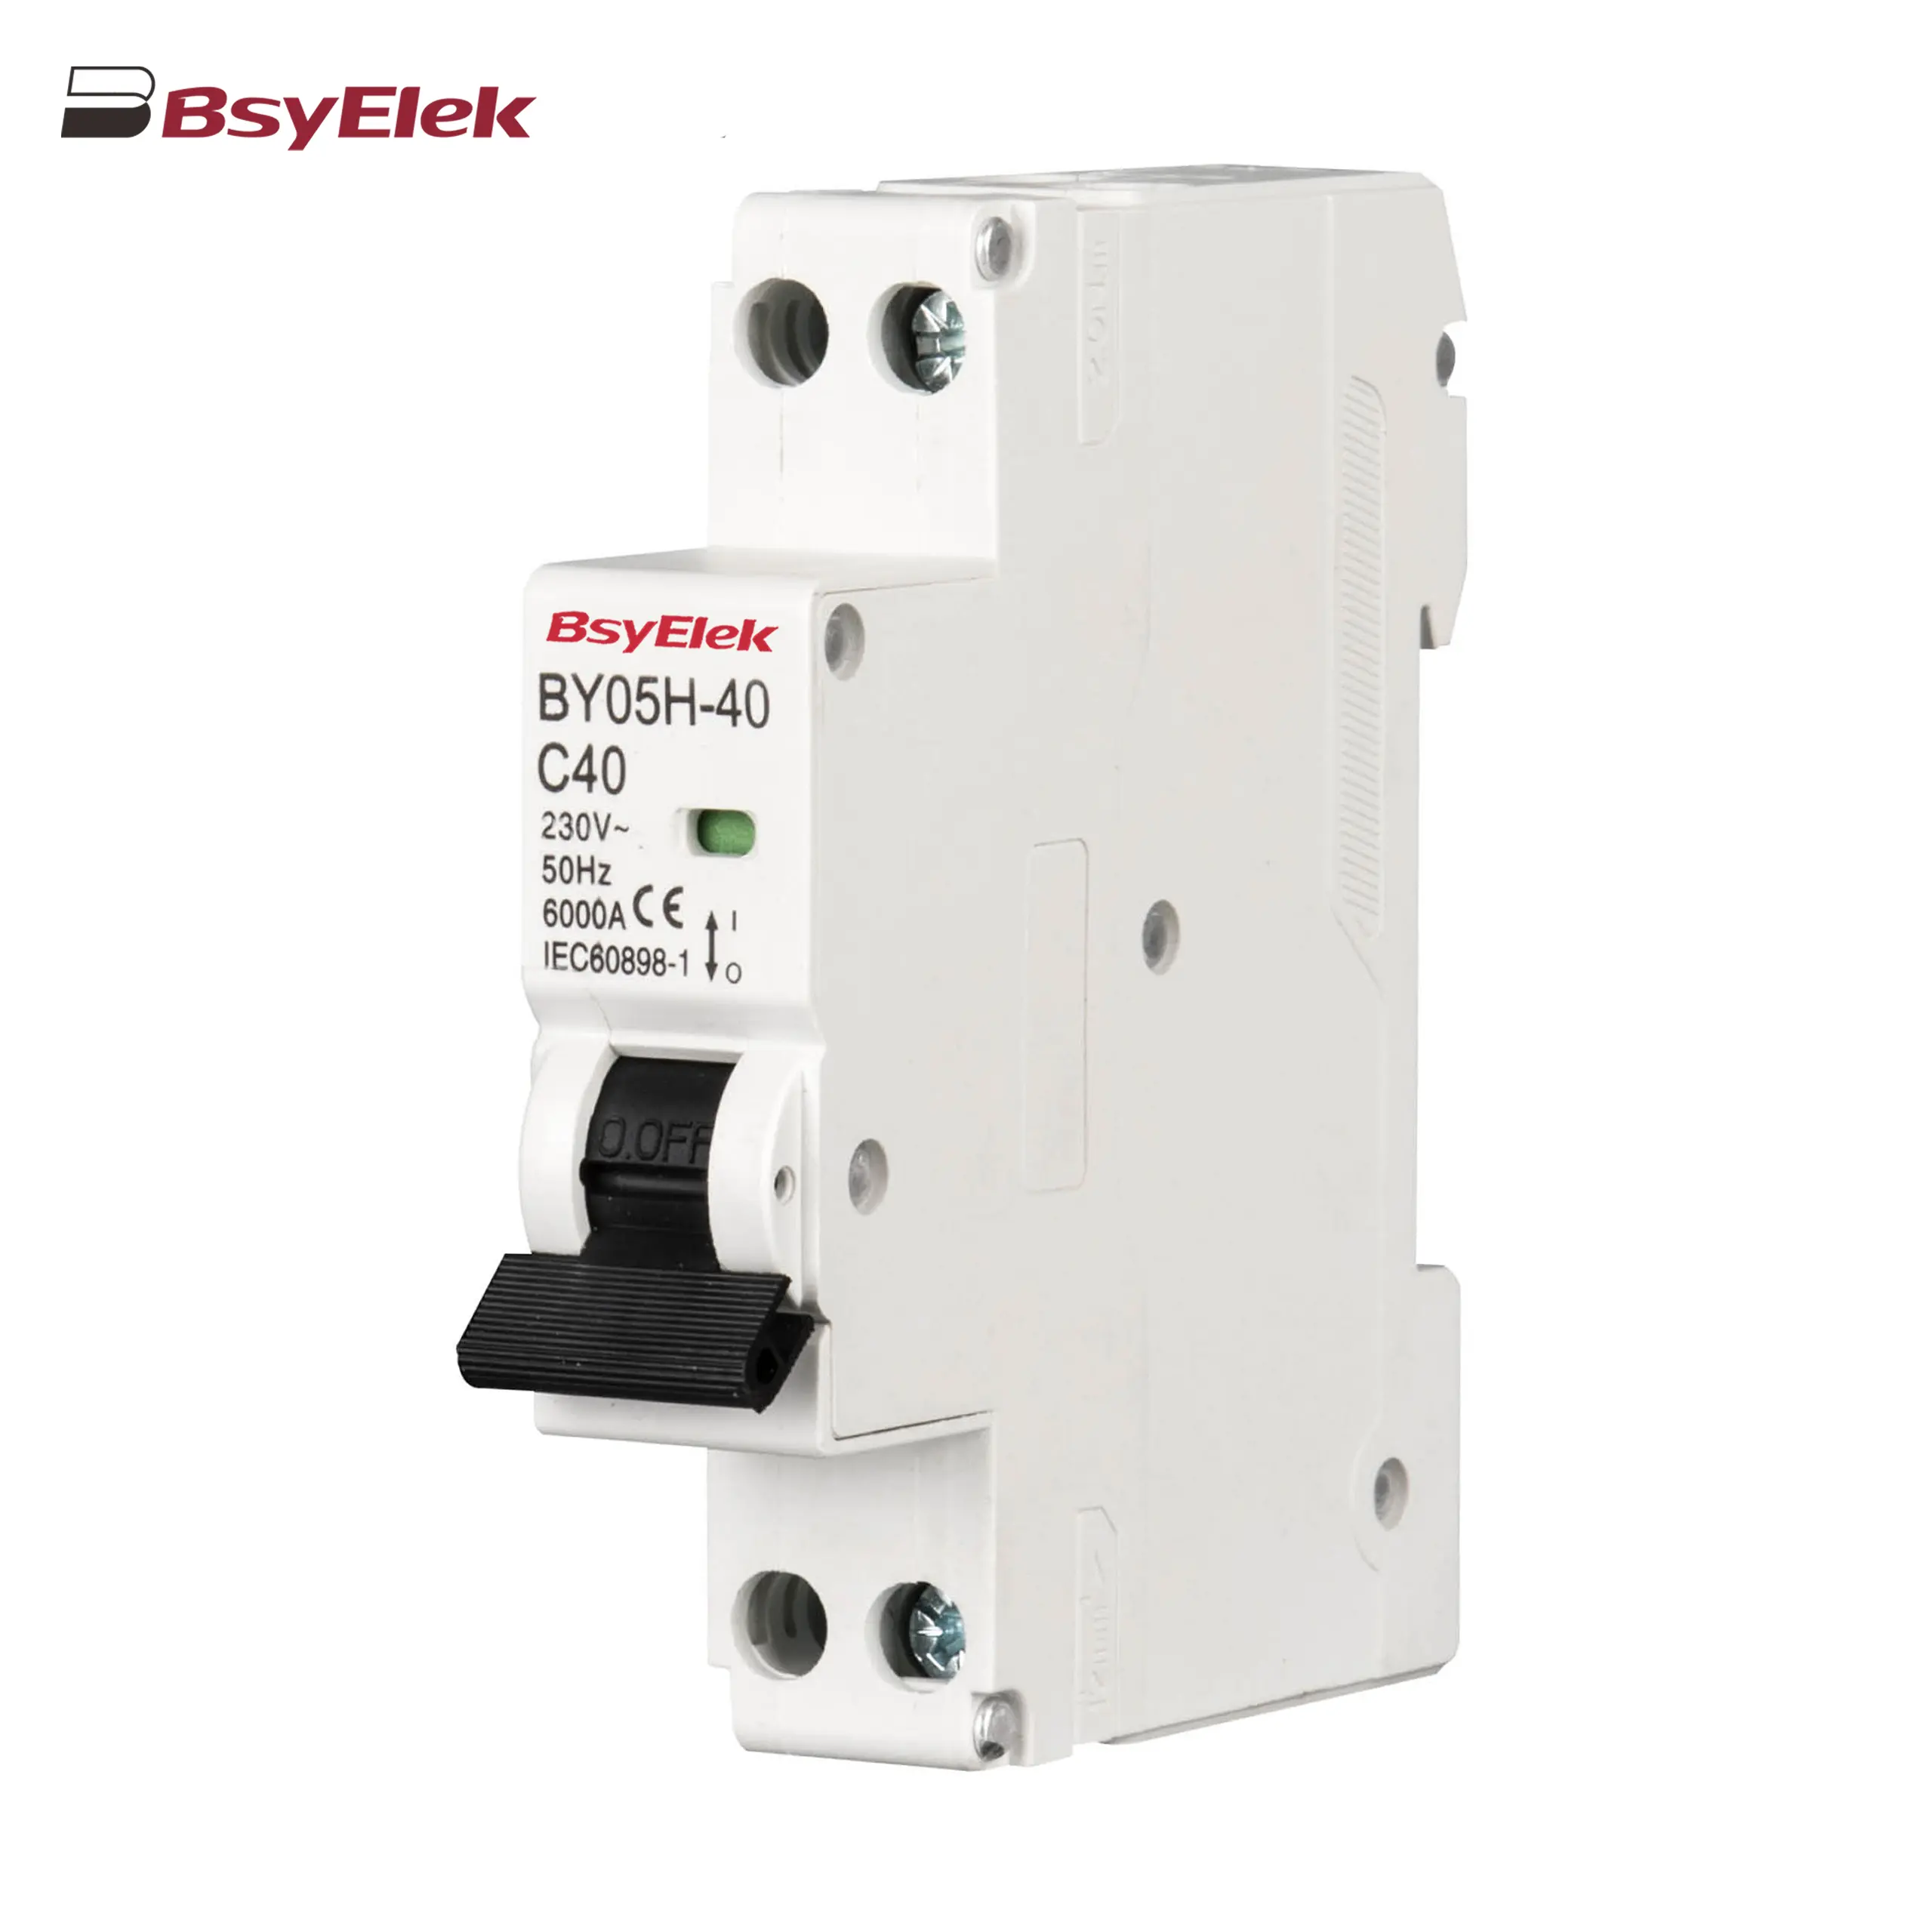 BY05H-40 MCB Single Modular 6KA Miniature Circuit Breaker
-
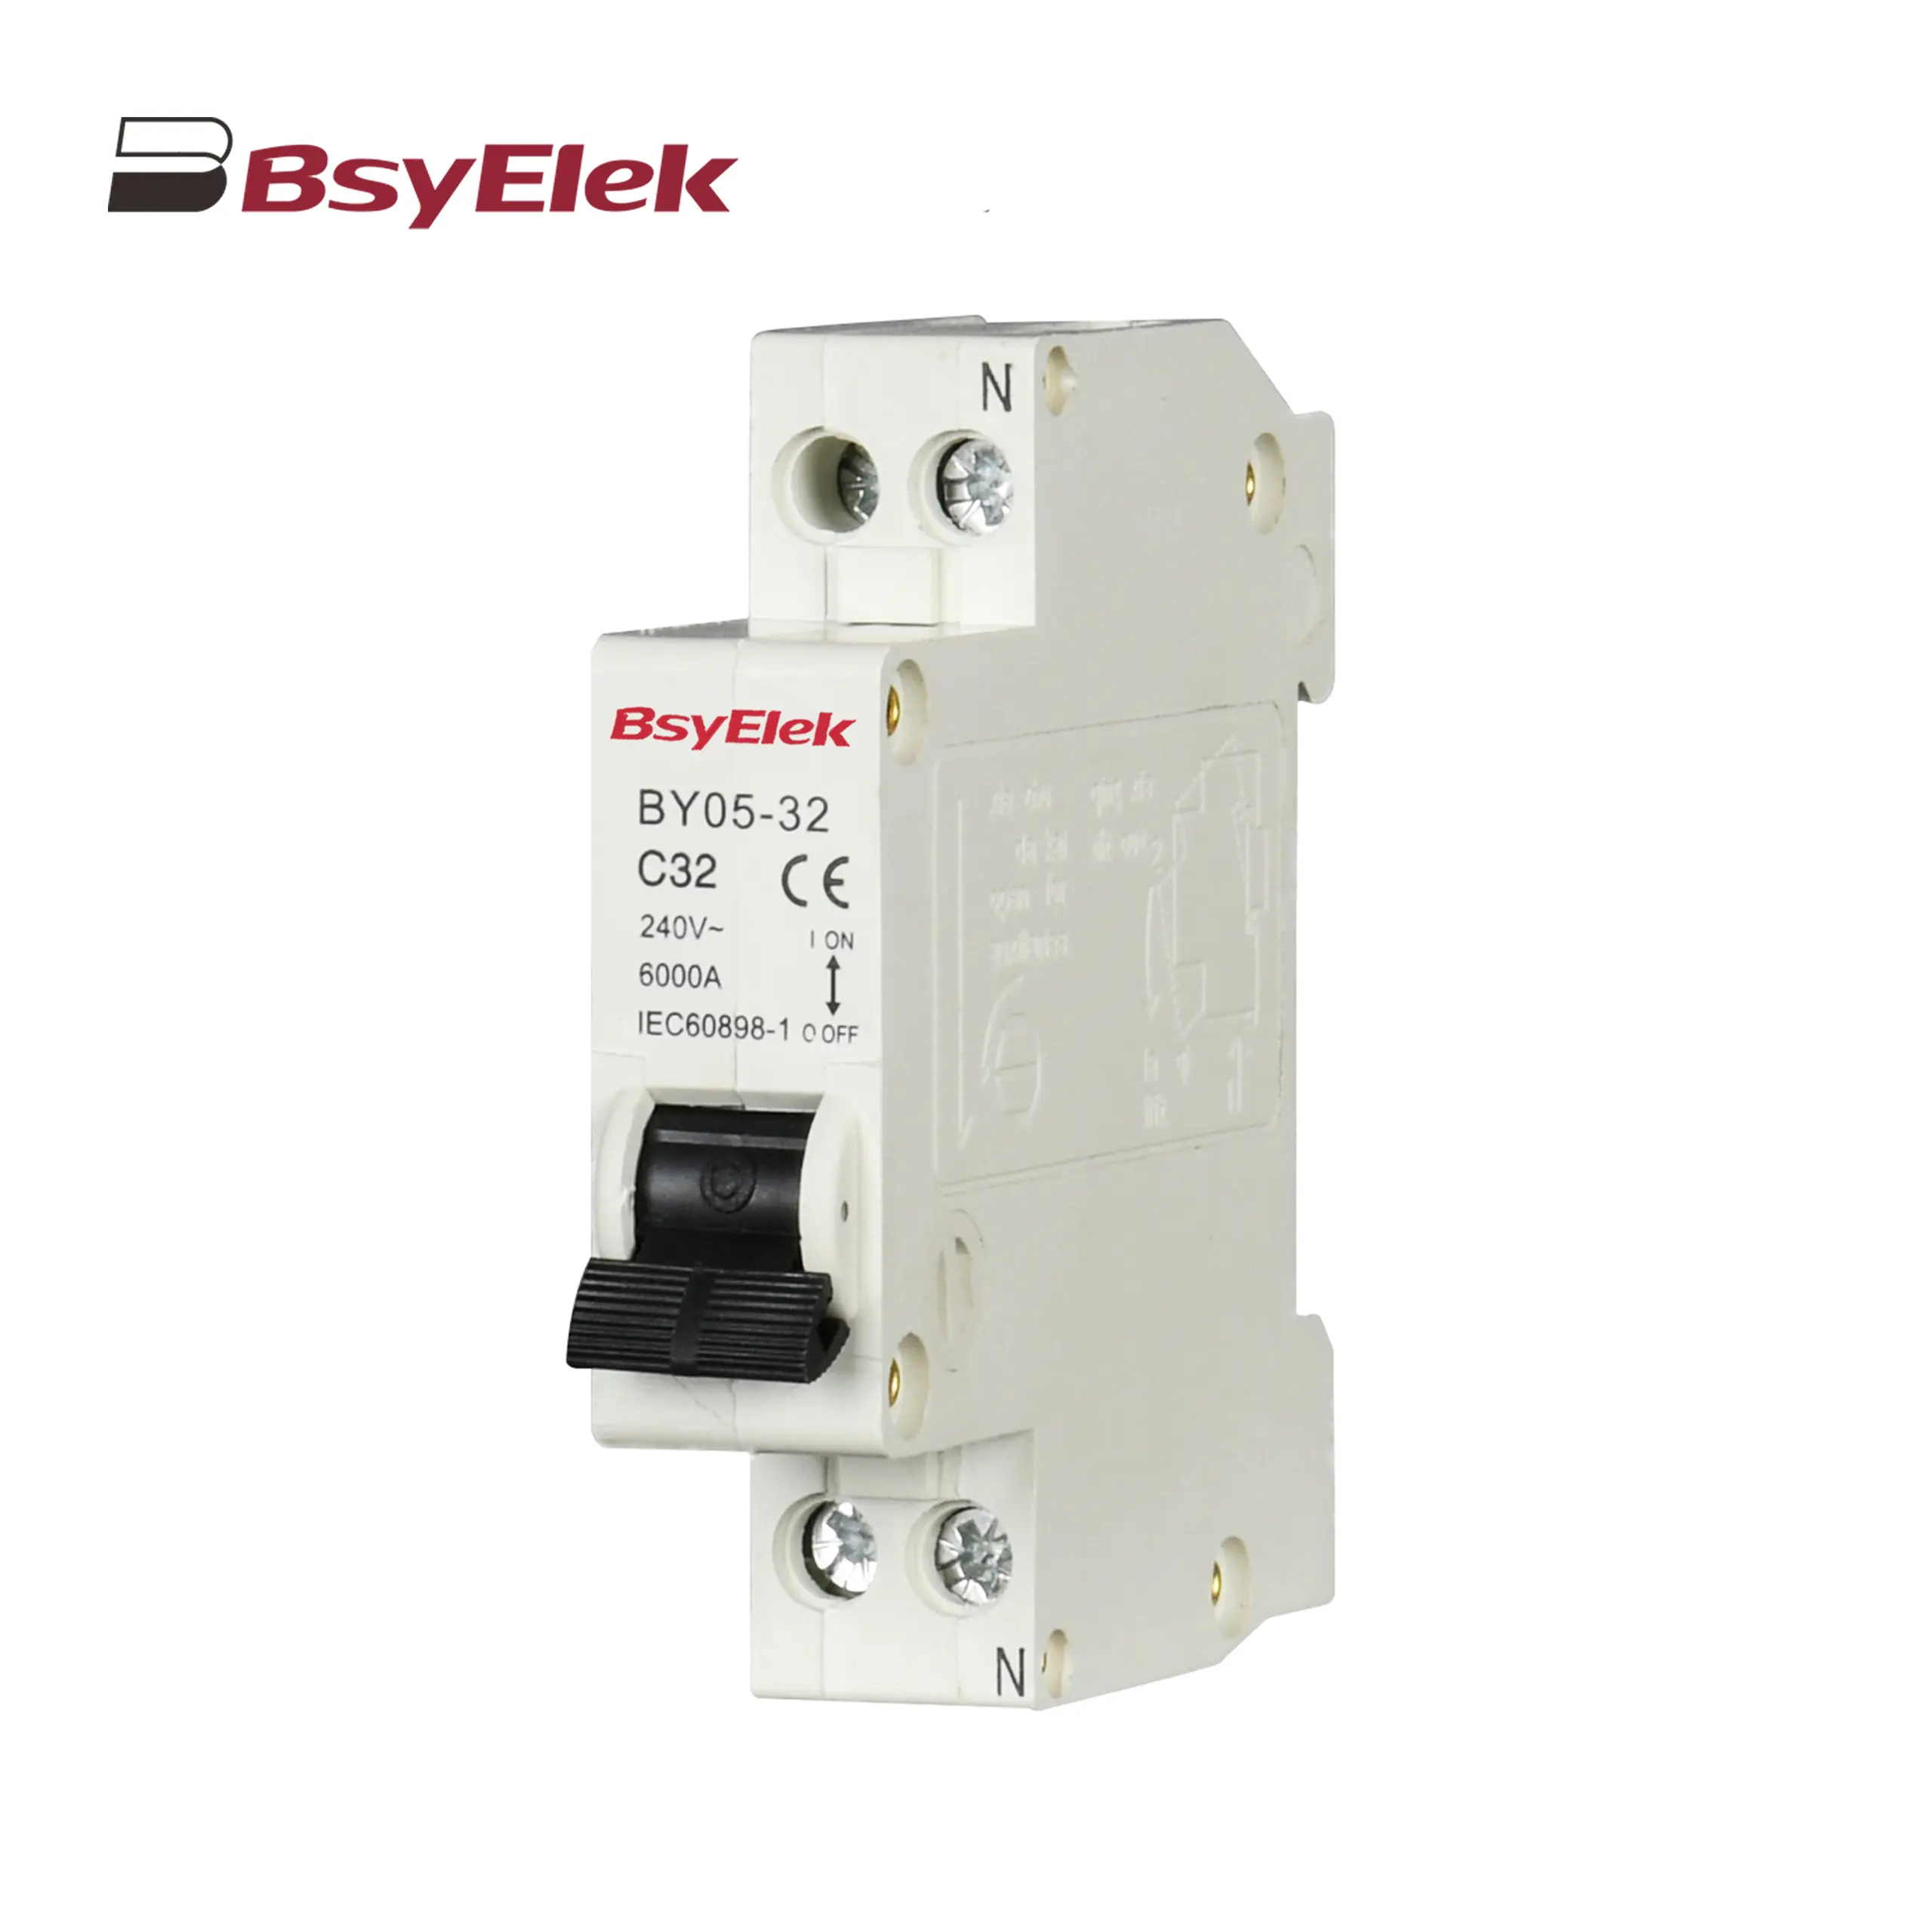 BY05-32 MCB Single Modular 3KA Miniature Circuit Breaker
-
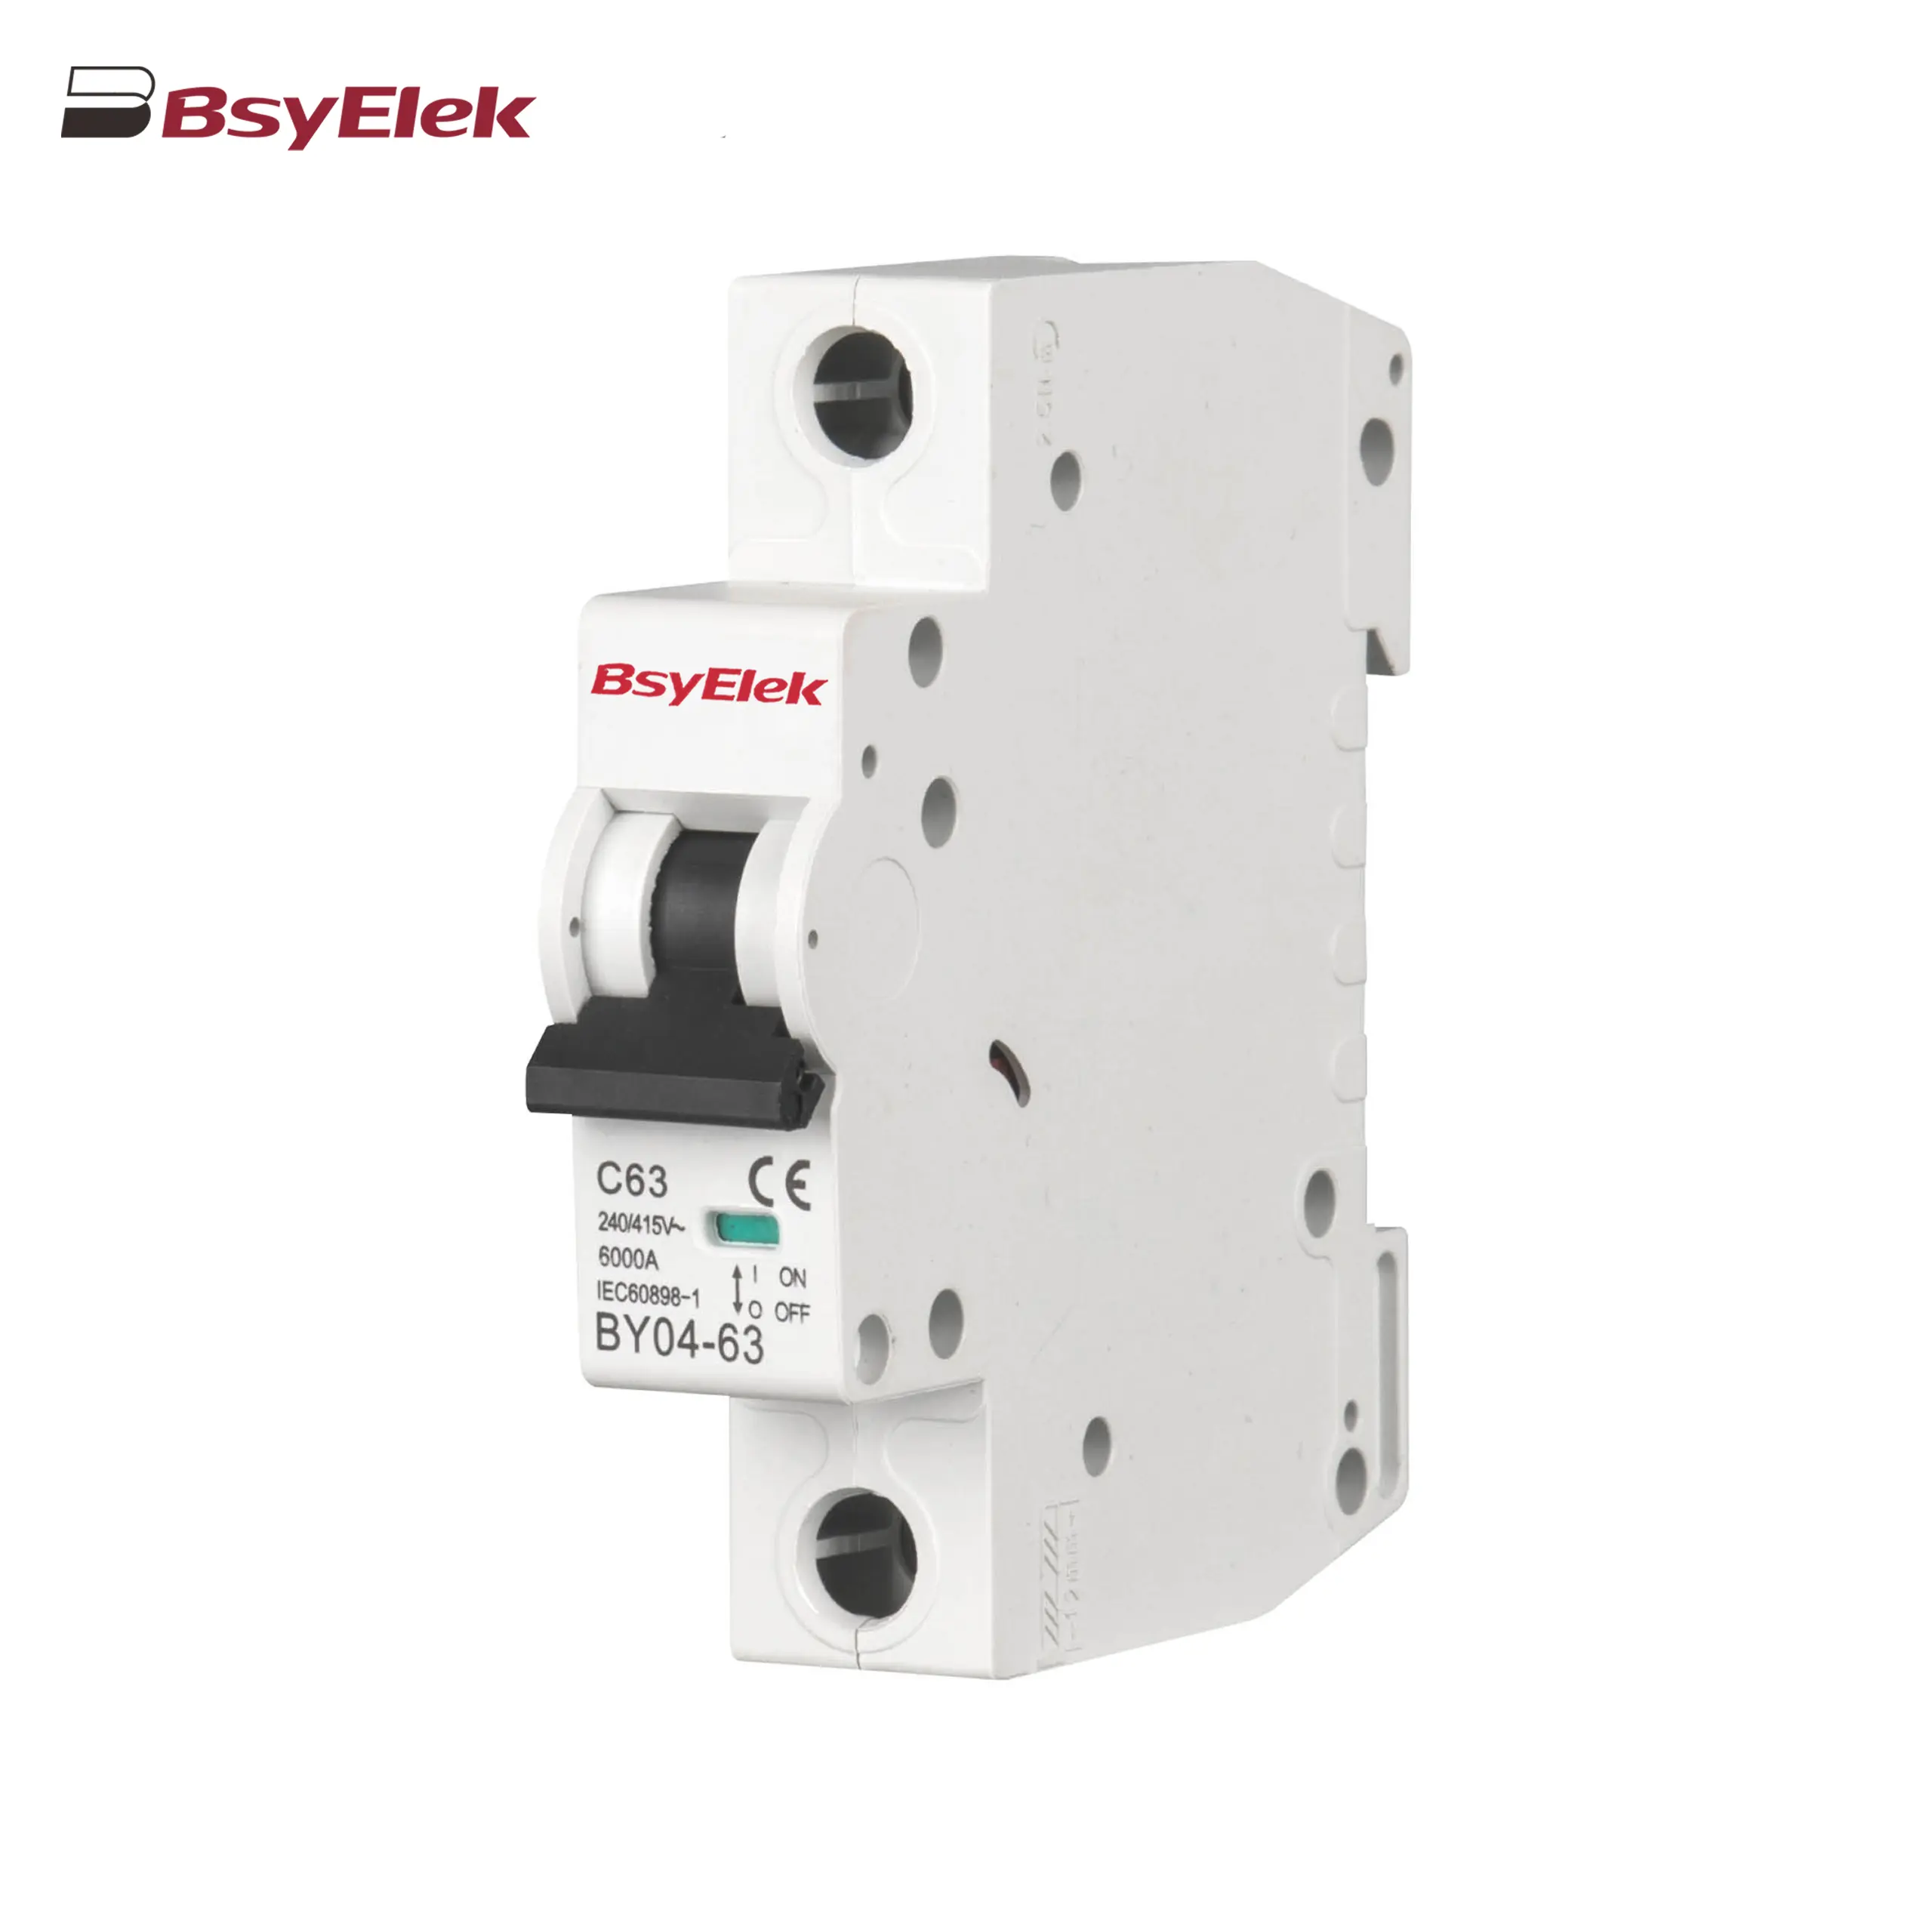 BY04-63 MCB 6-10KA Miniature Circuit Breaker
-
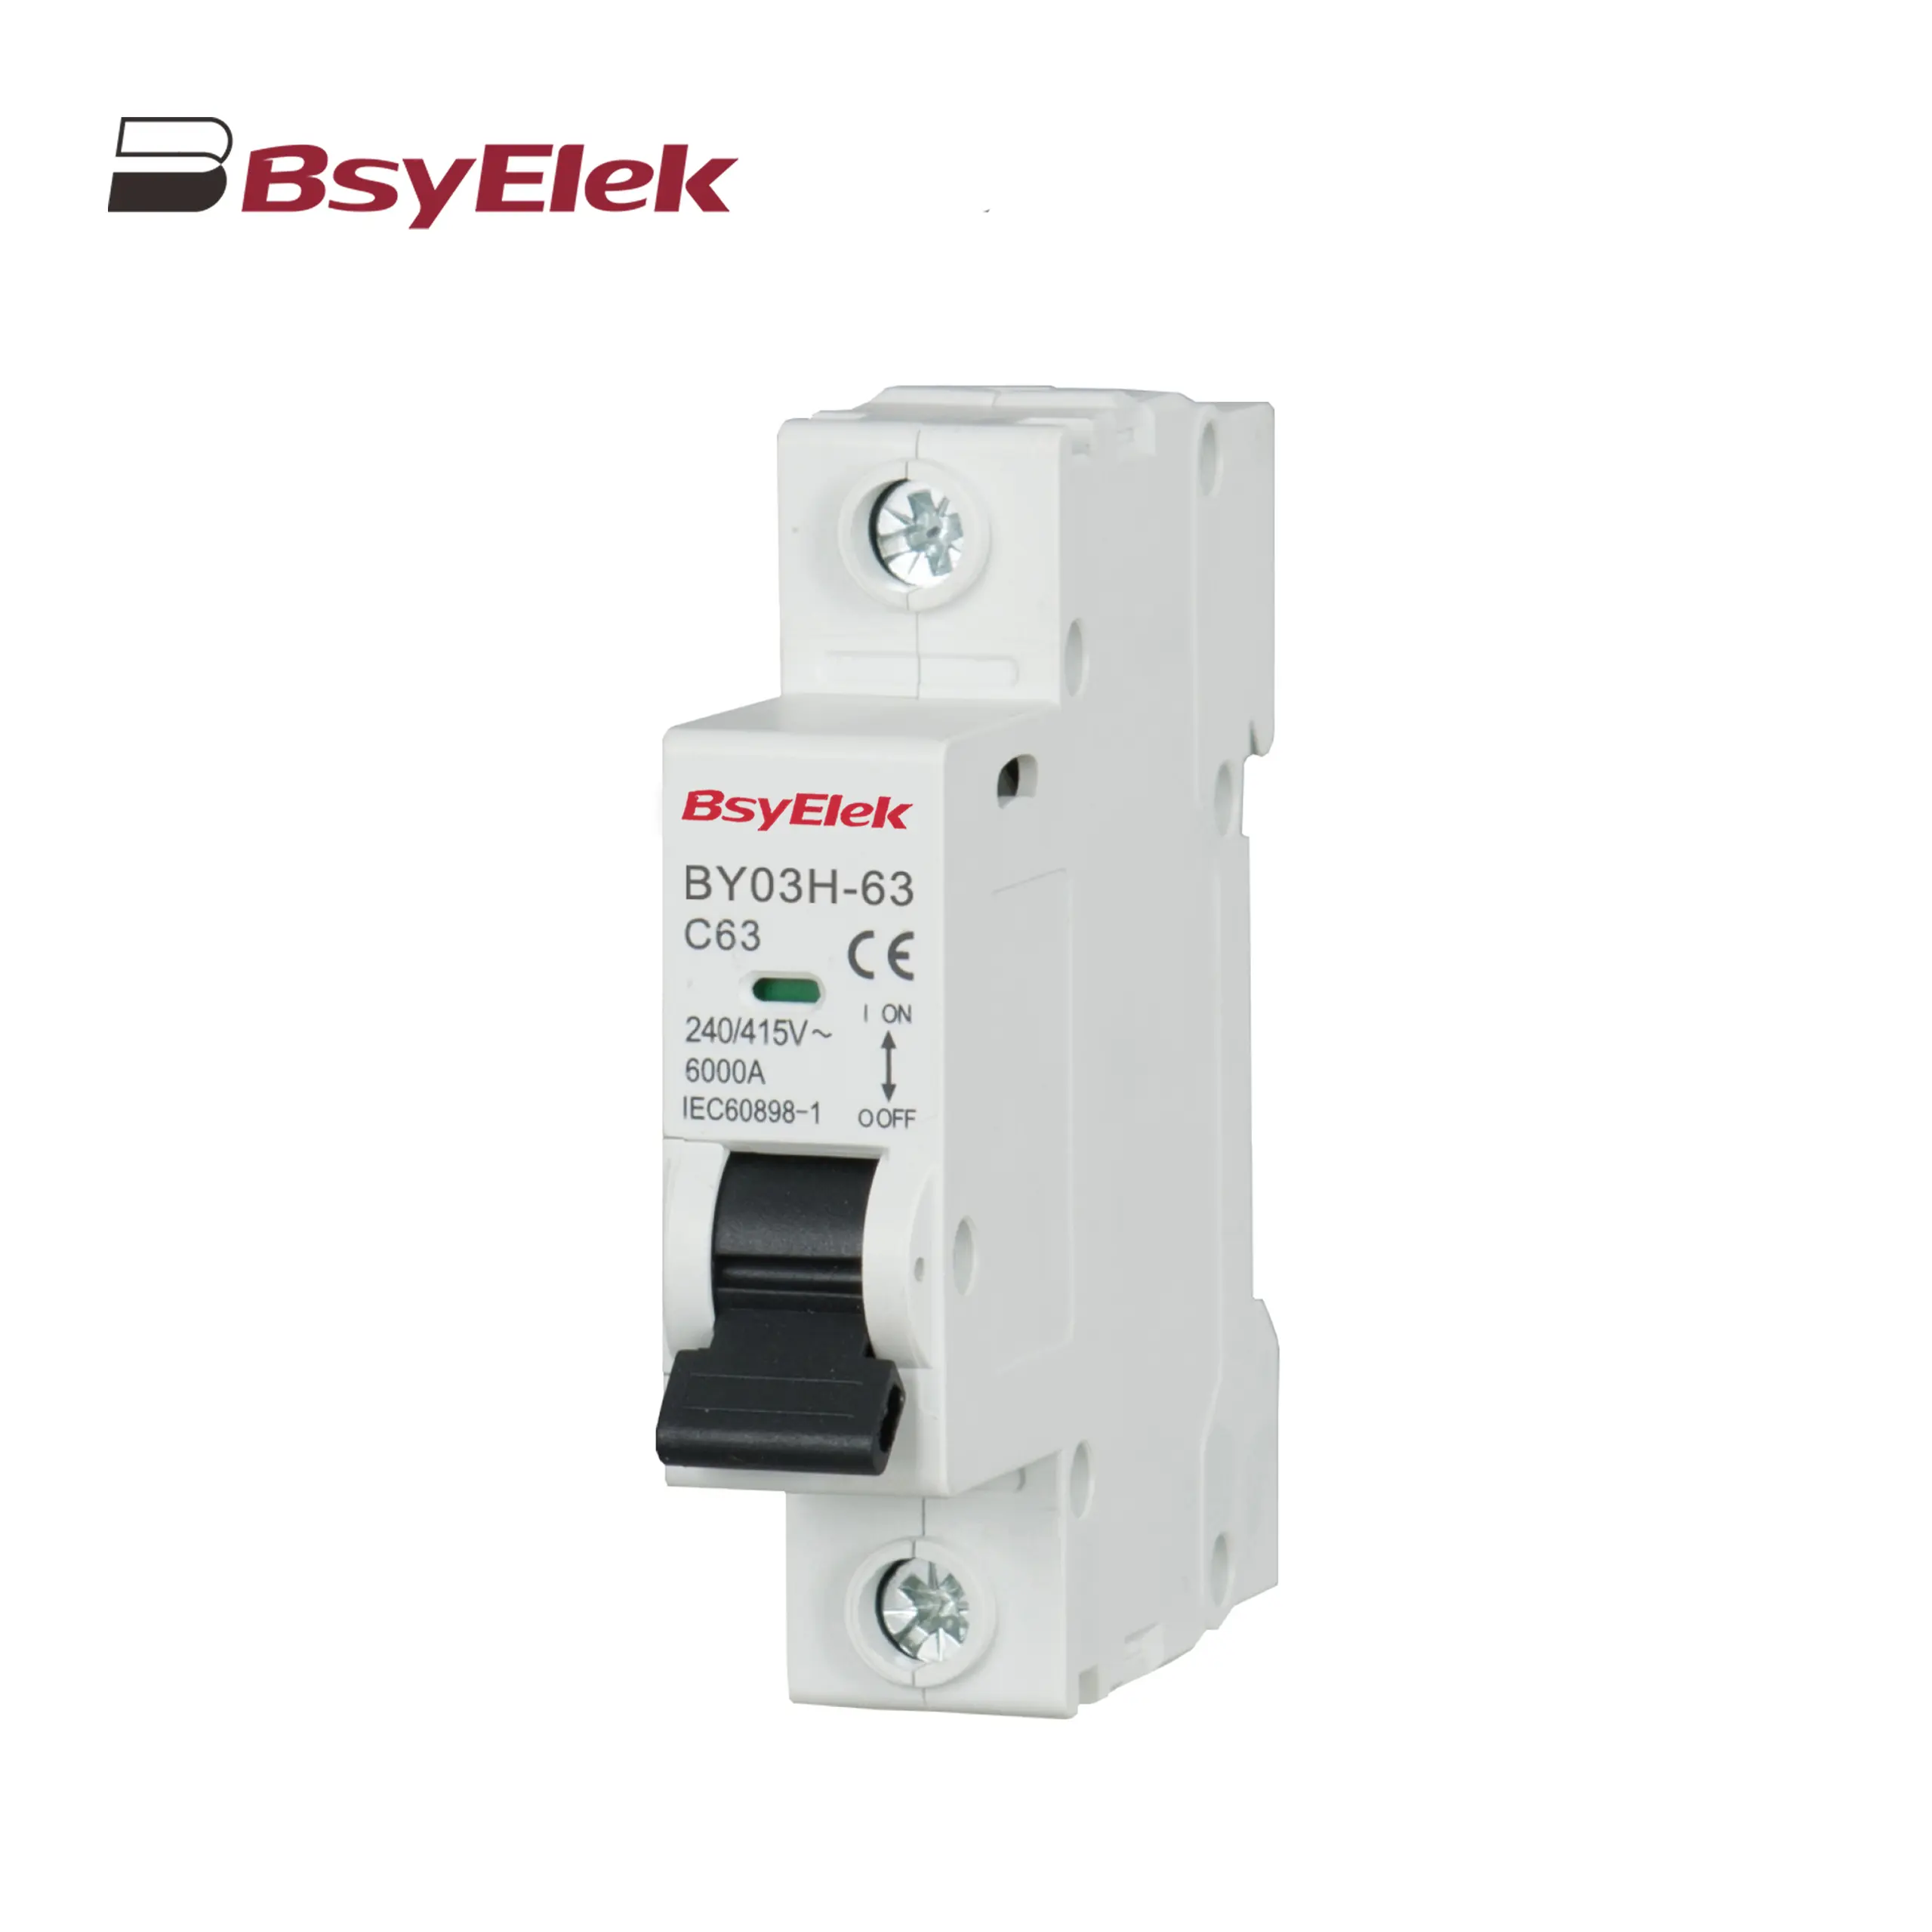
 BY03H-63 MCB 6KA Miniature Circuit Breaker
-
 BY03-63 MCB 4.5KA Miniature Circuit Breaker
-
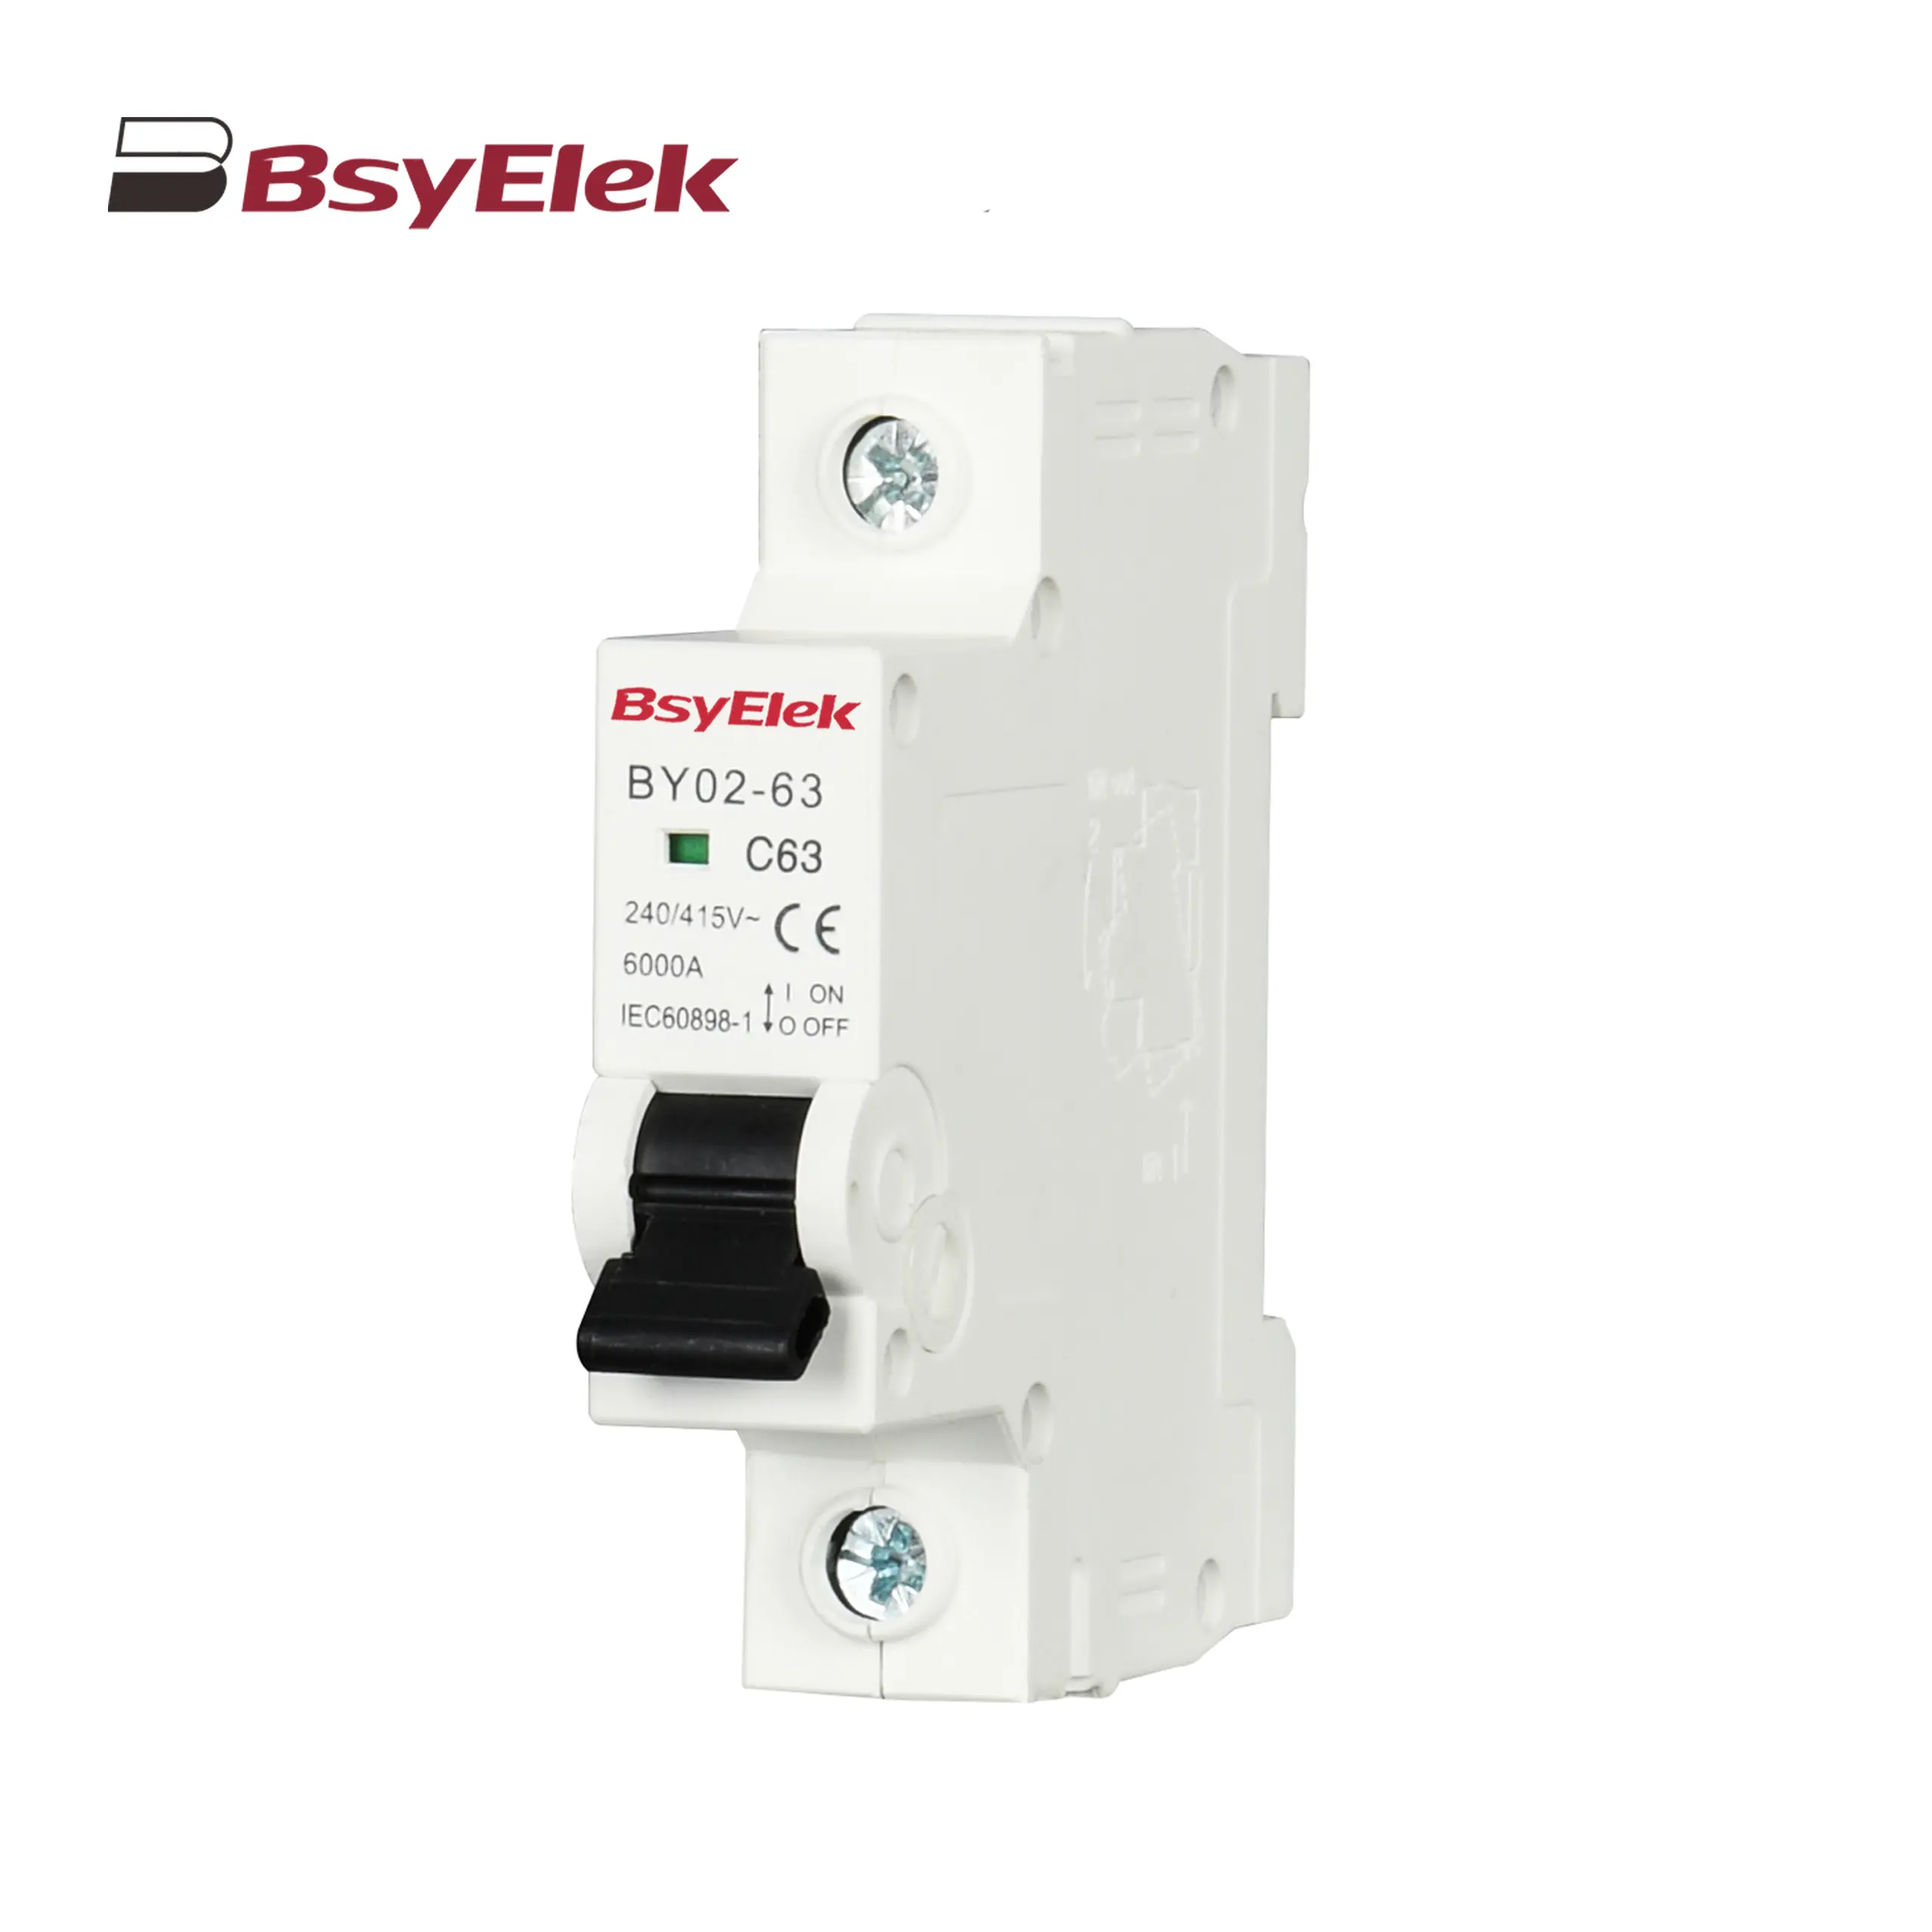 BY02-63 MCB 3kA Miniature Circuit Breaker
-
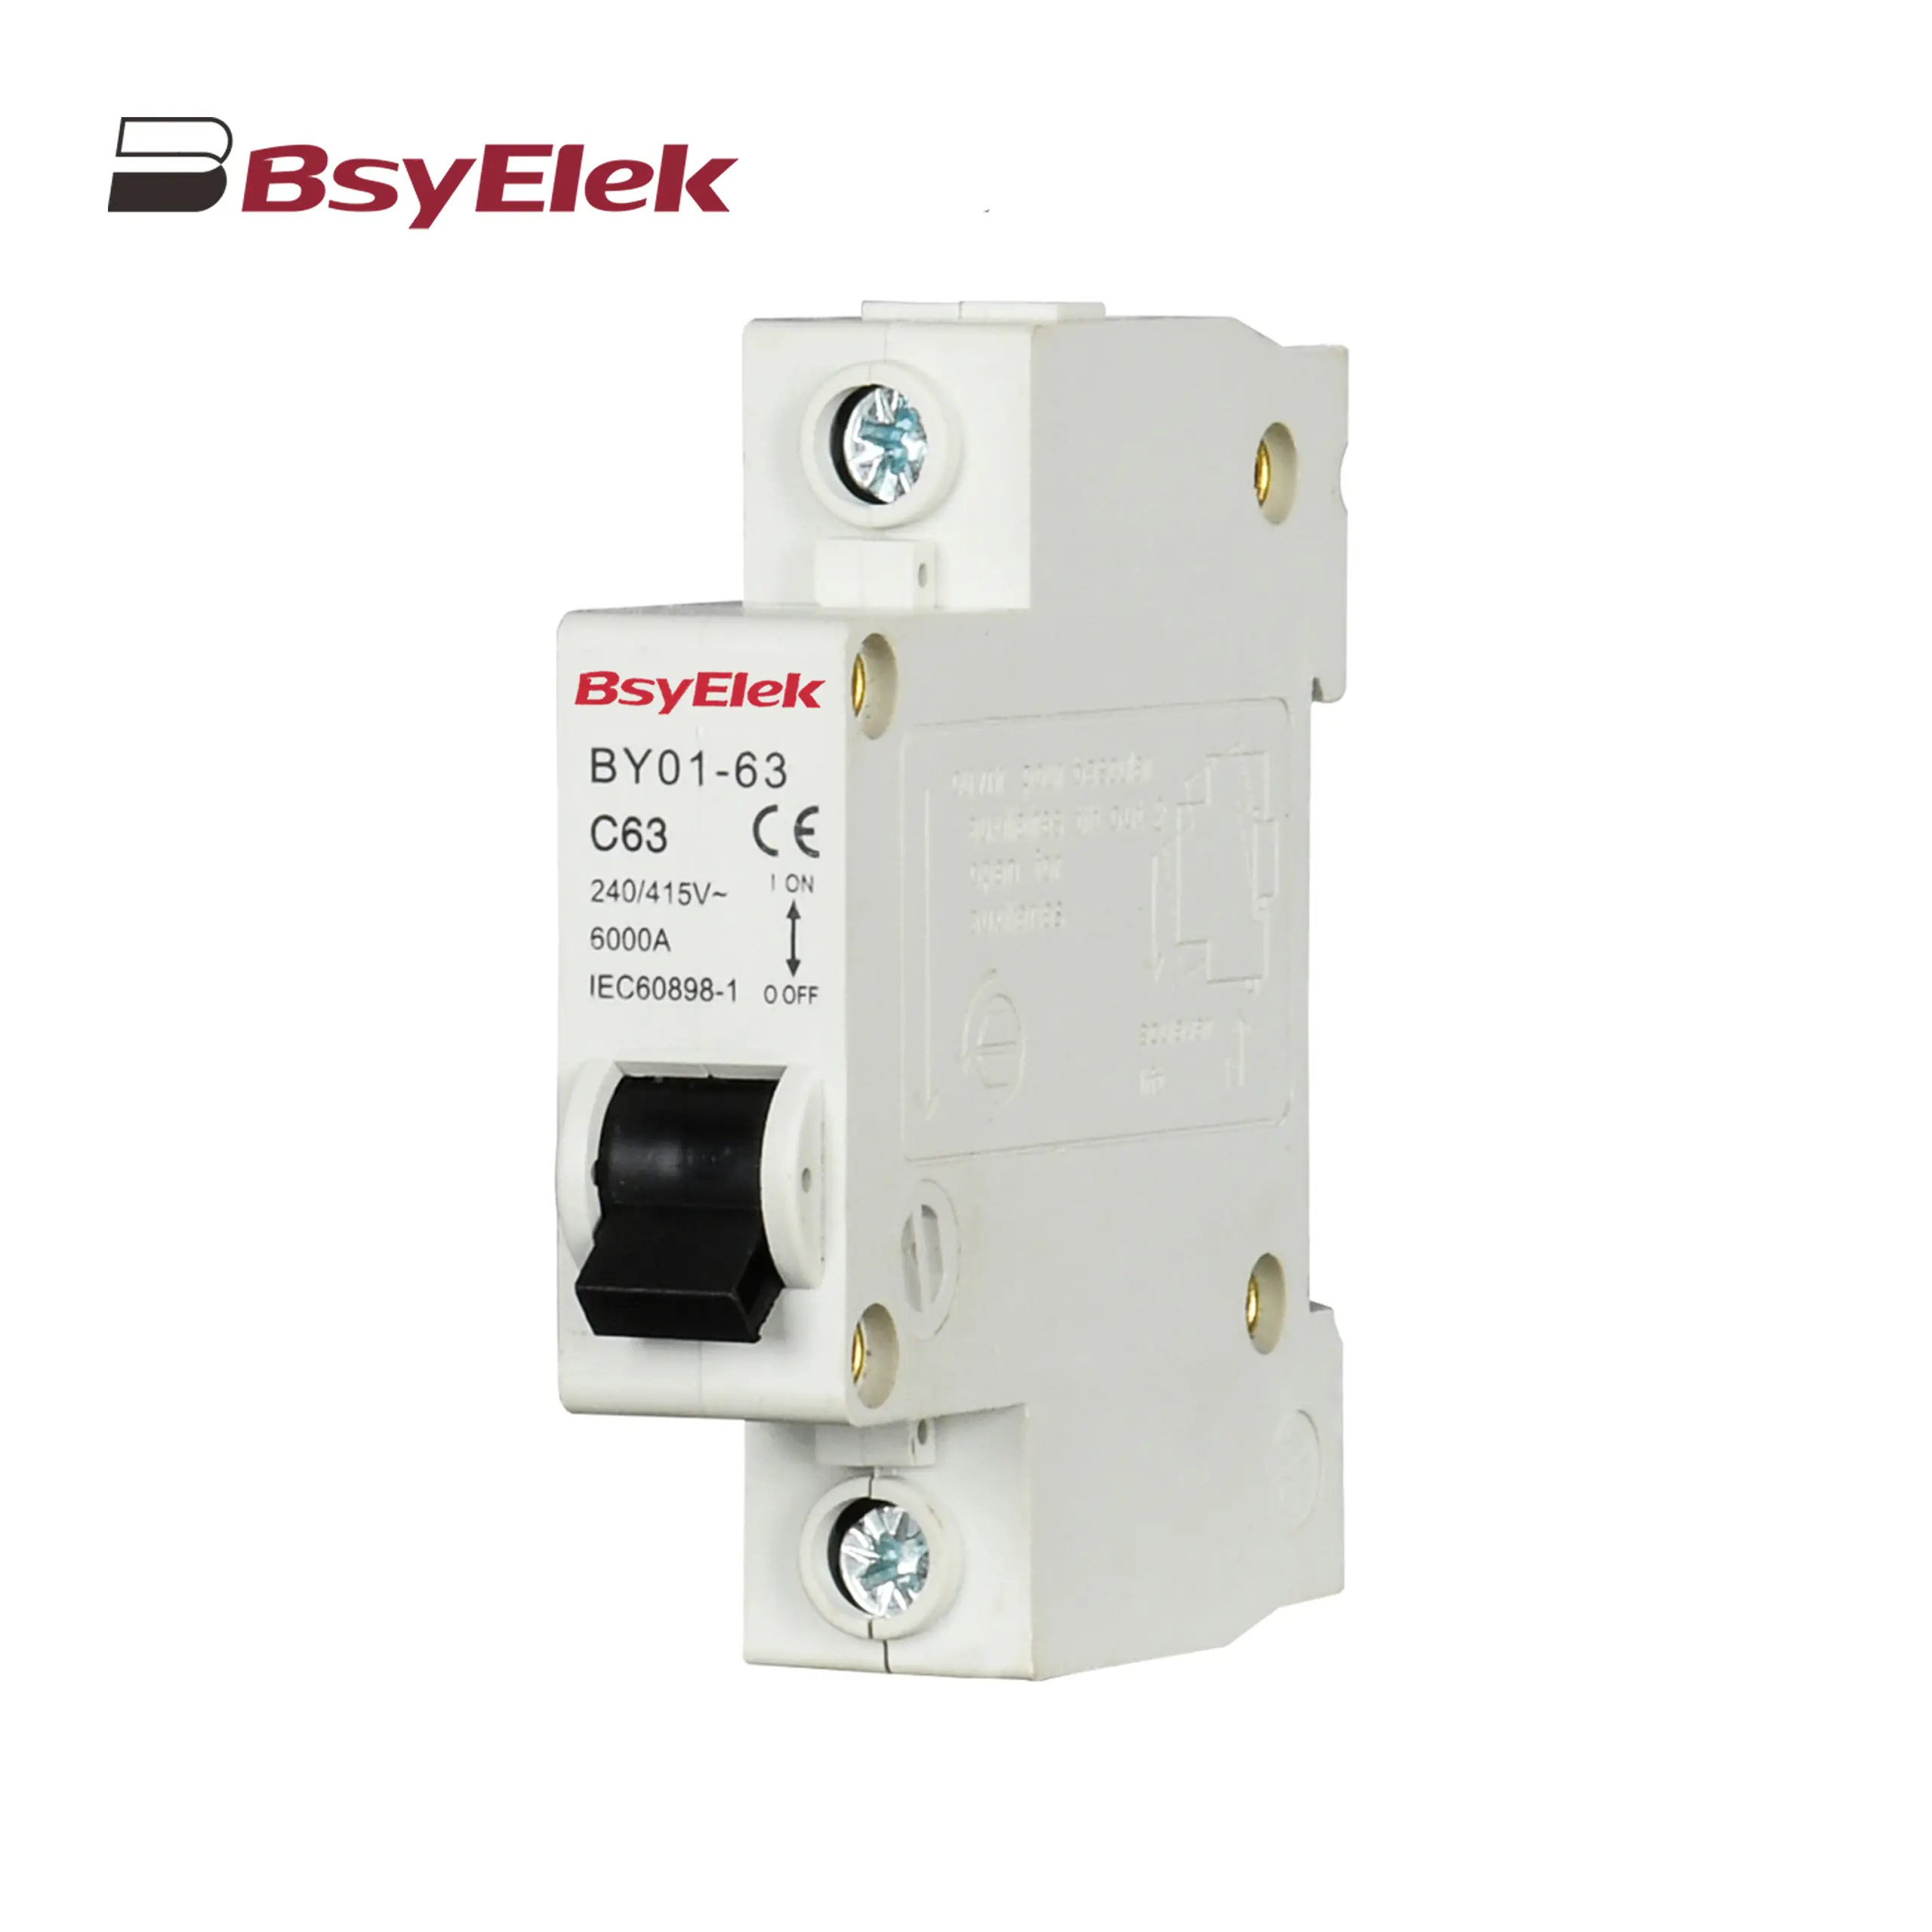 BY01-63 MCB 3kA Miniature Circuit Breaker
-
- MCB Accessories
- Main Switch
-
RCBO RCCB
-
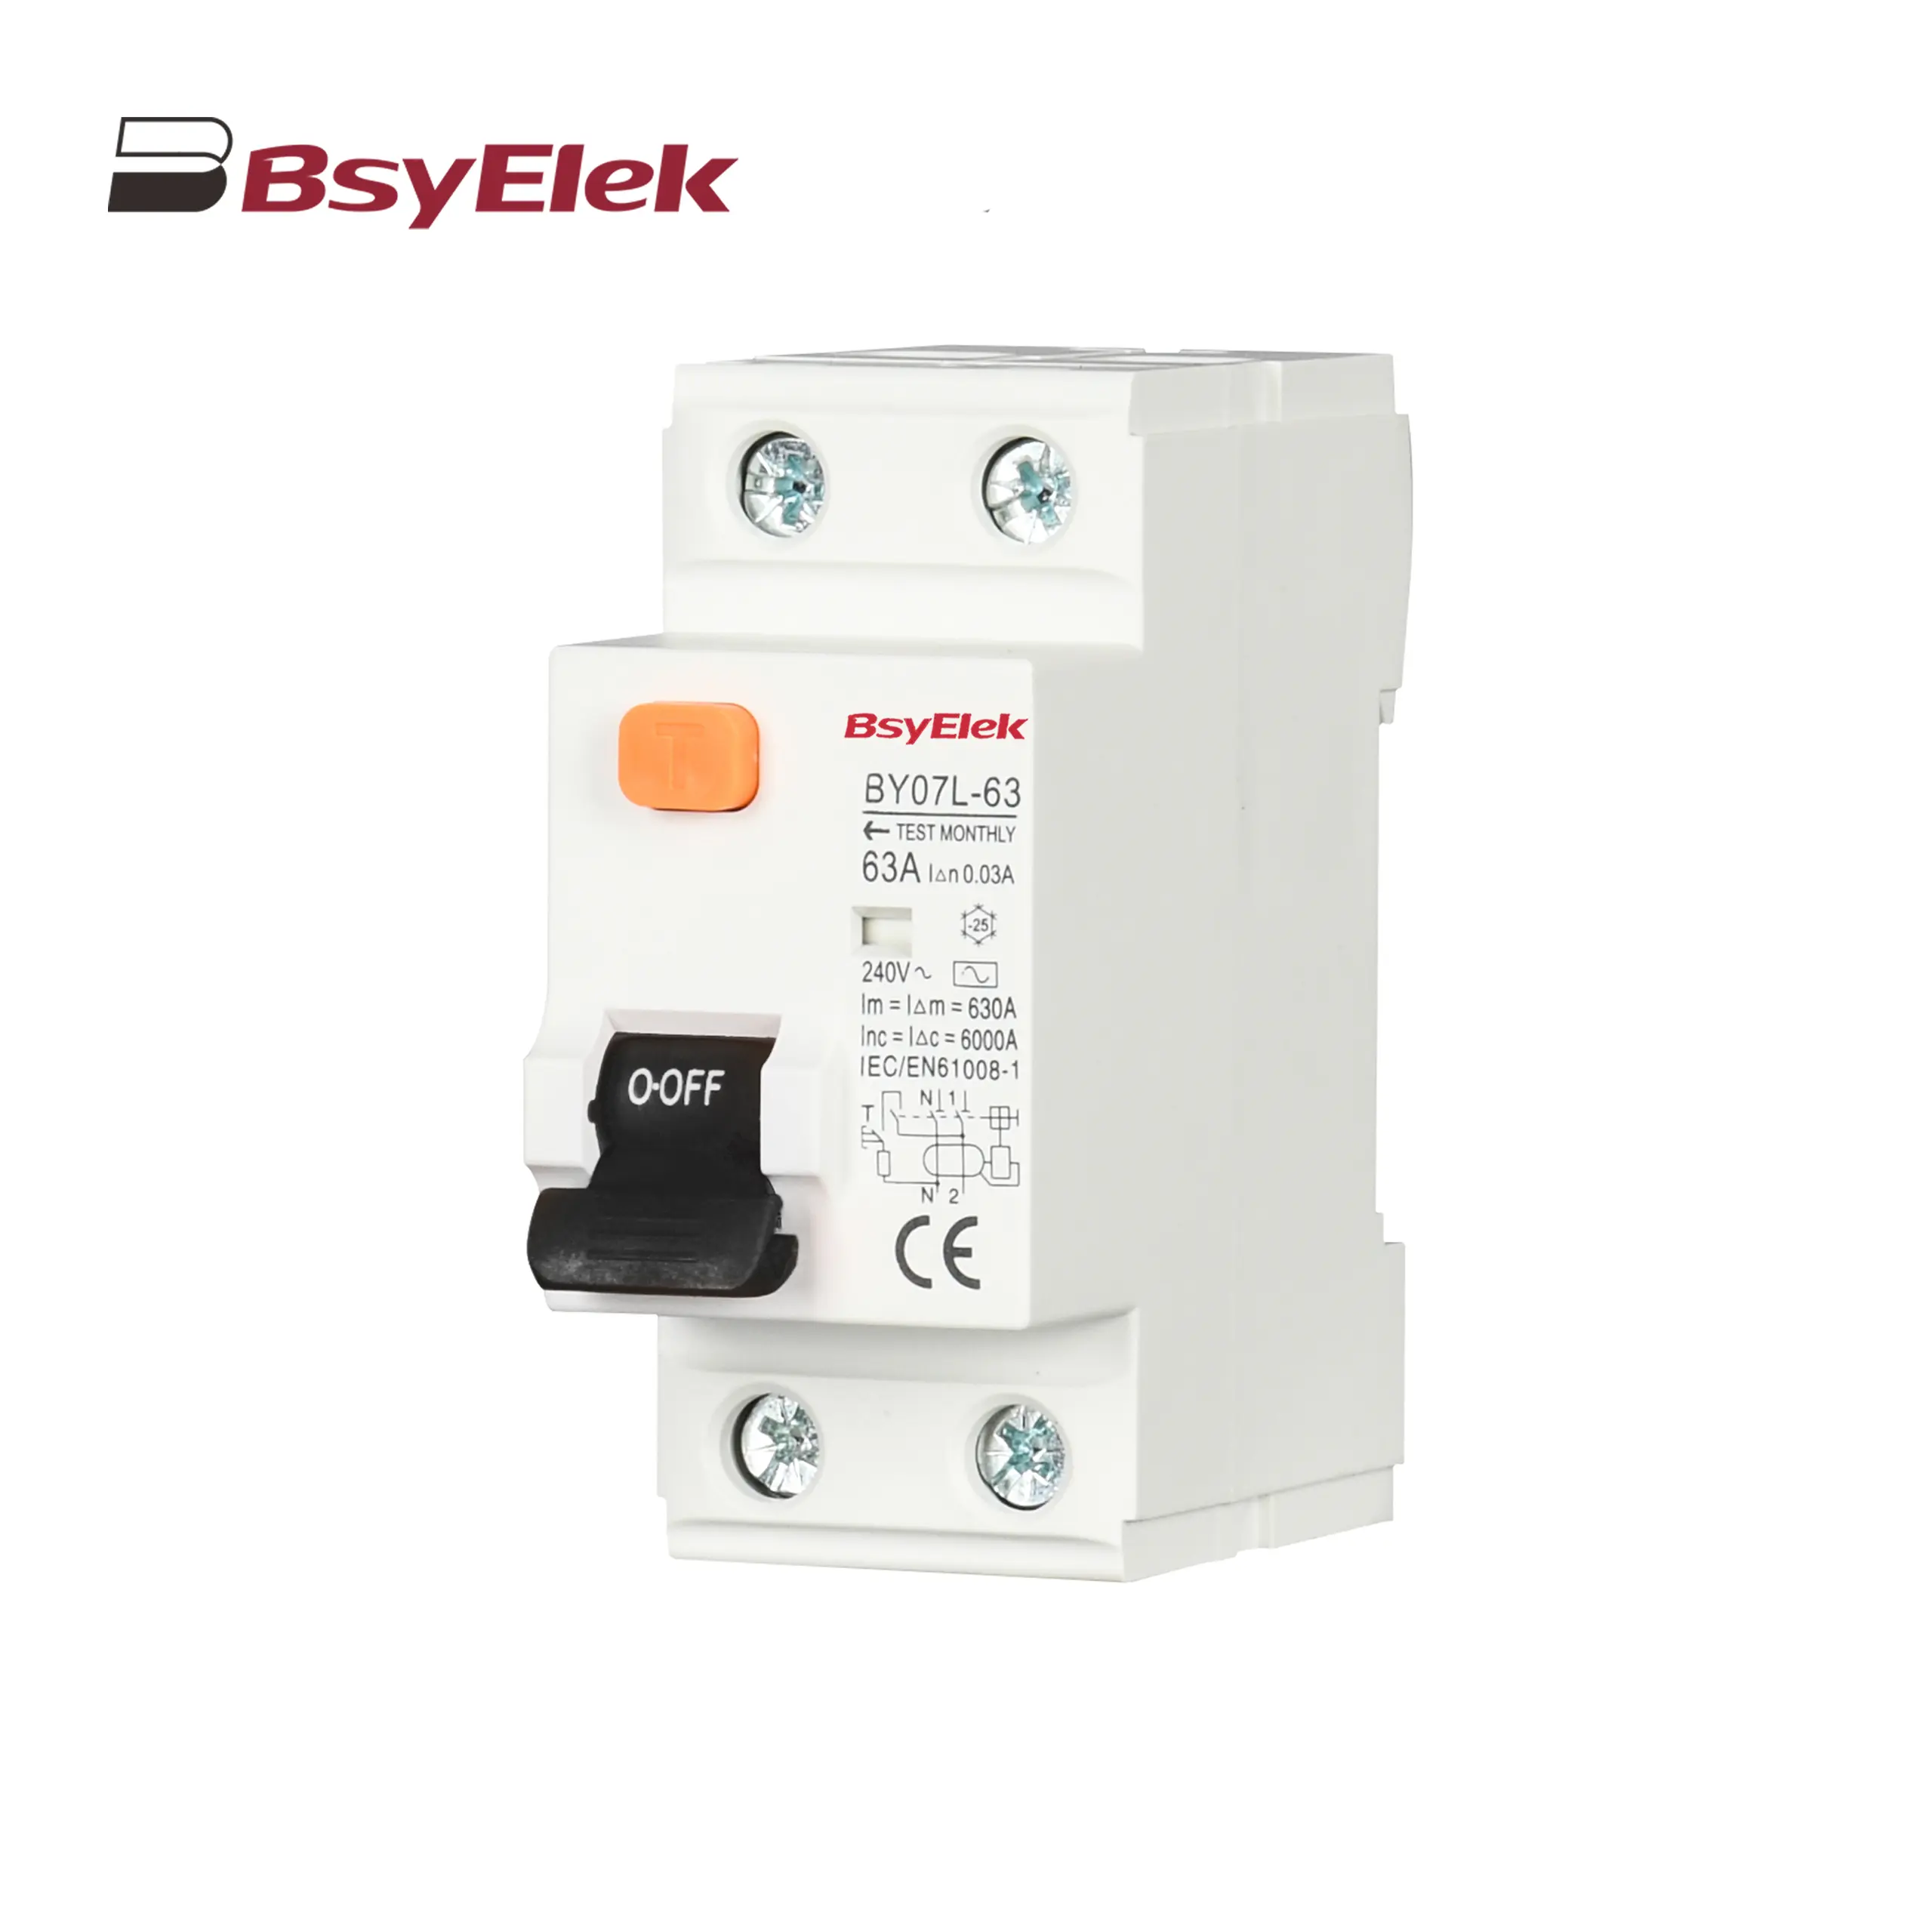 BY07L-63 RCCB 6KA Residual Current Circuit Breaker
-
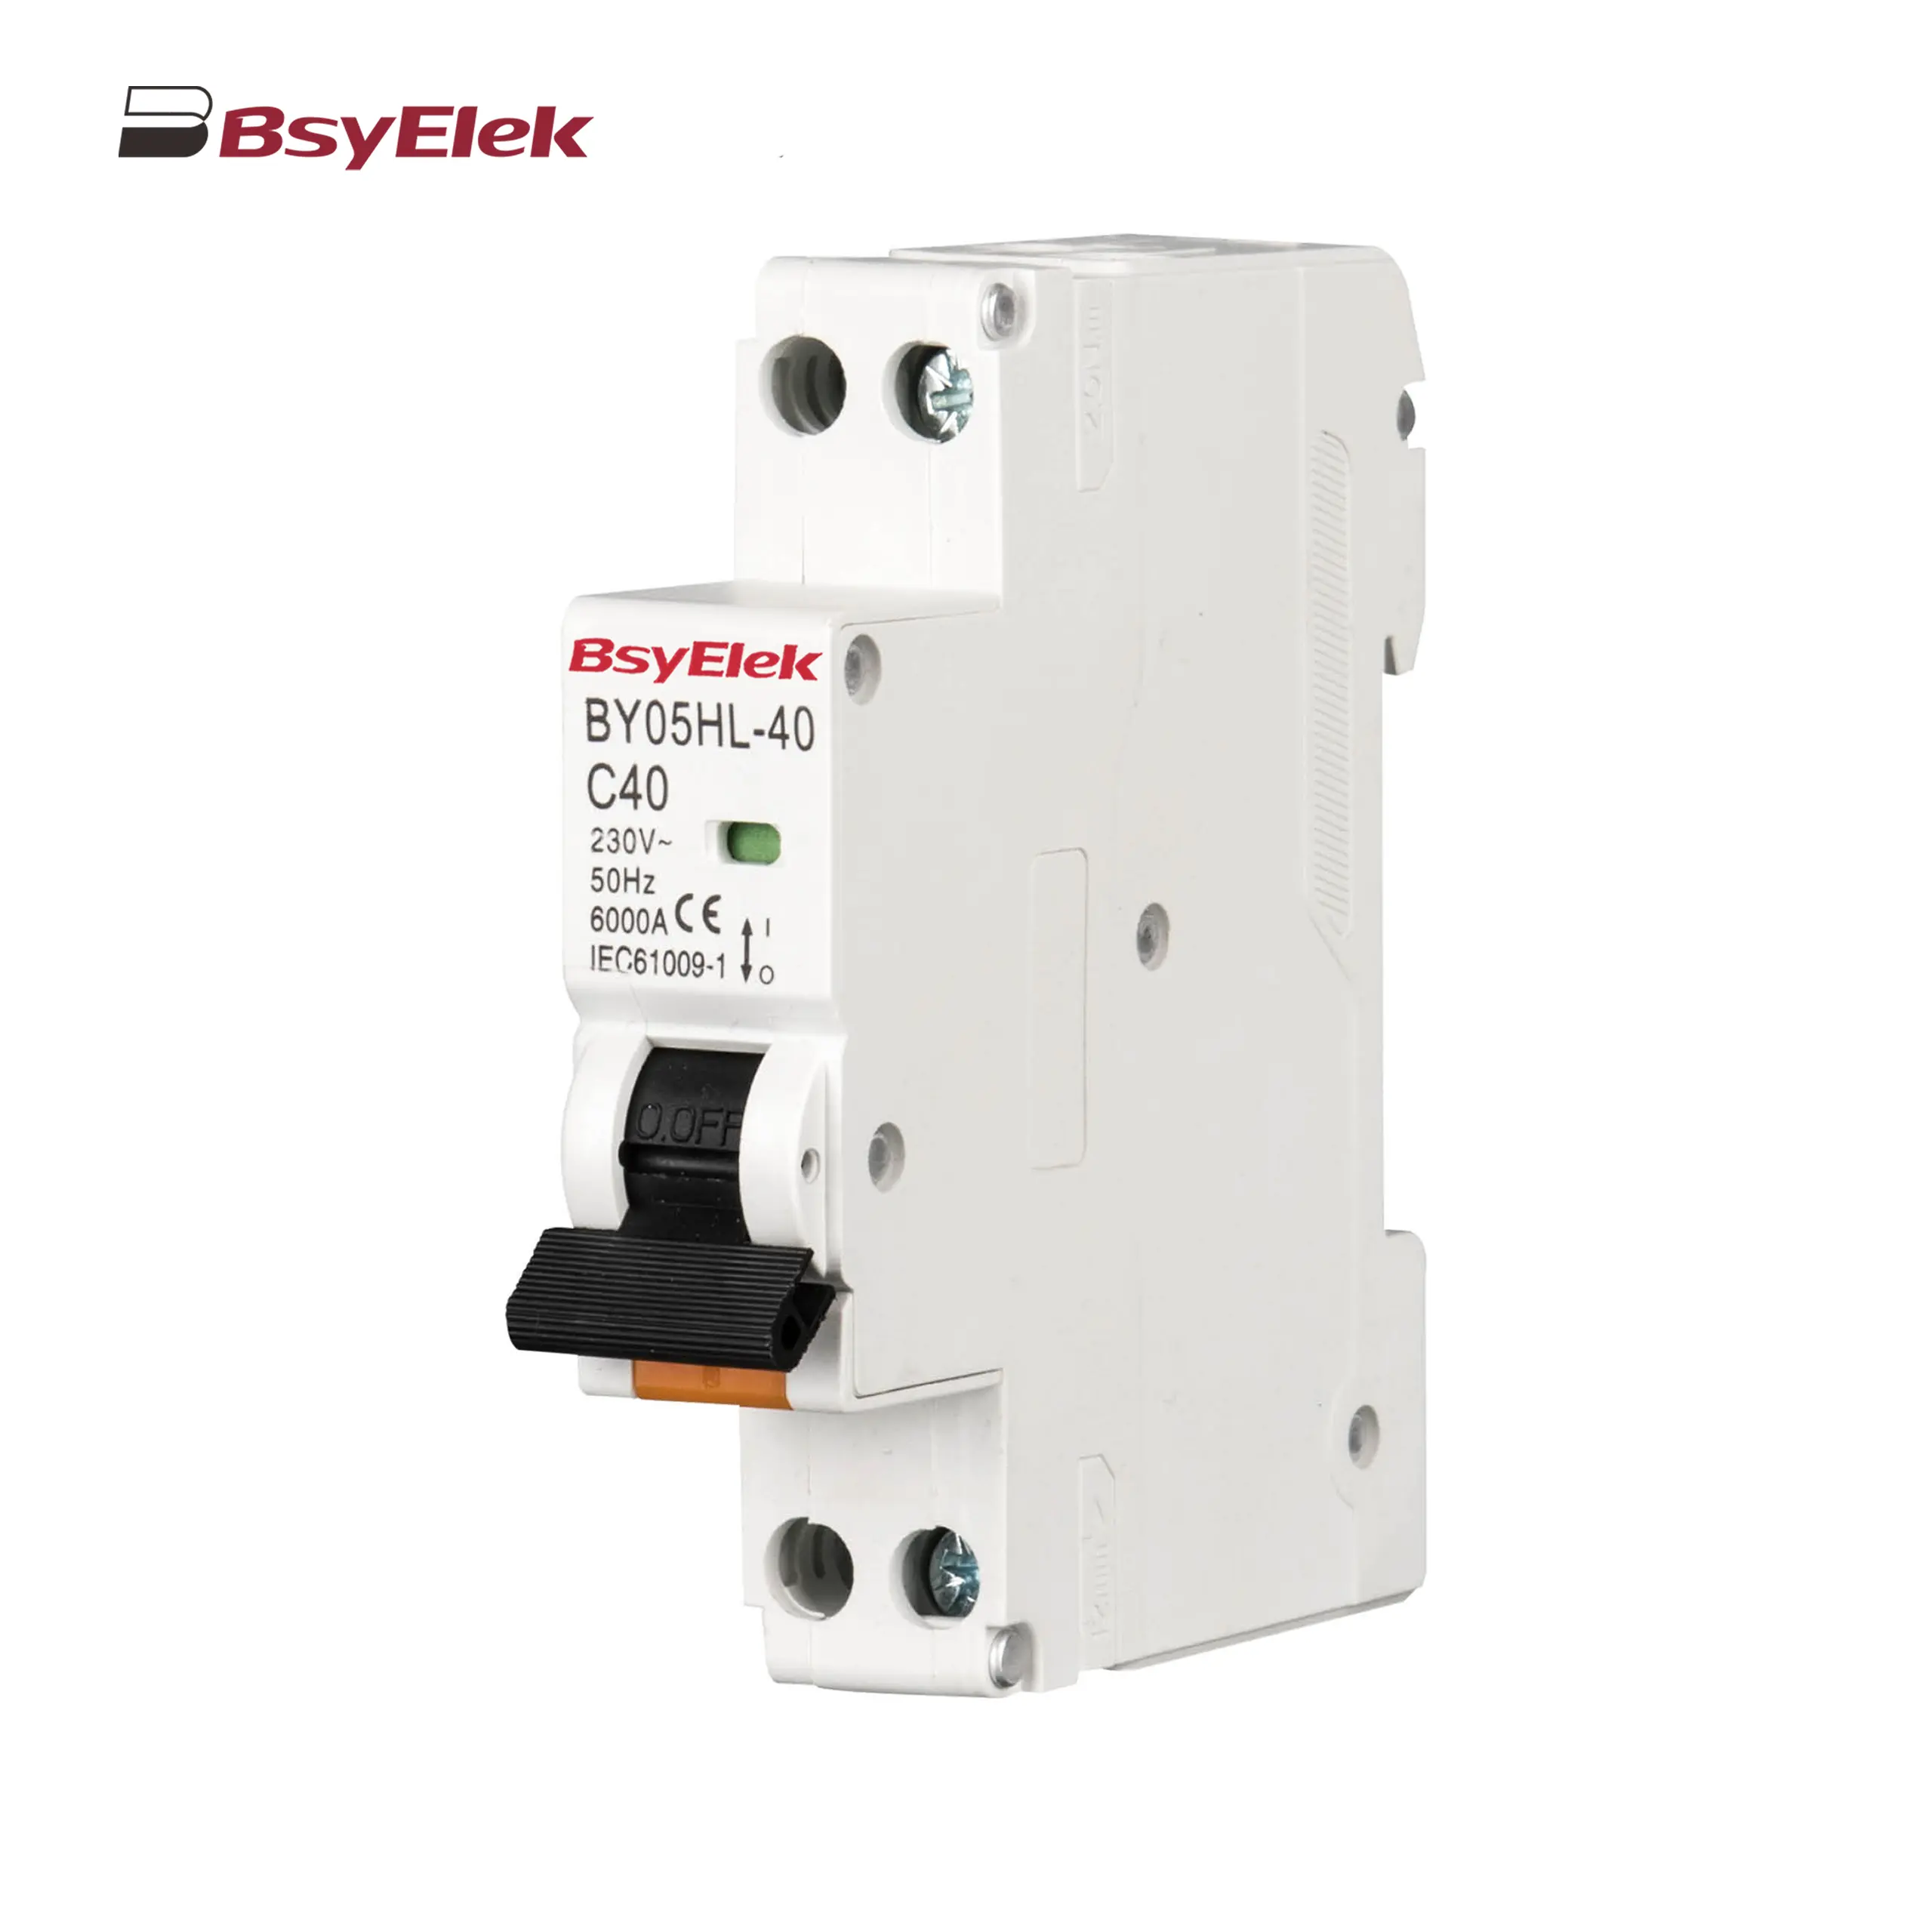 BY05HL-40 RCBO 6KA Residual Current Circuit Breaker with Over-current Protection
-
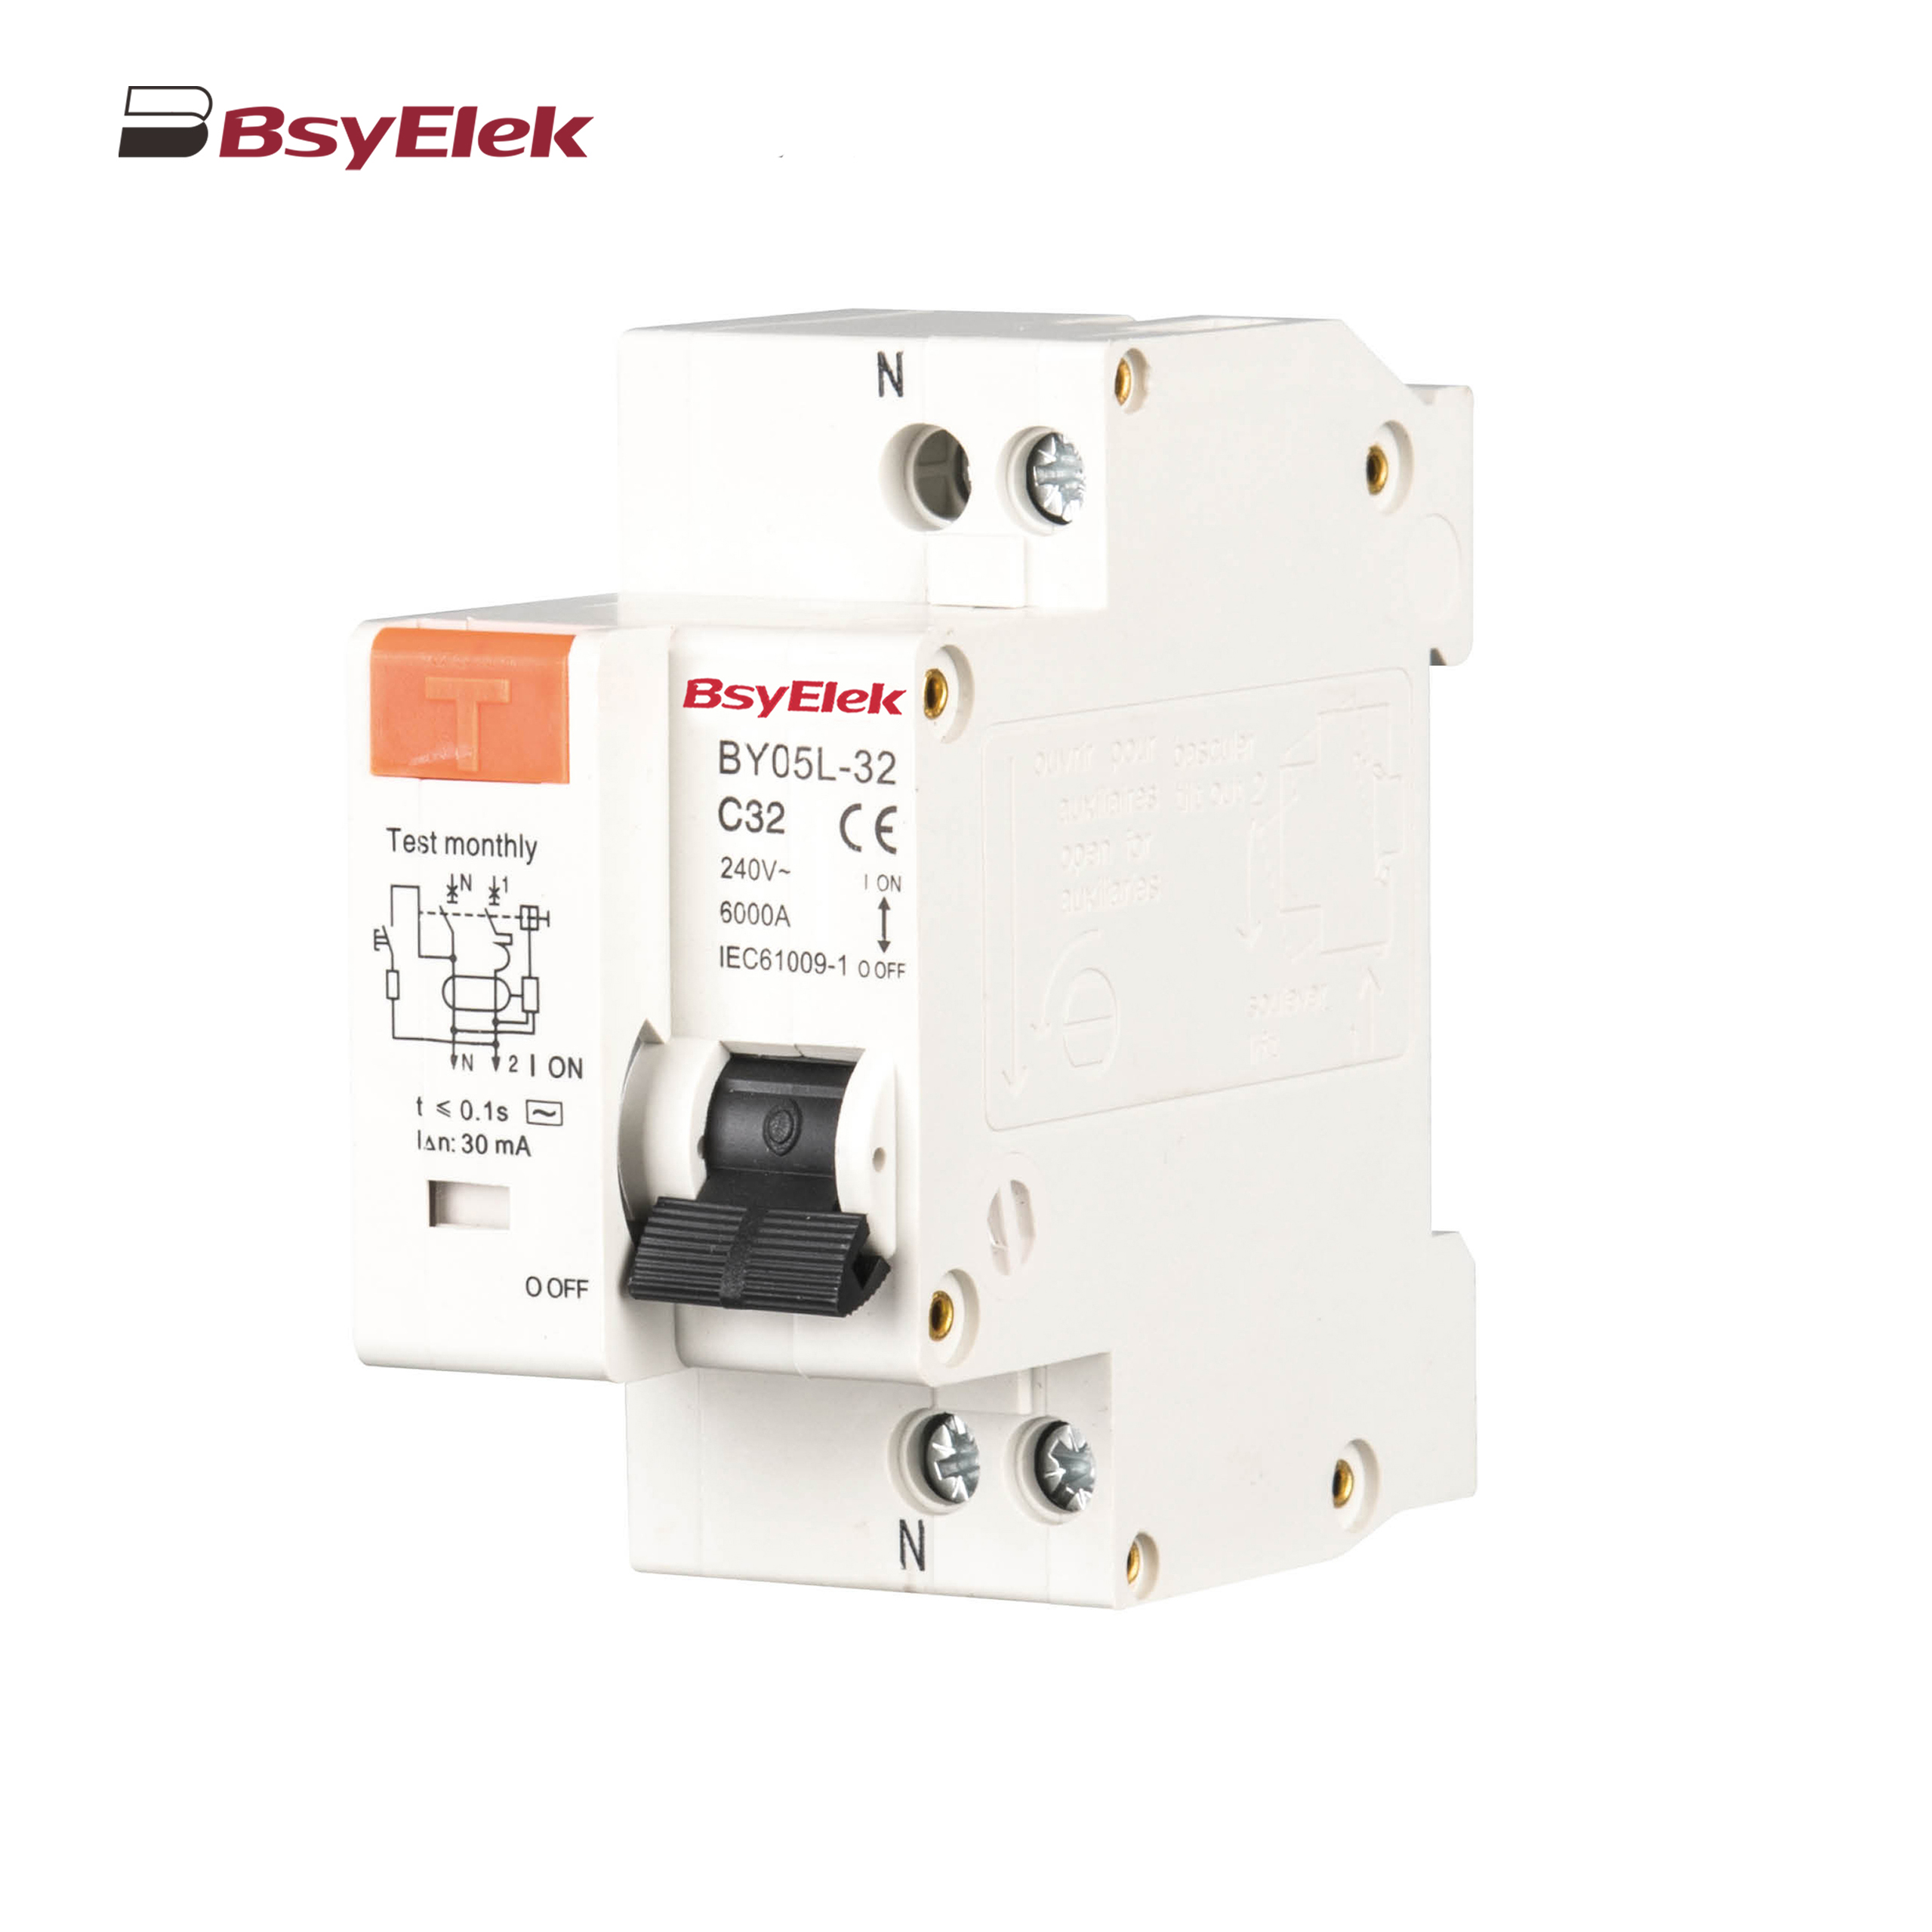 BY05L-32 RCBO 3KA Residual Current Circuit Breaker with Over-current Protection
-
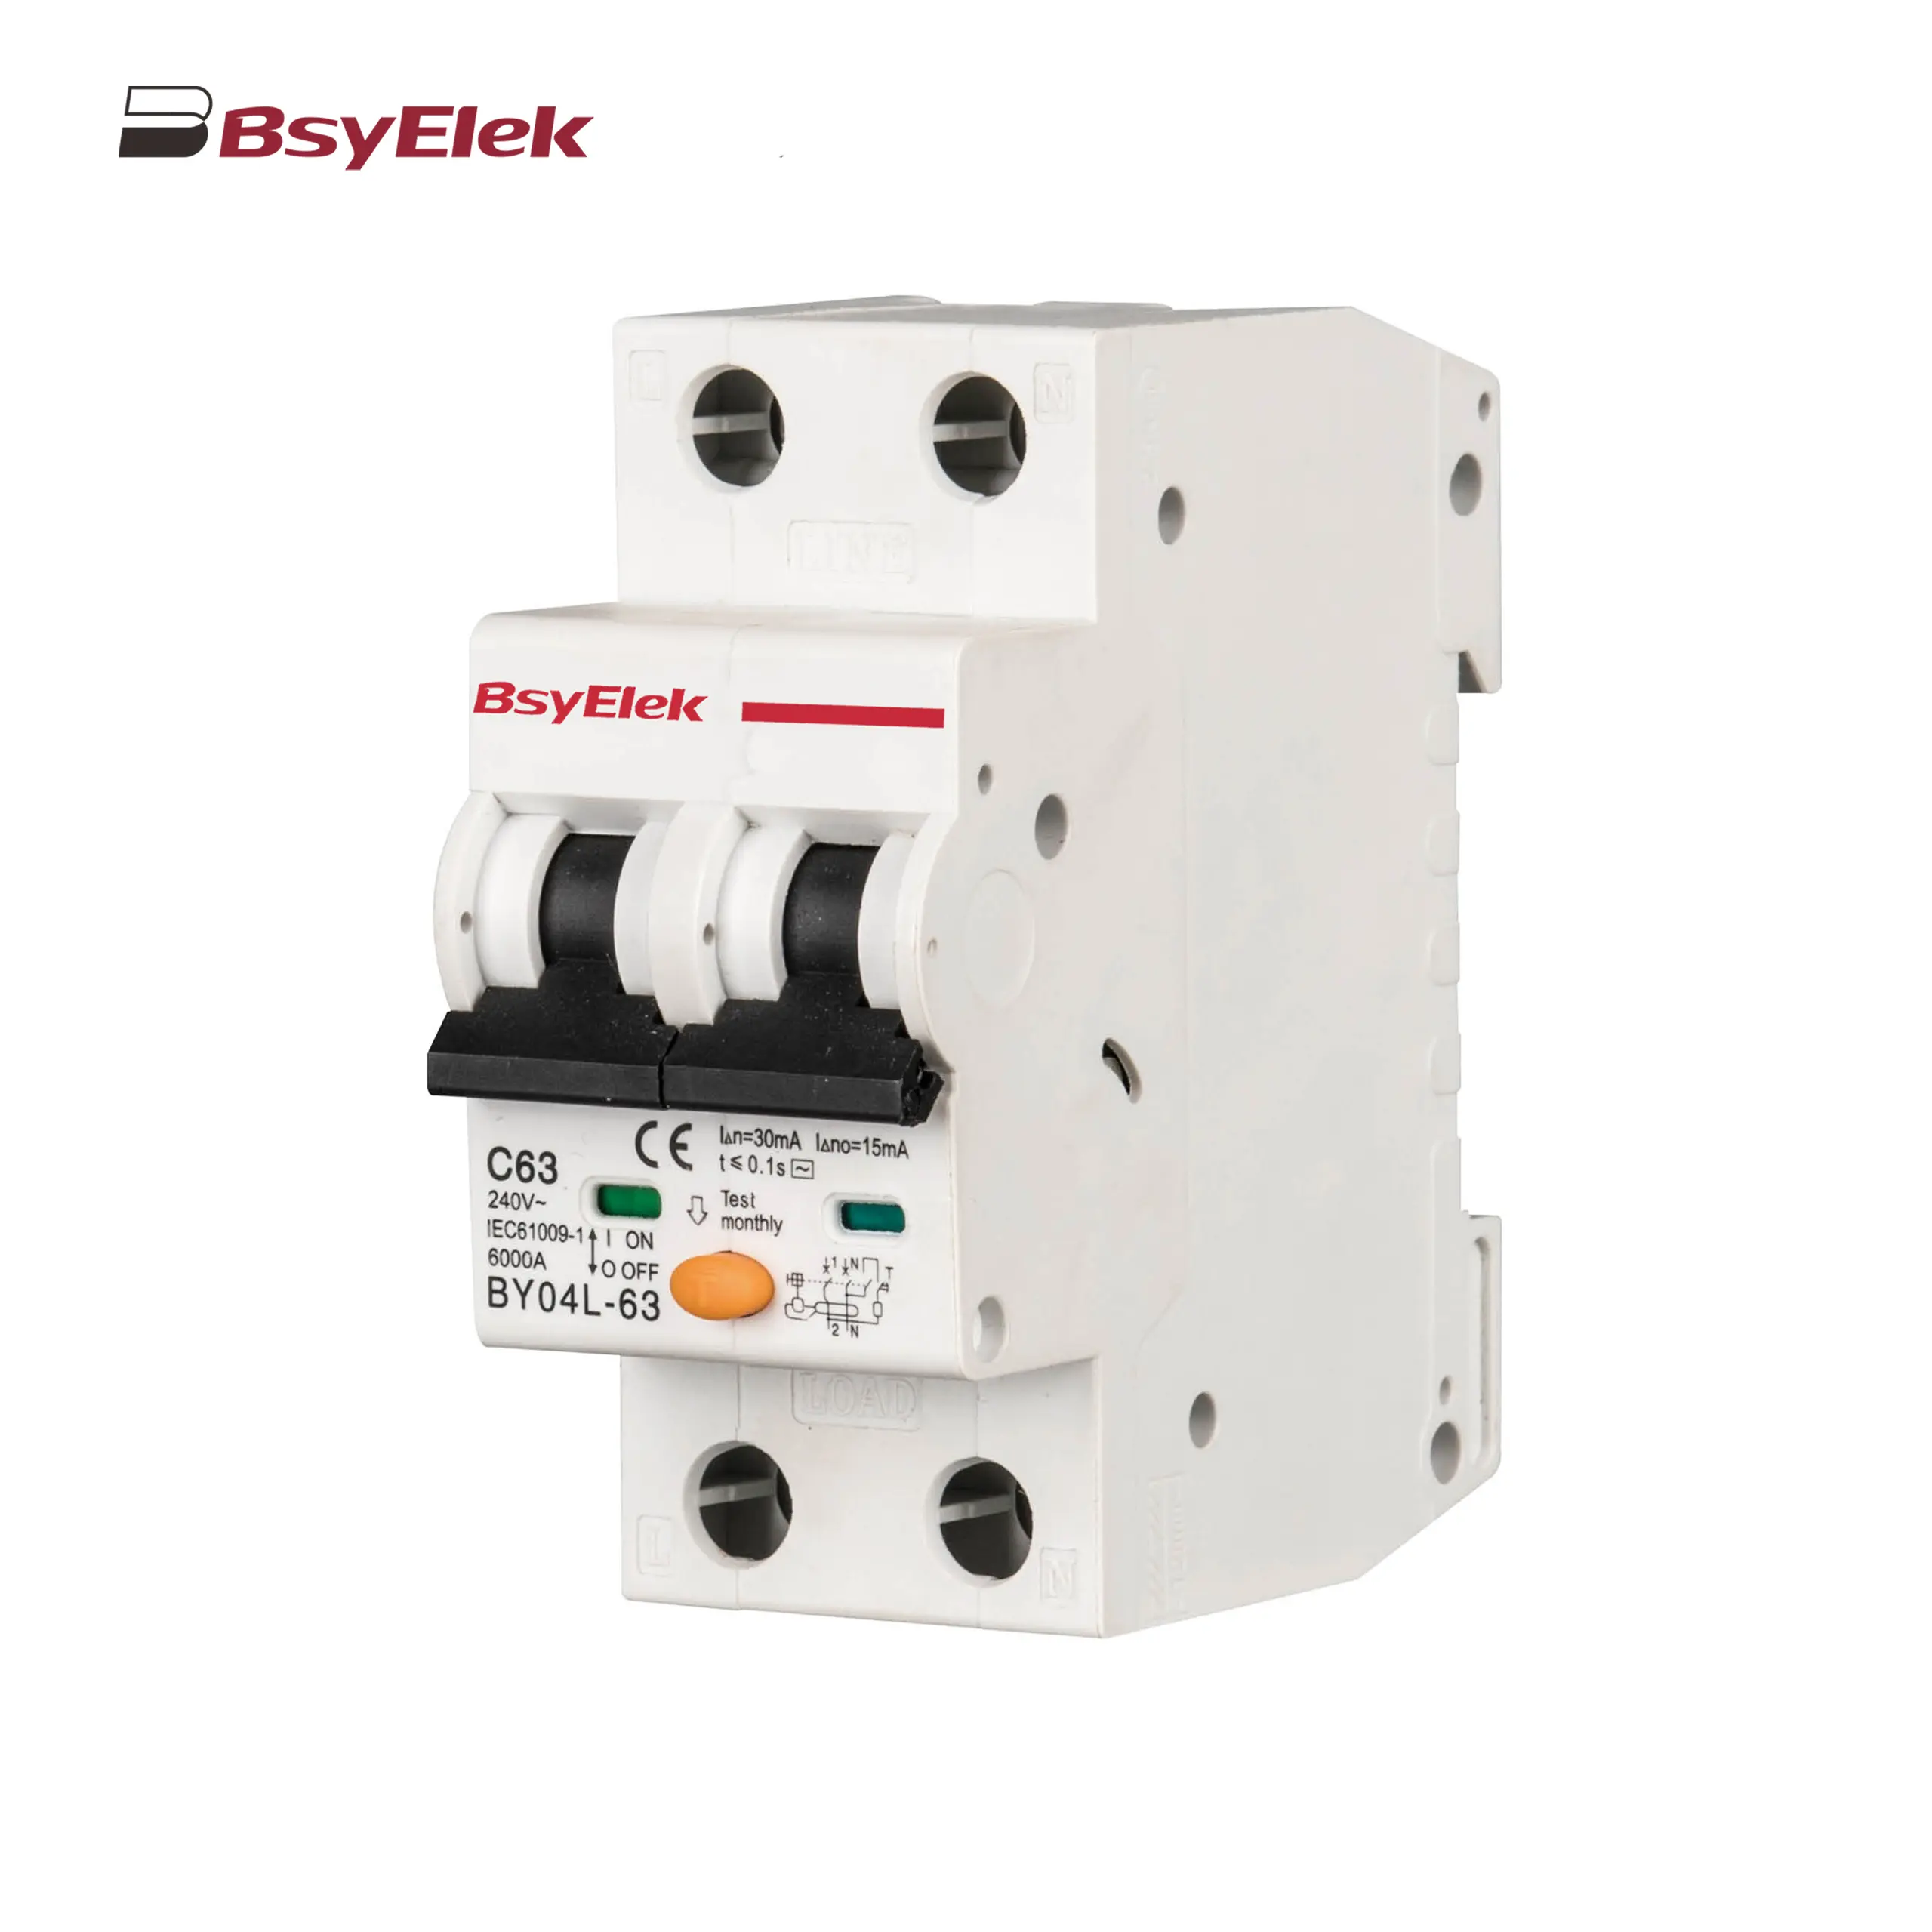 BY04L-63 RCBO 6KA Residual Current Circuit Breaker with Over-current Protection
-
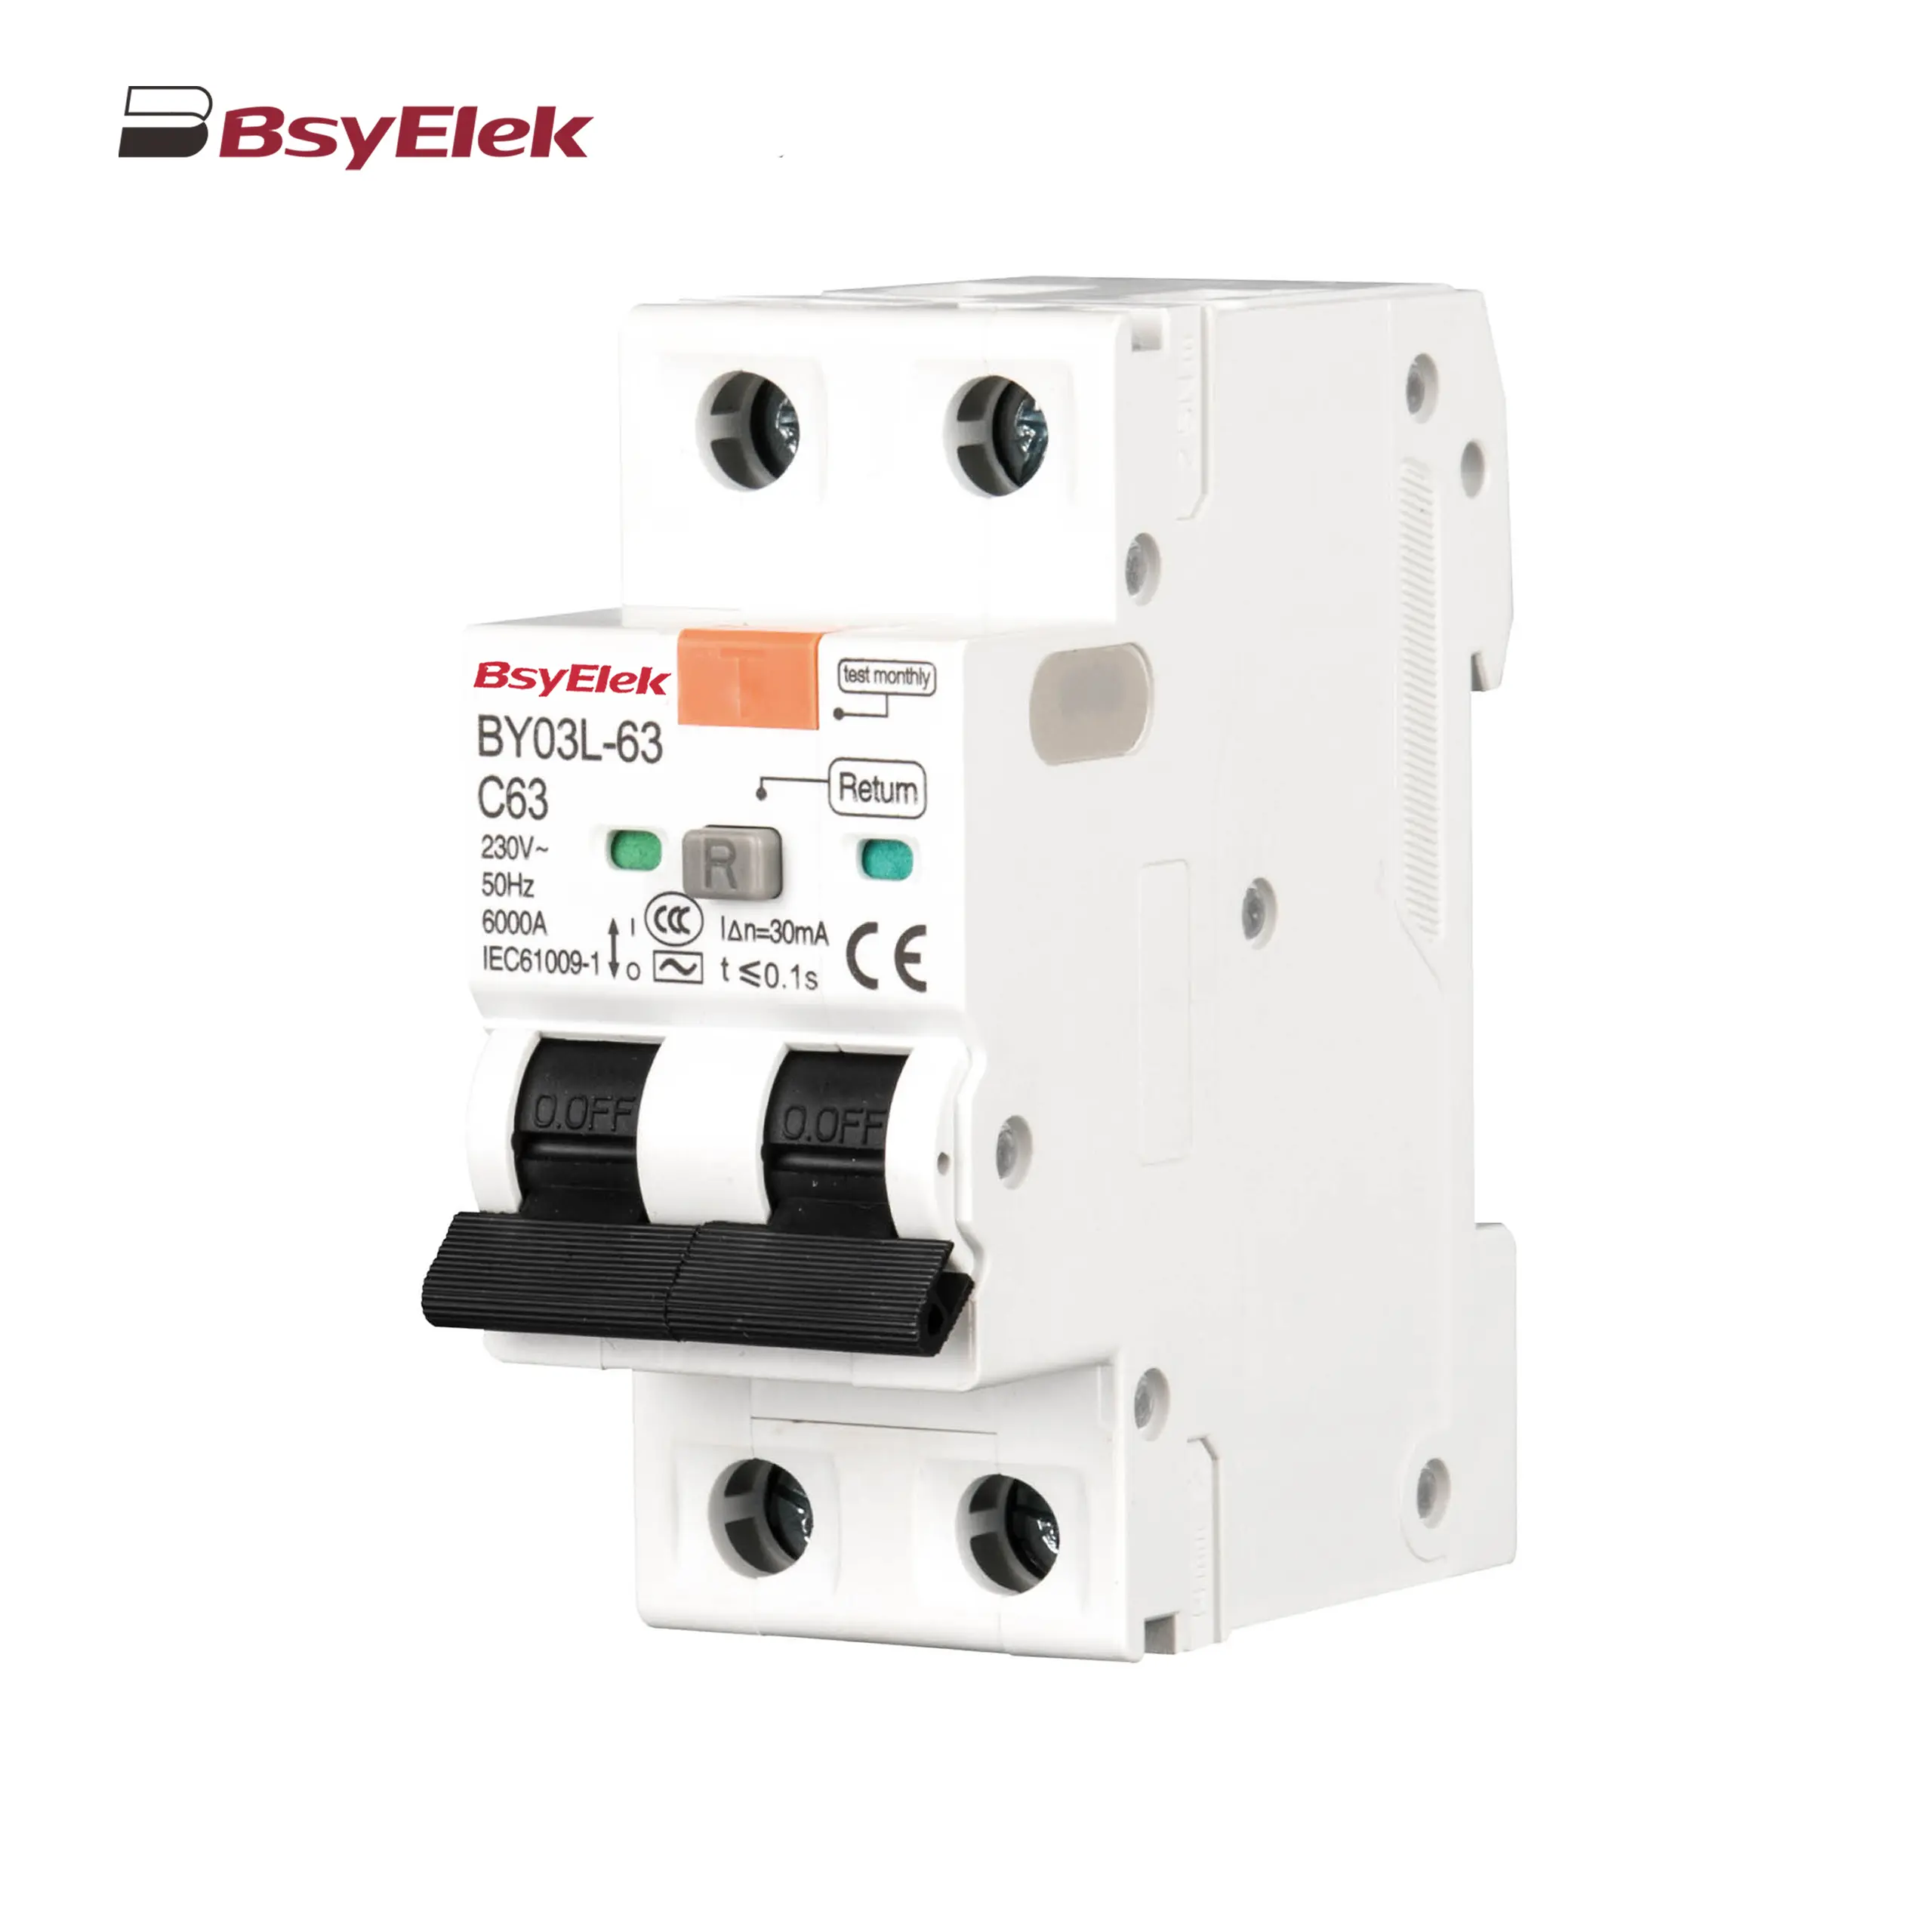 BY03L-63 RCBO 4.5KA Residual Current Circuit Breaker with Over-current Protection
-
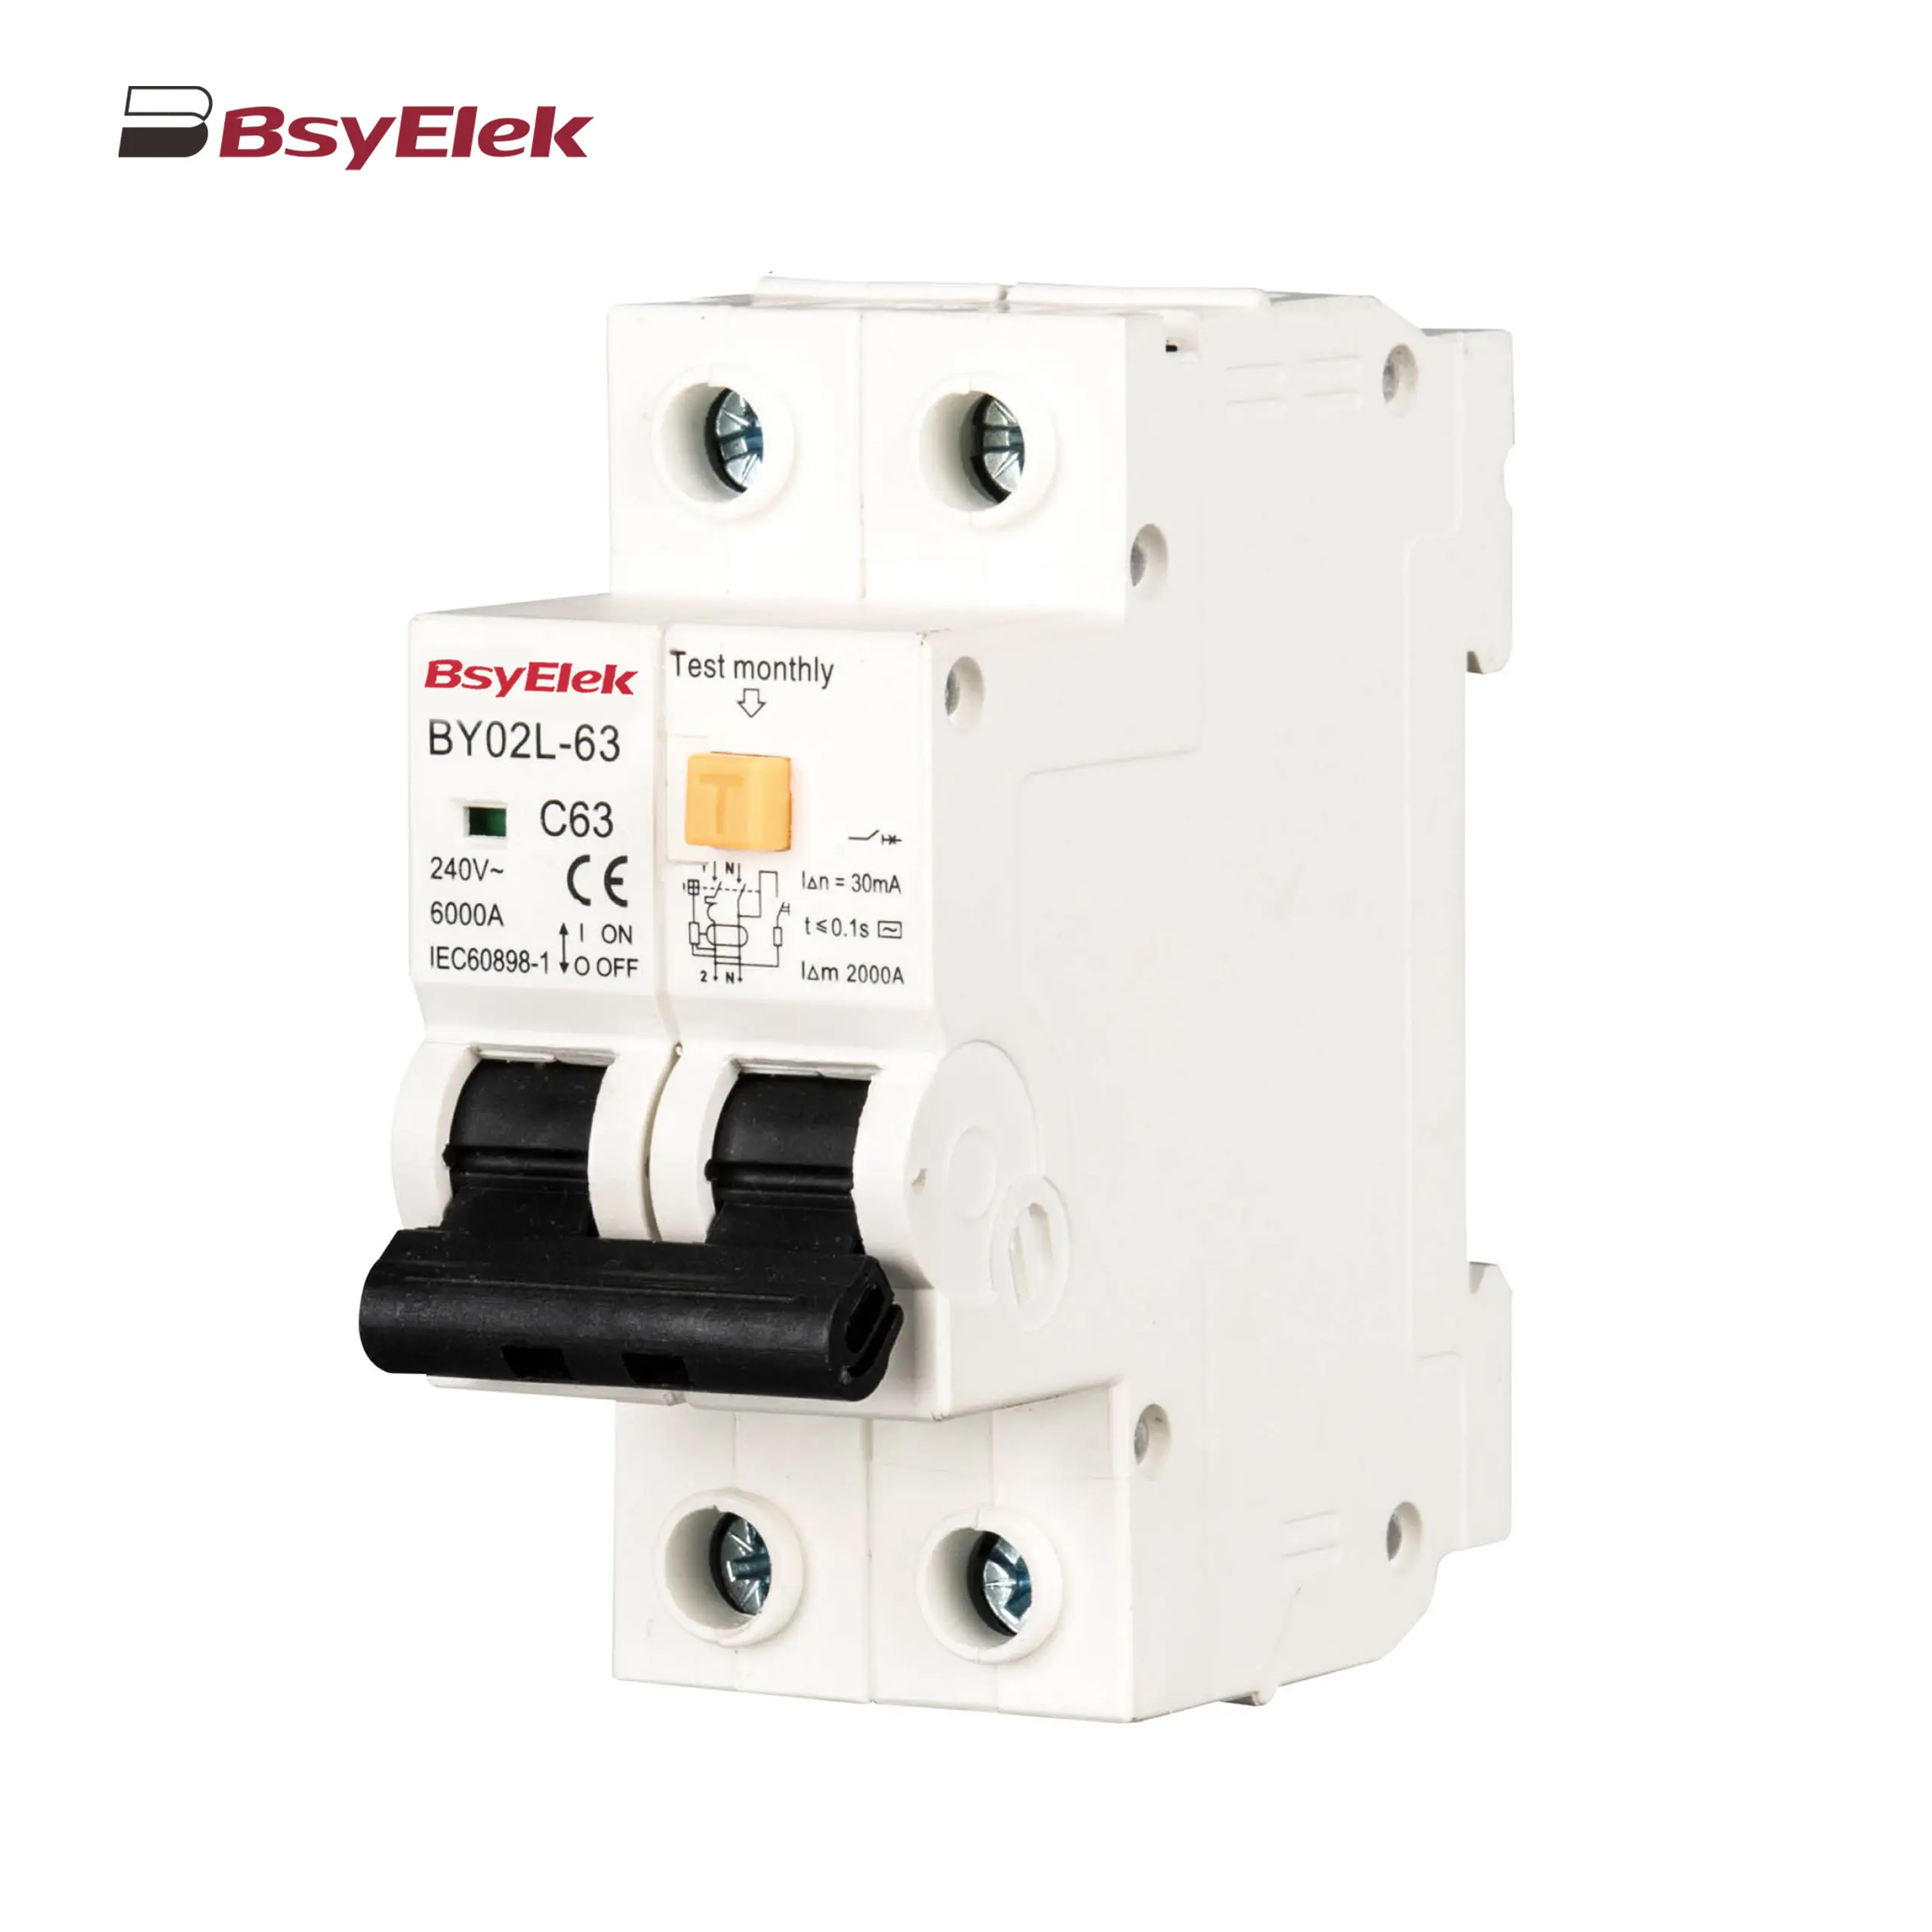 BY02L-63 RCBO 3KA Residual Current Circuit Breaker with Over-current Protection
-
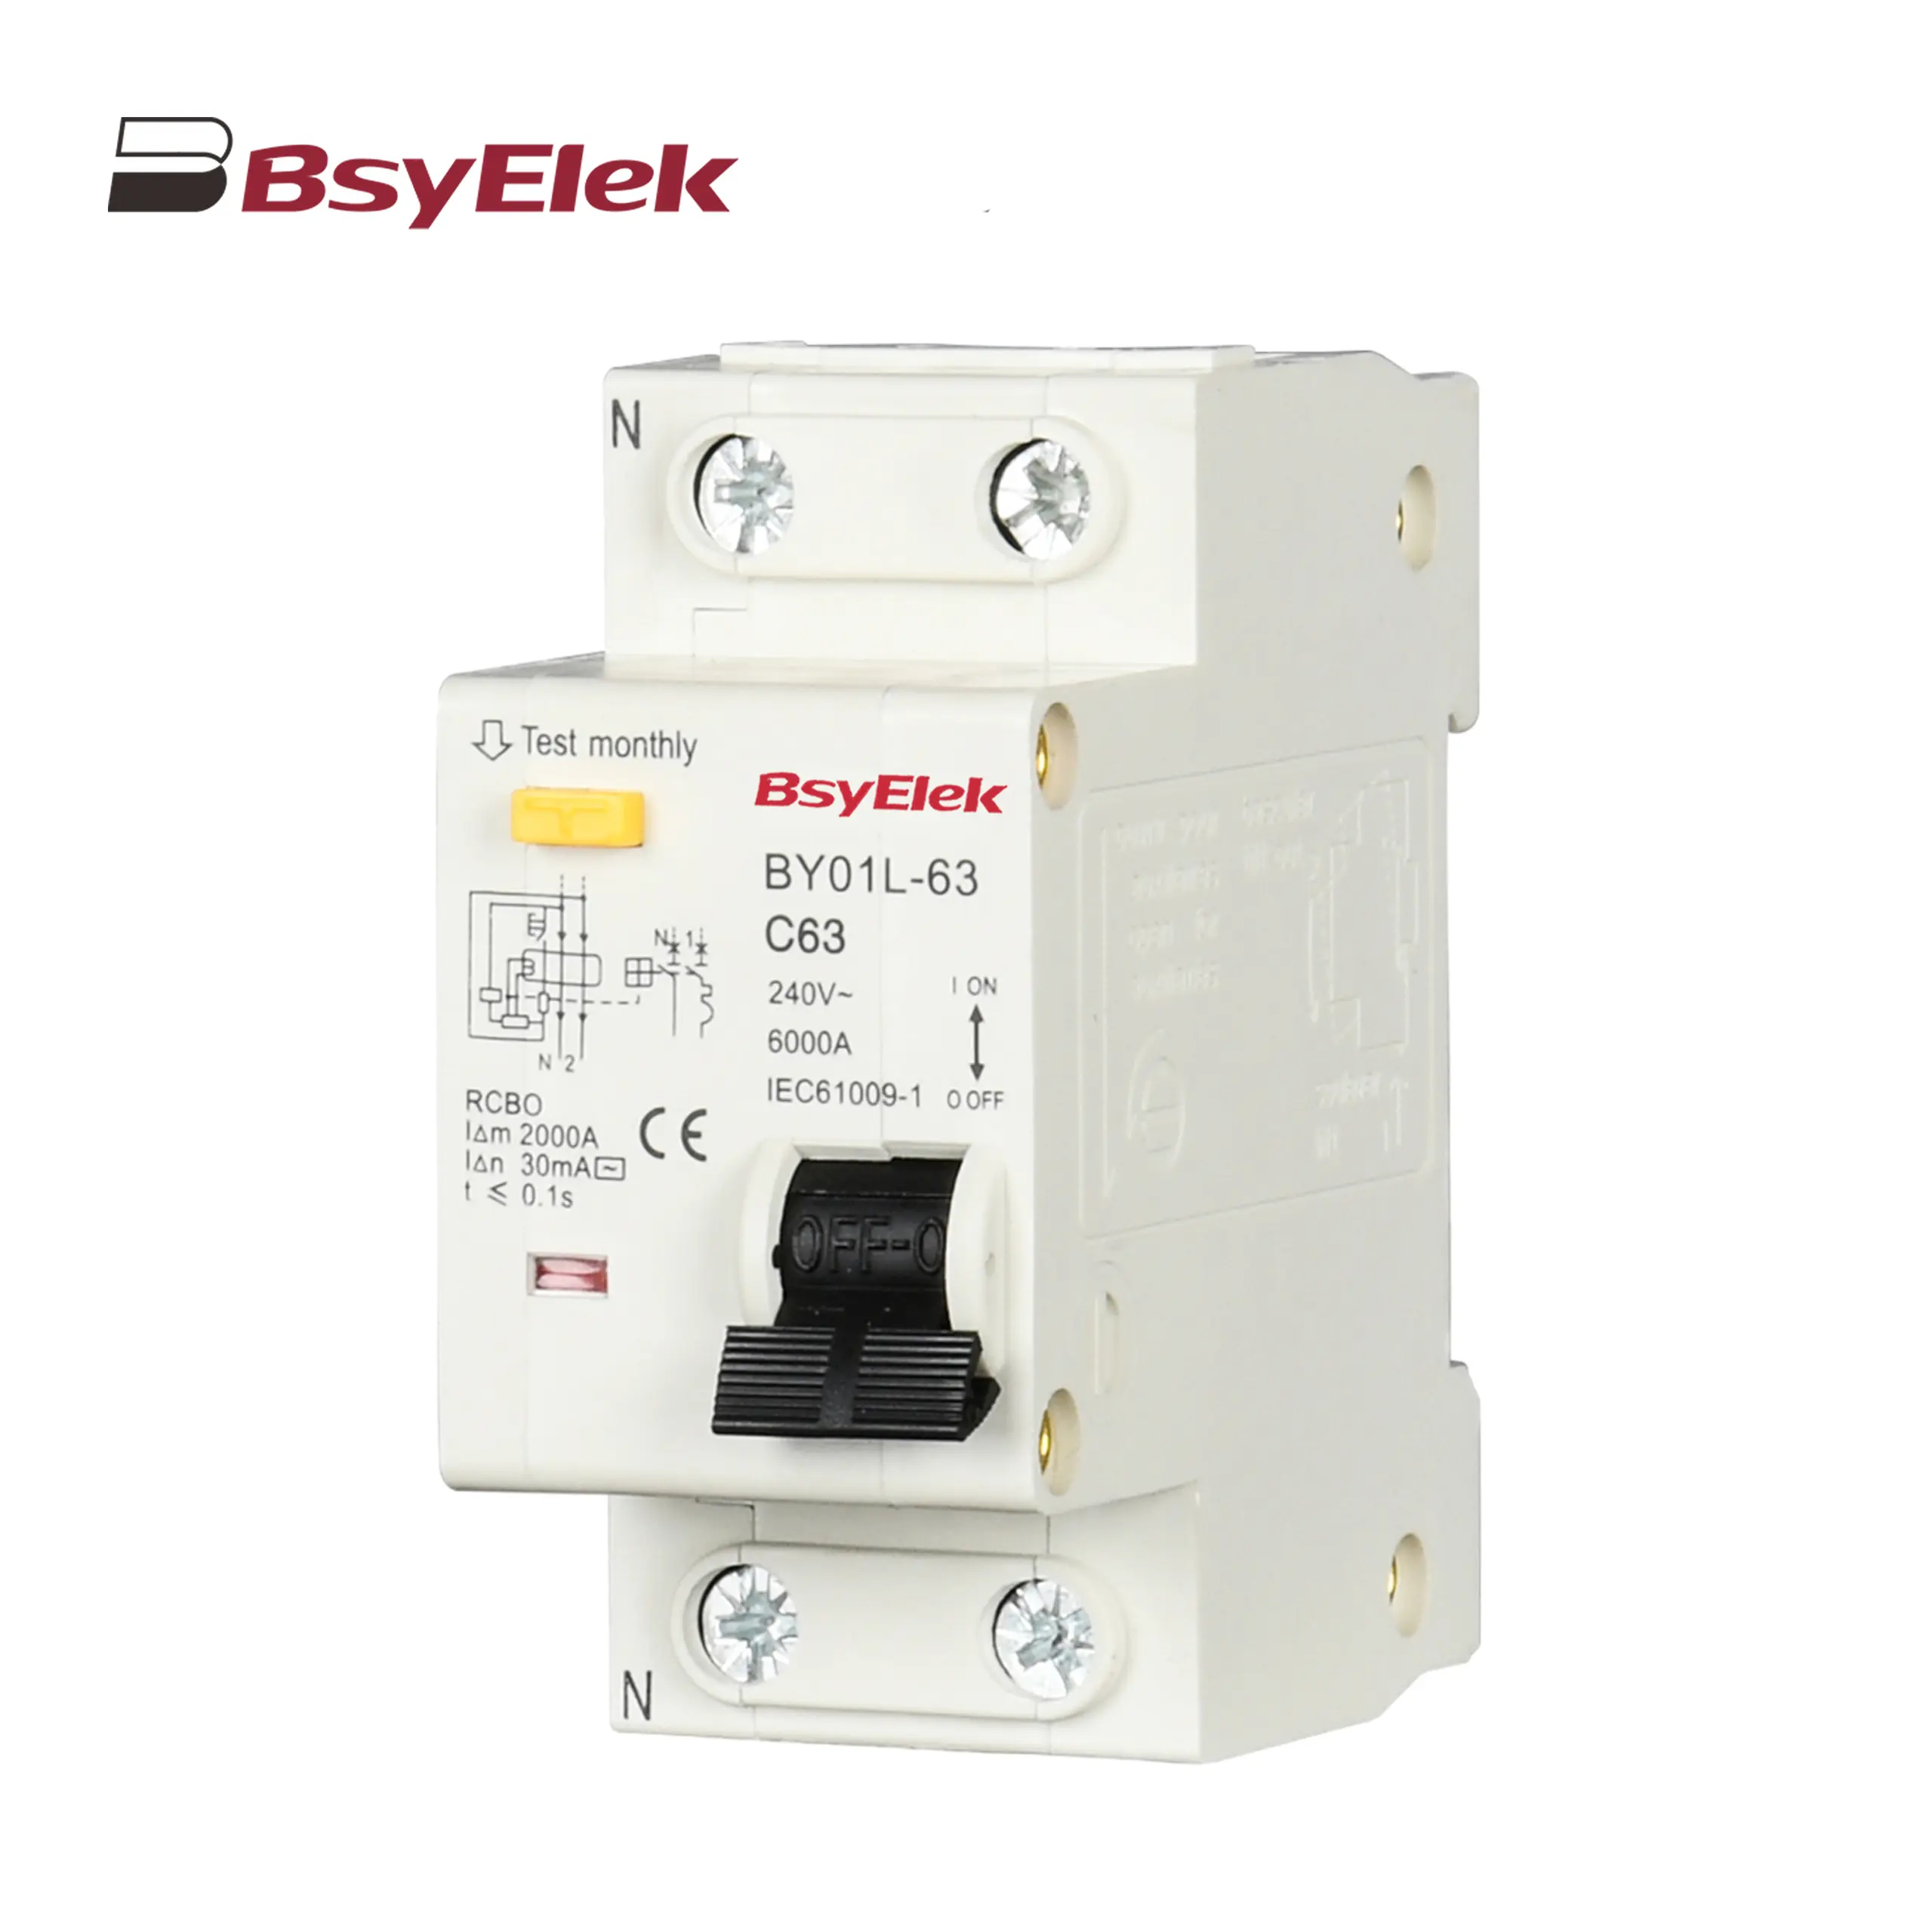 BY01L-63 RCBO 1P+N 3KA Residual Current Circuit Breaker with Over-current Protection
-
- Resettable Overvoltage and Undervoltage Protector
- AC Contactor
- AC Surge Protective Device
- Changeover Switch
-
AC Miniature Circuit Breaker
-
Photovoltaic System Protection
-
DC Miniature Circuit Breaker
-
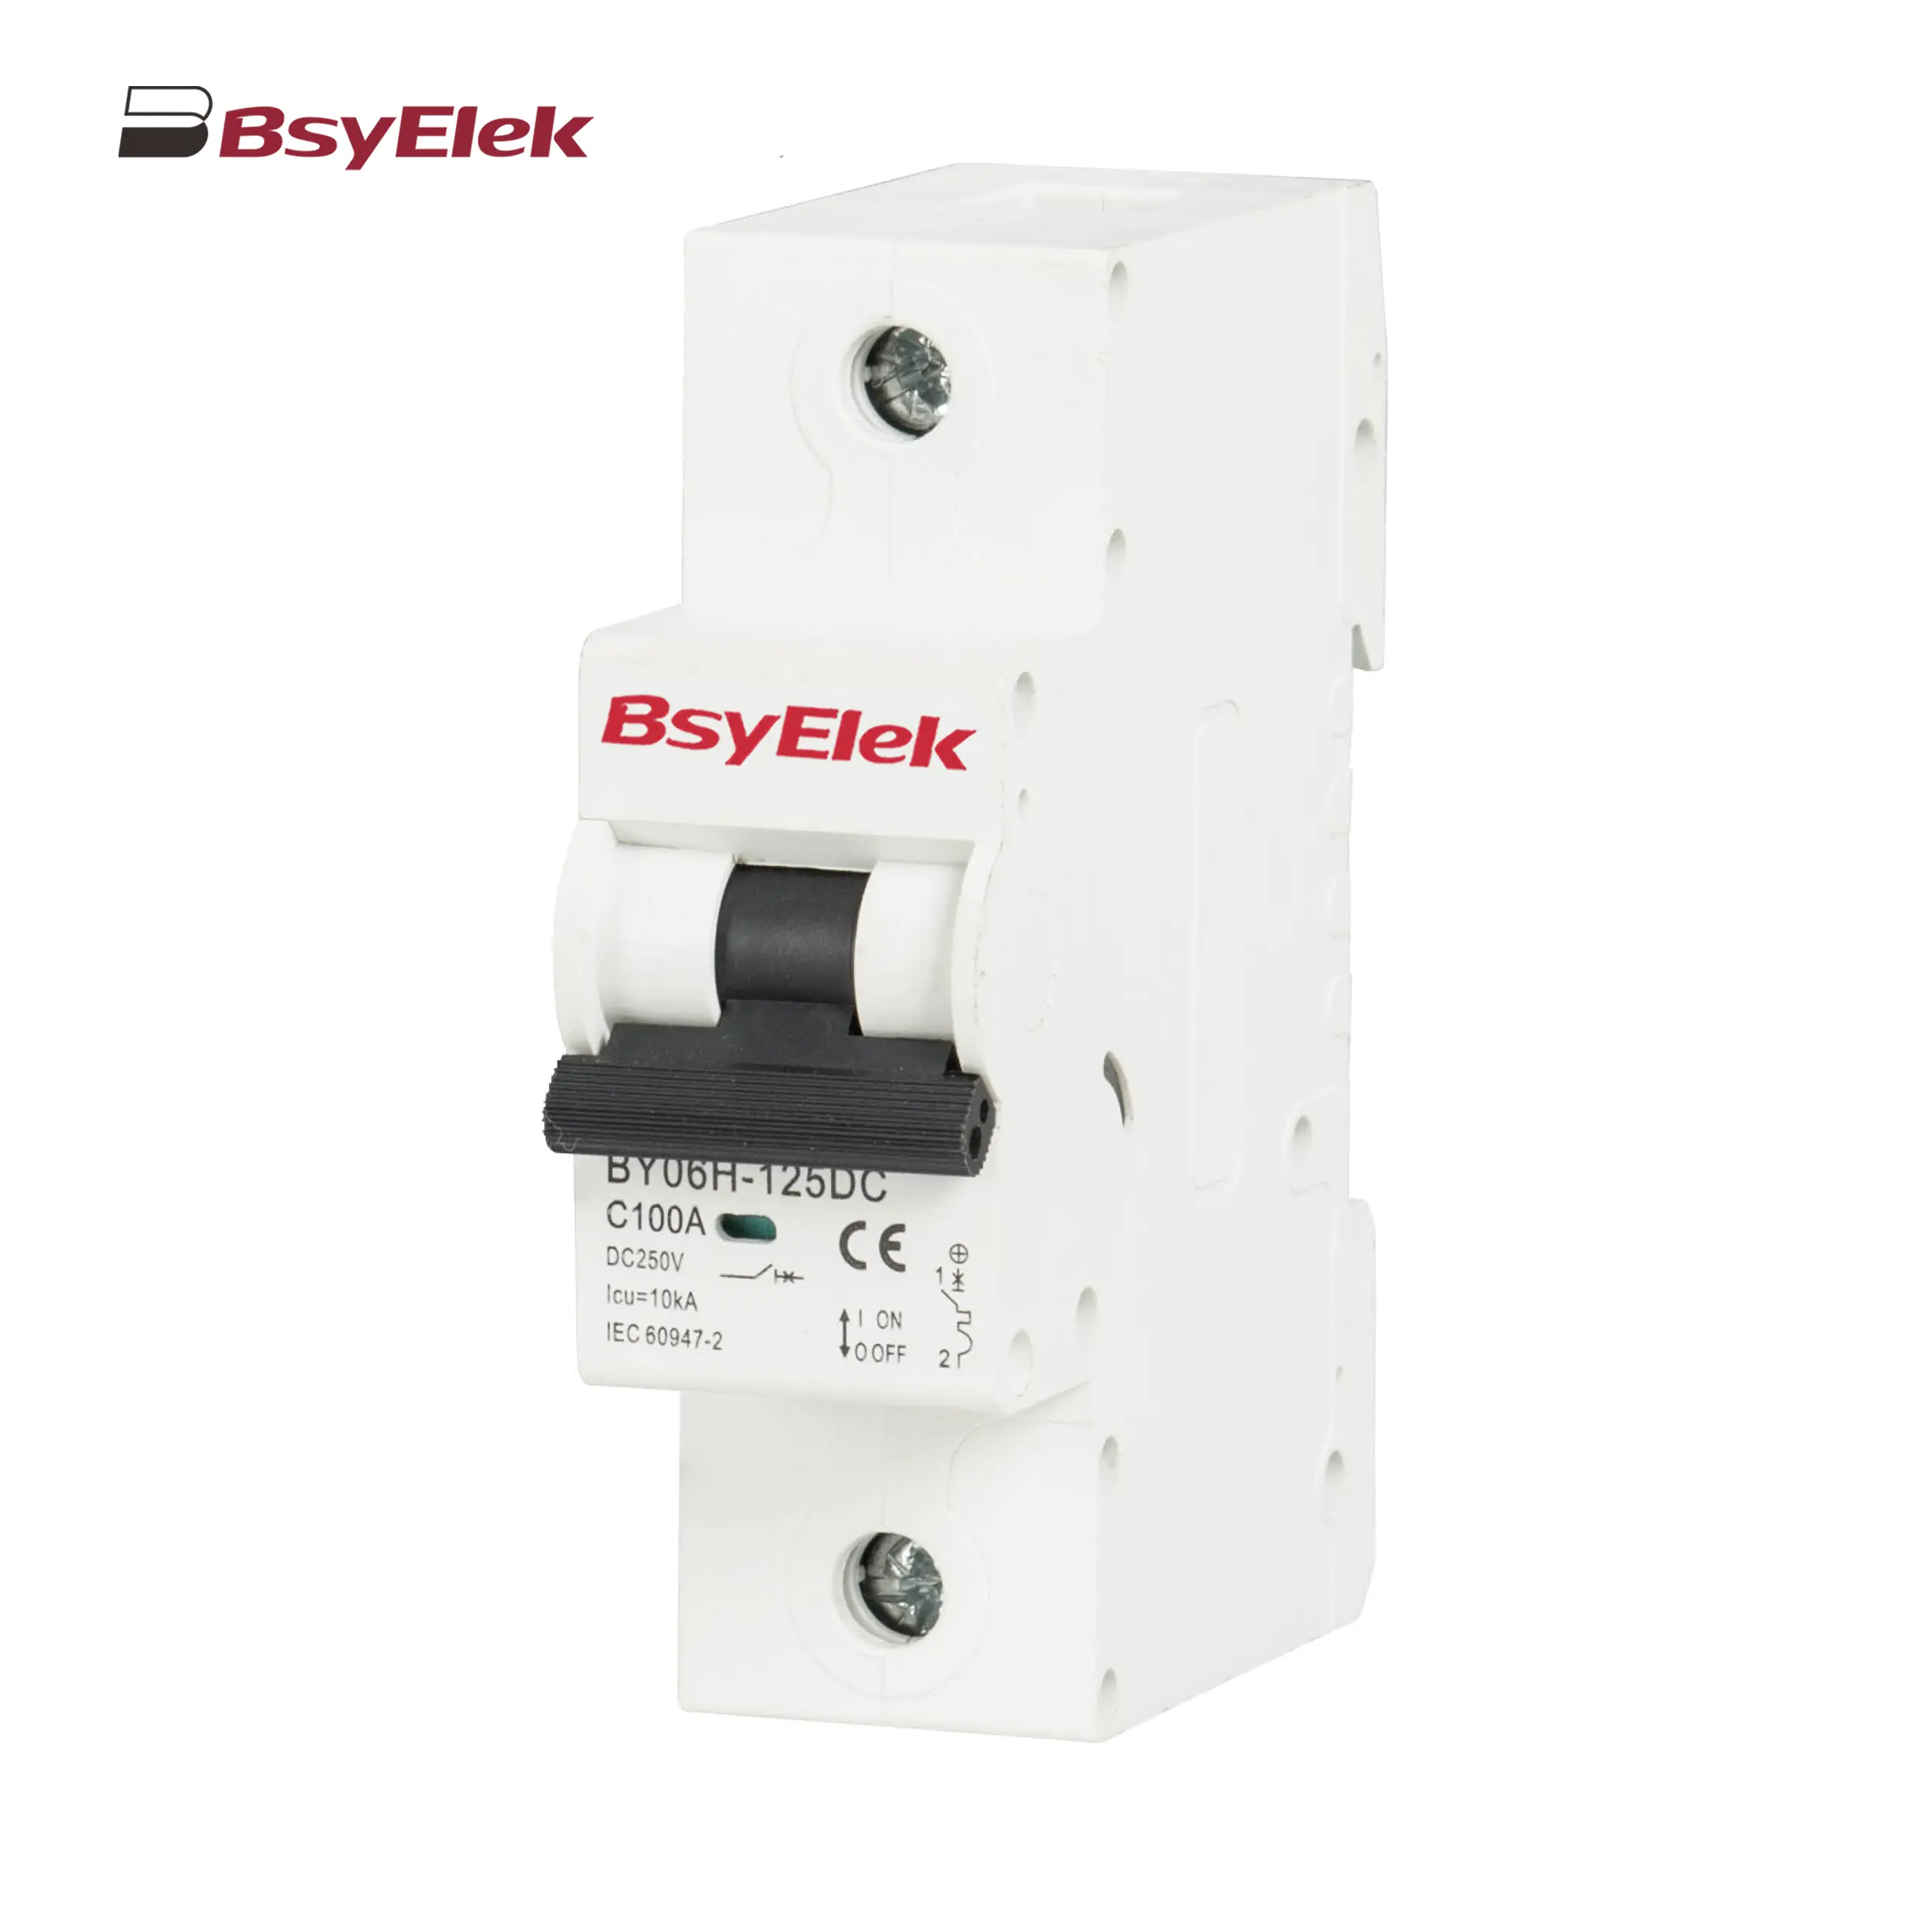 BY06H-125DC MCB 10-15kA DC Miniature Circuit Breaker
-
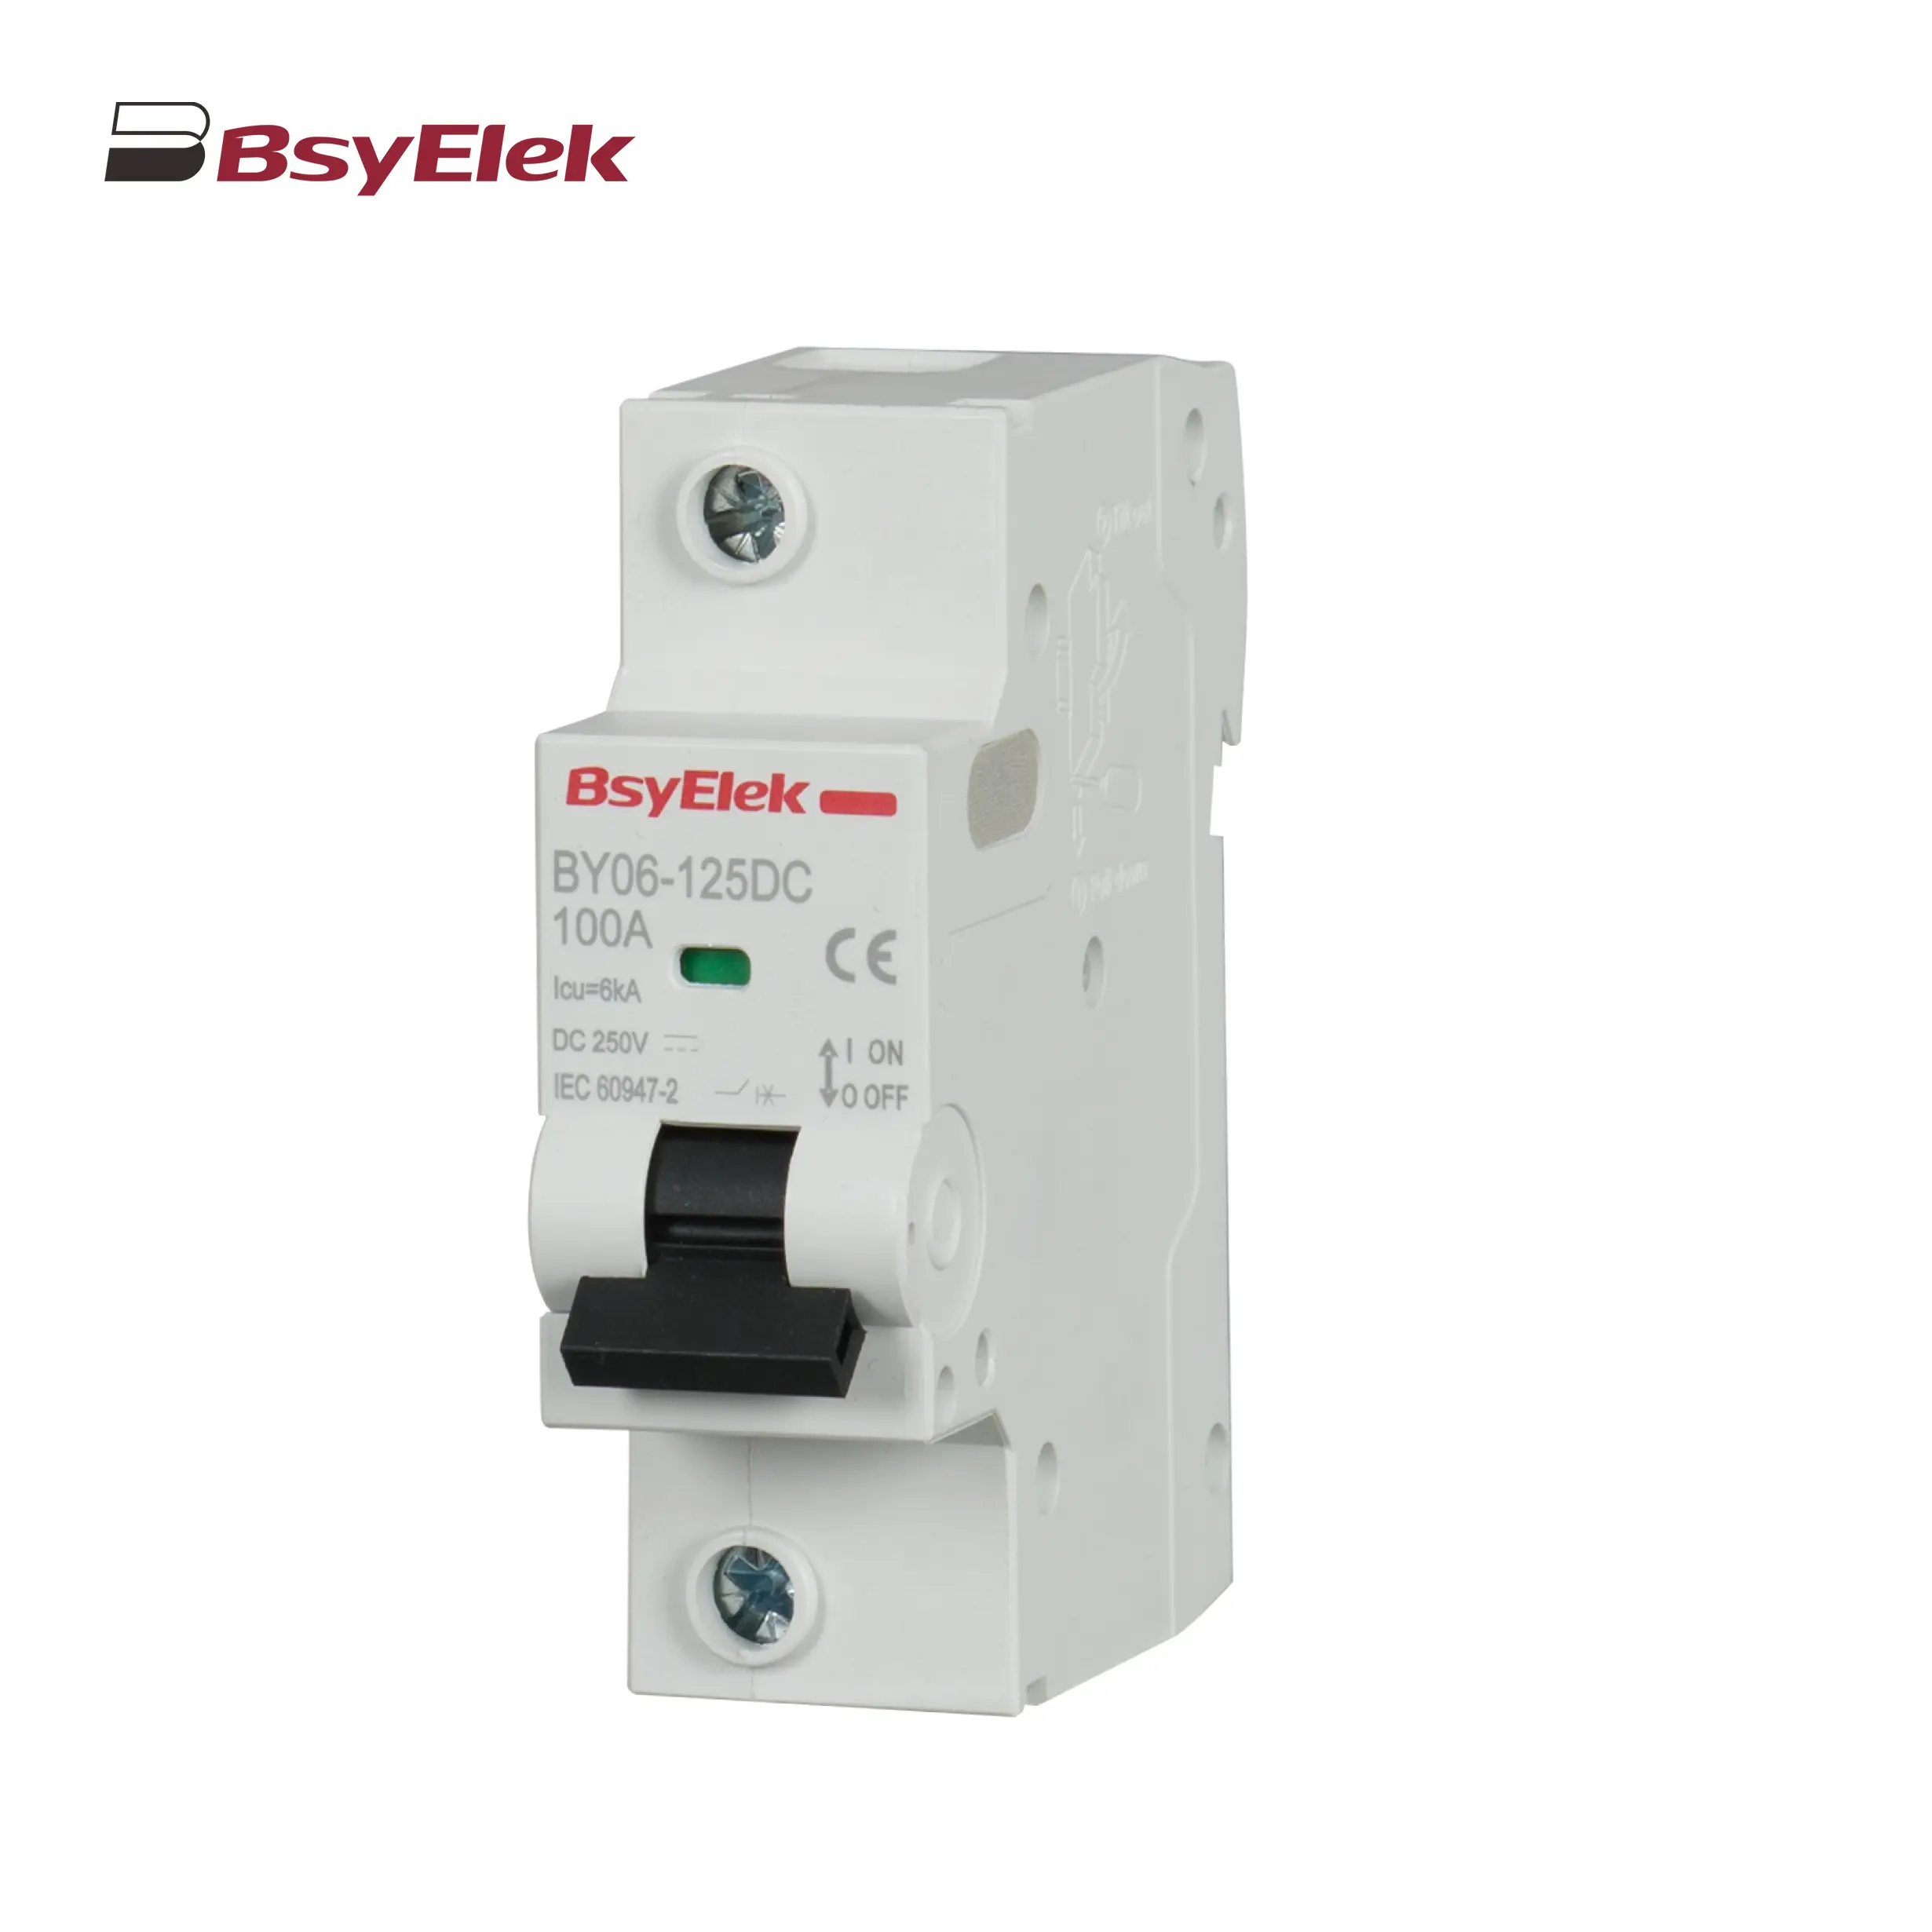 BY06-125DC MCB 6kA DC Miniature Circuit Breaker
-
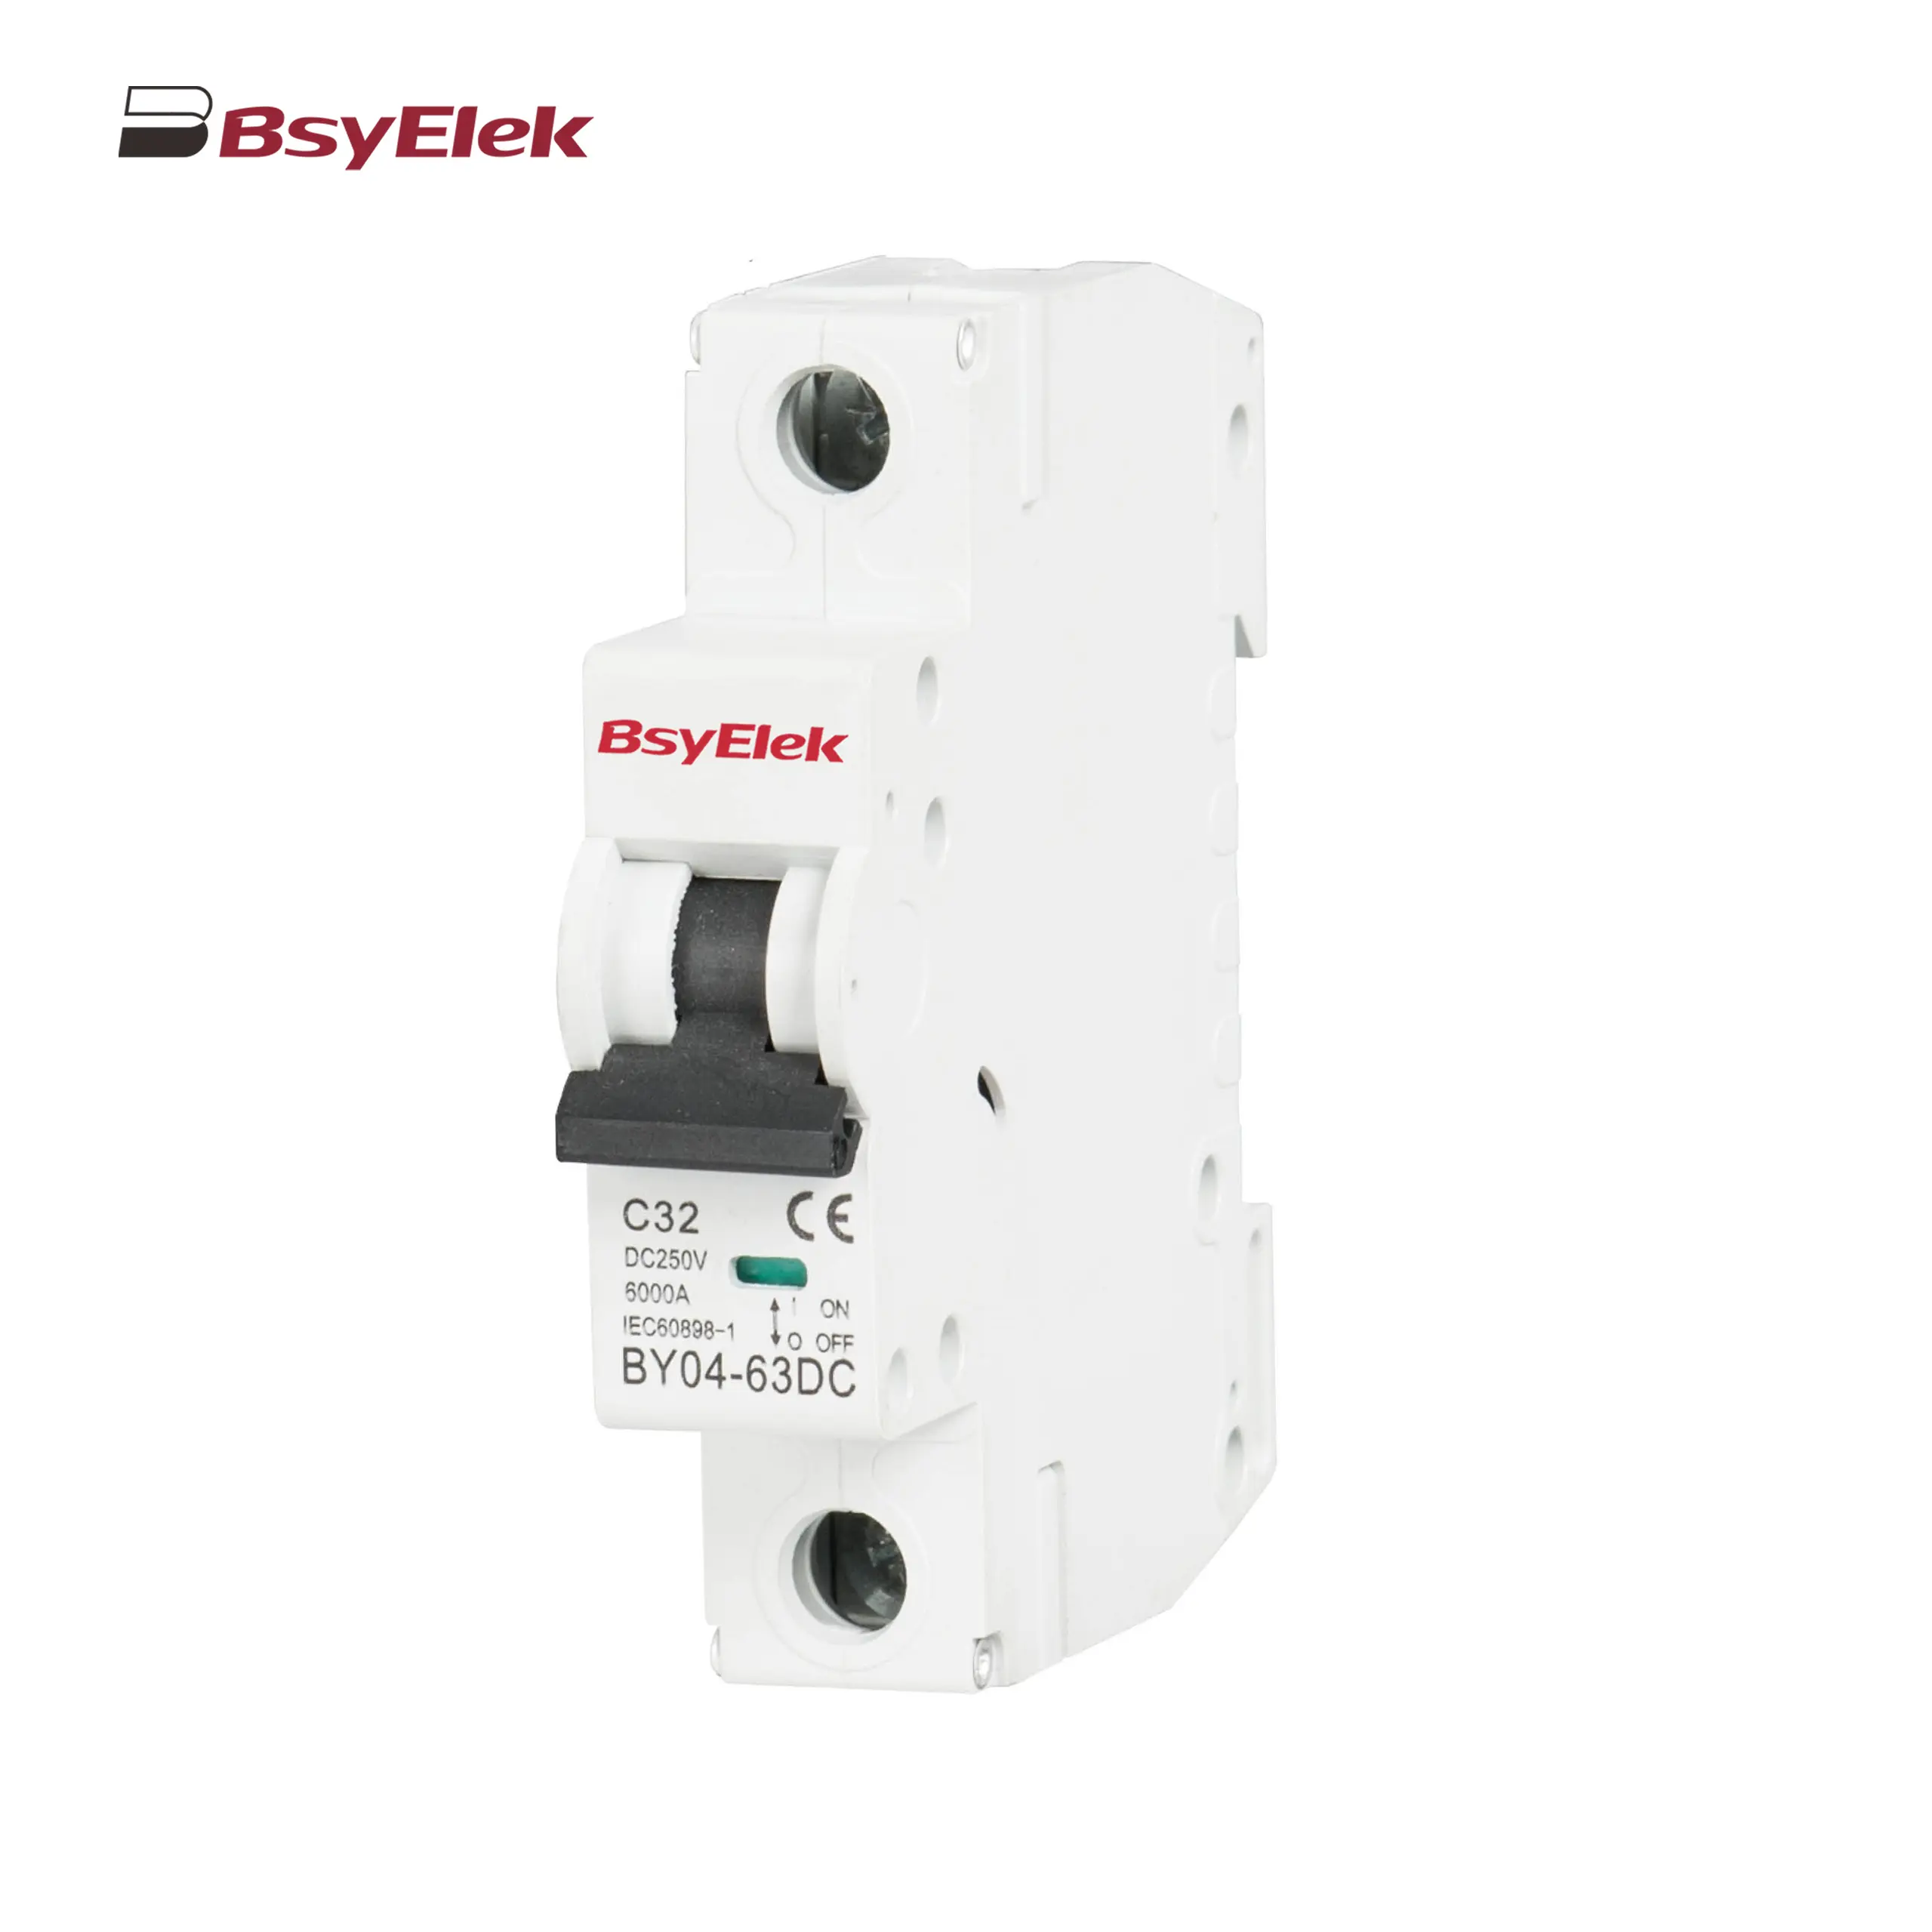 BY04-63DC MCB 6-10kA DC Miniature Circuit Breaker
-
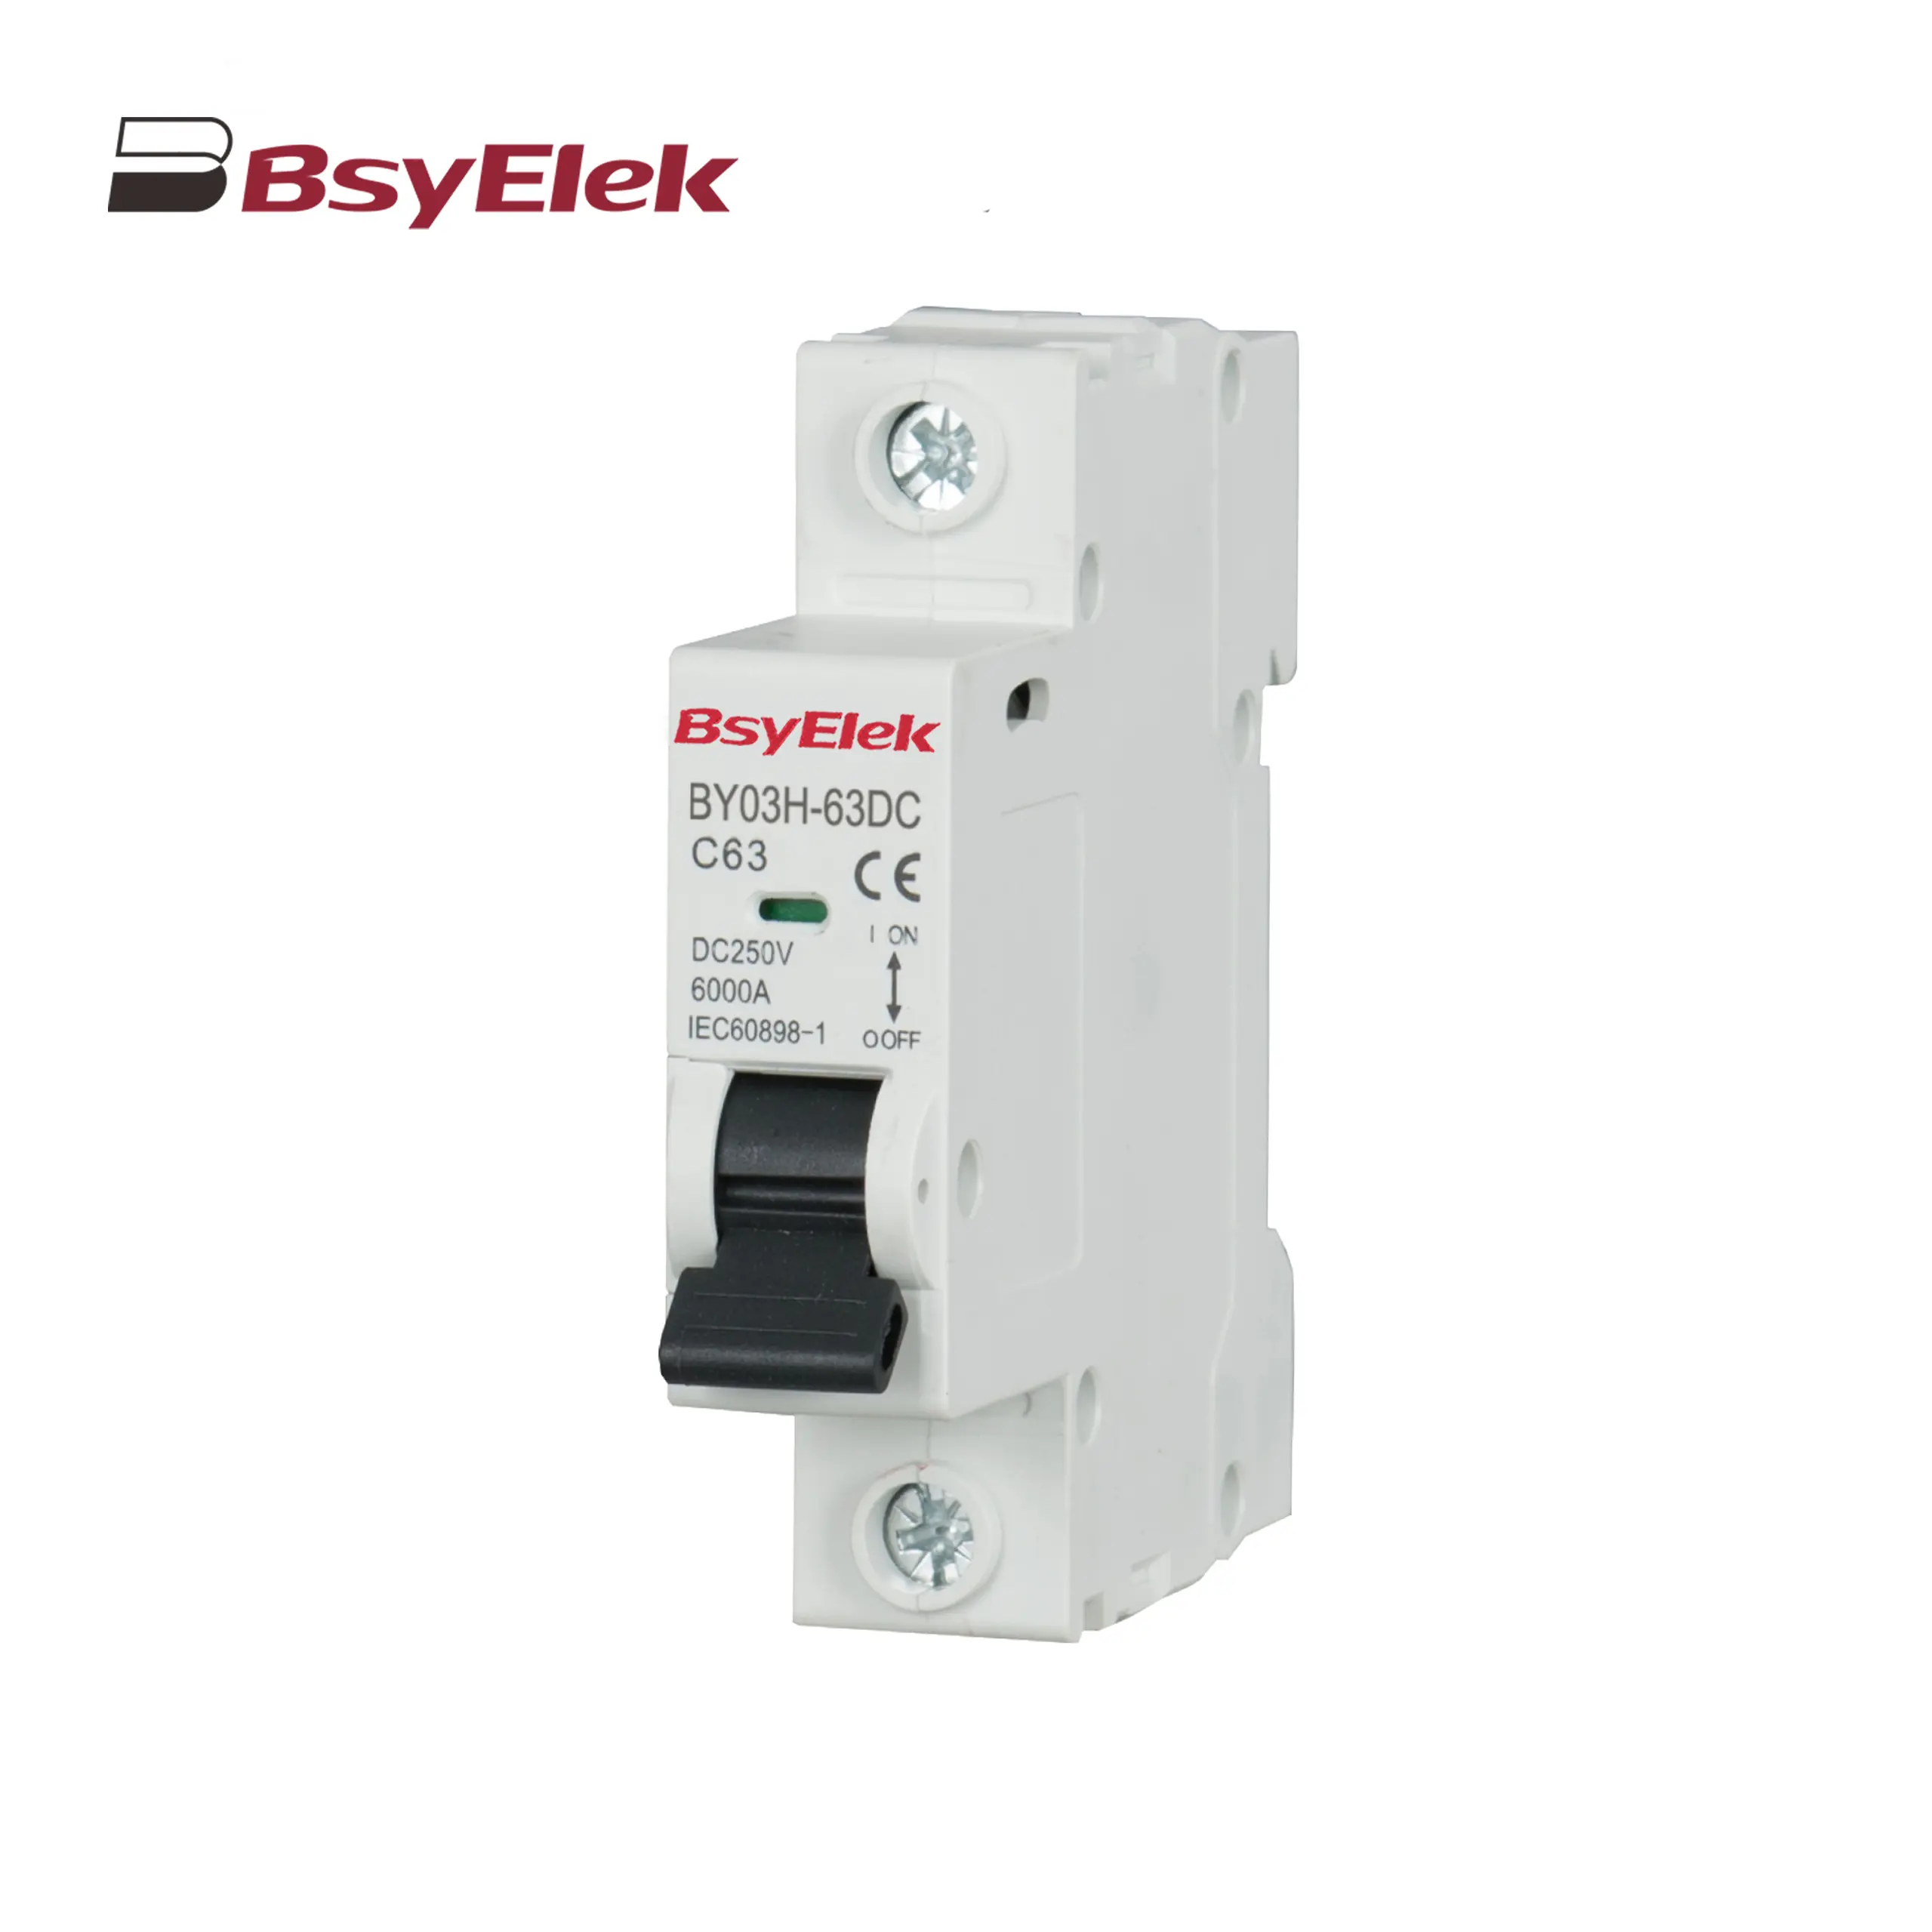 BY03H-63DC MCB 6kA DC Miniature Circuit Breaker
-
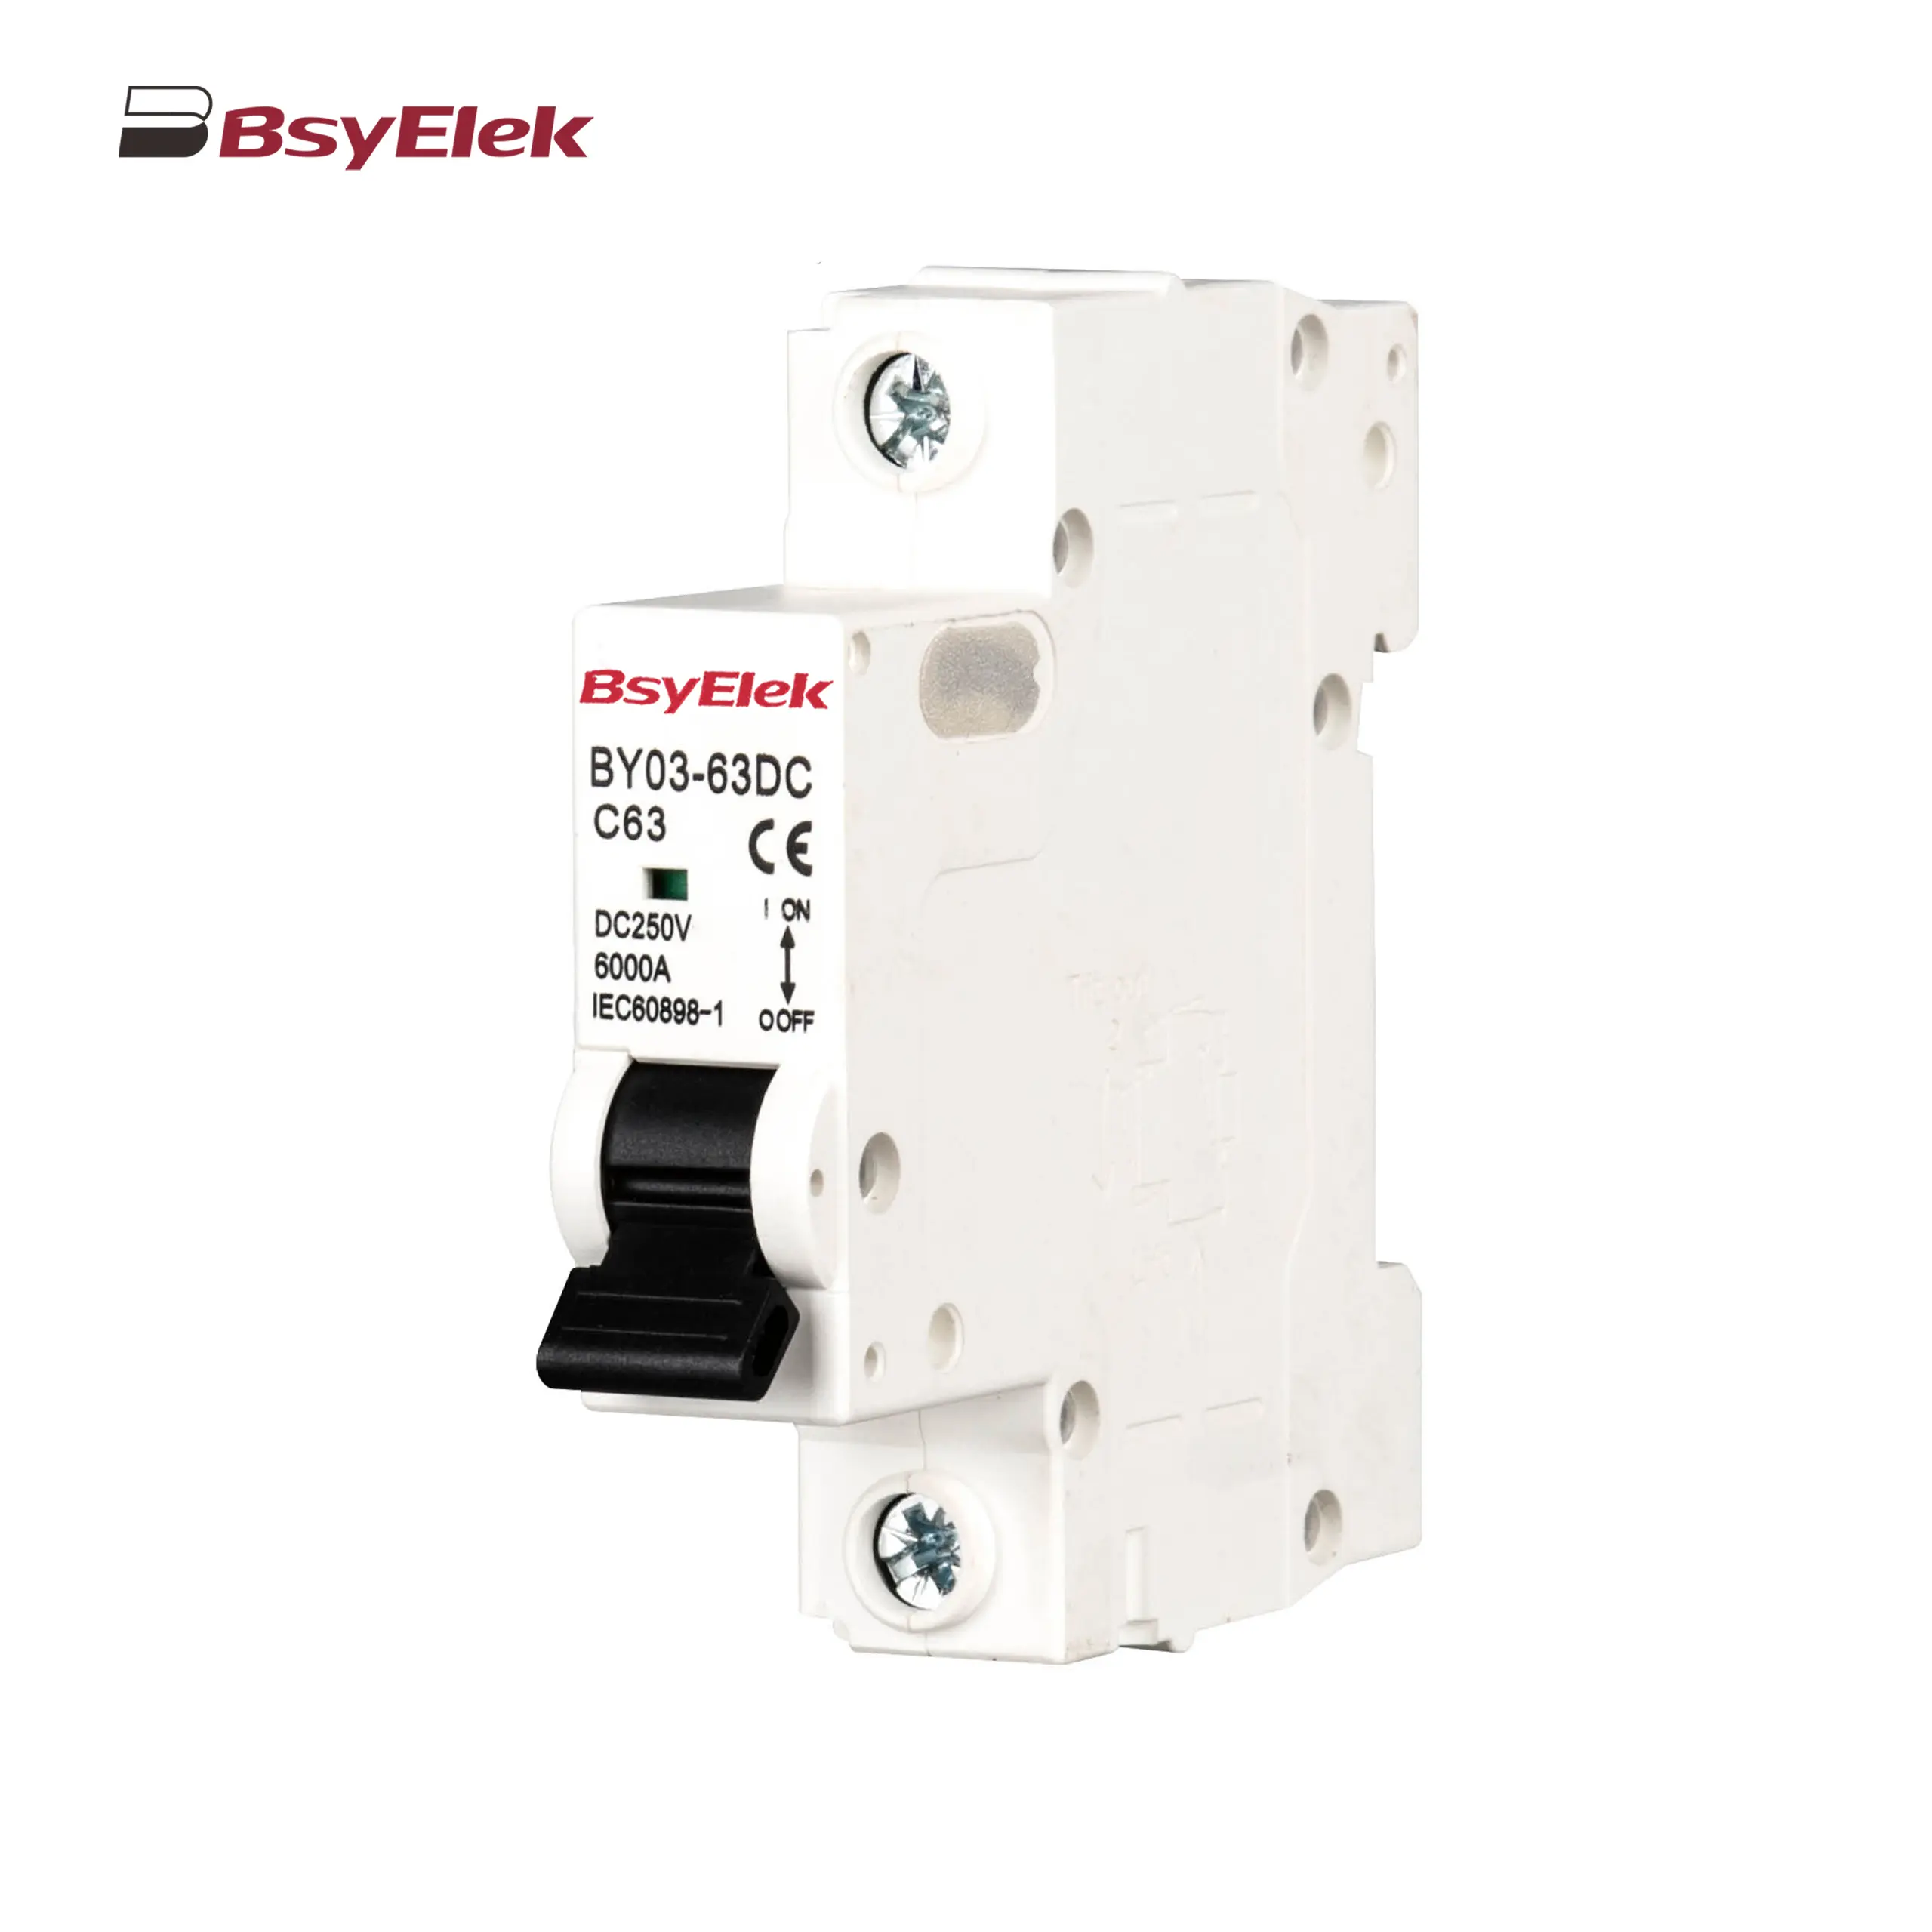 BY03-63DC MCB 4.5kA DC Miniature Circuit Breaker
-
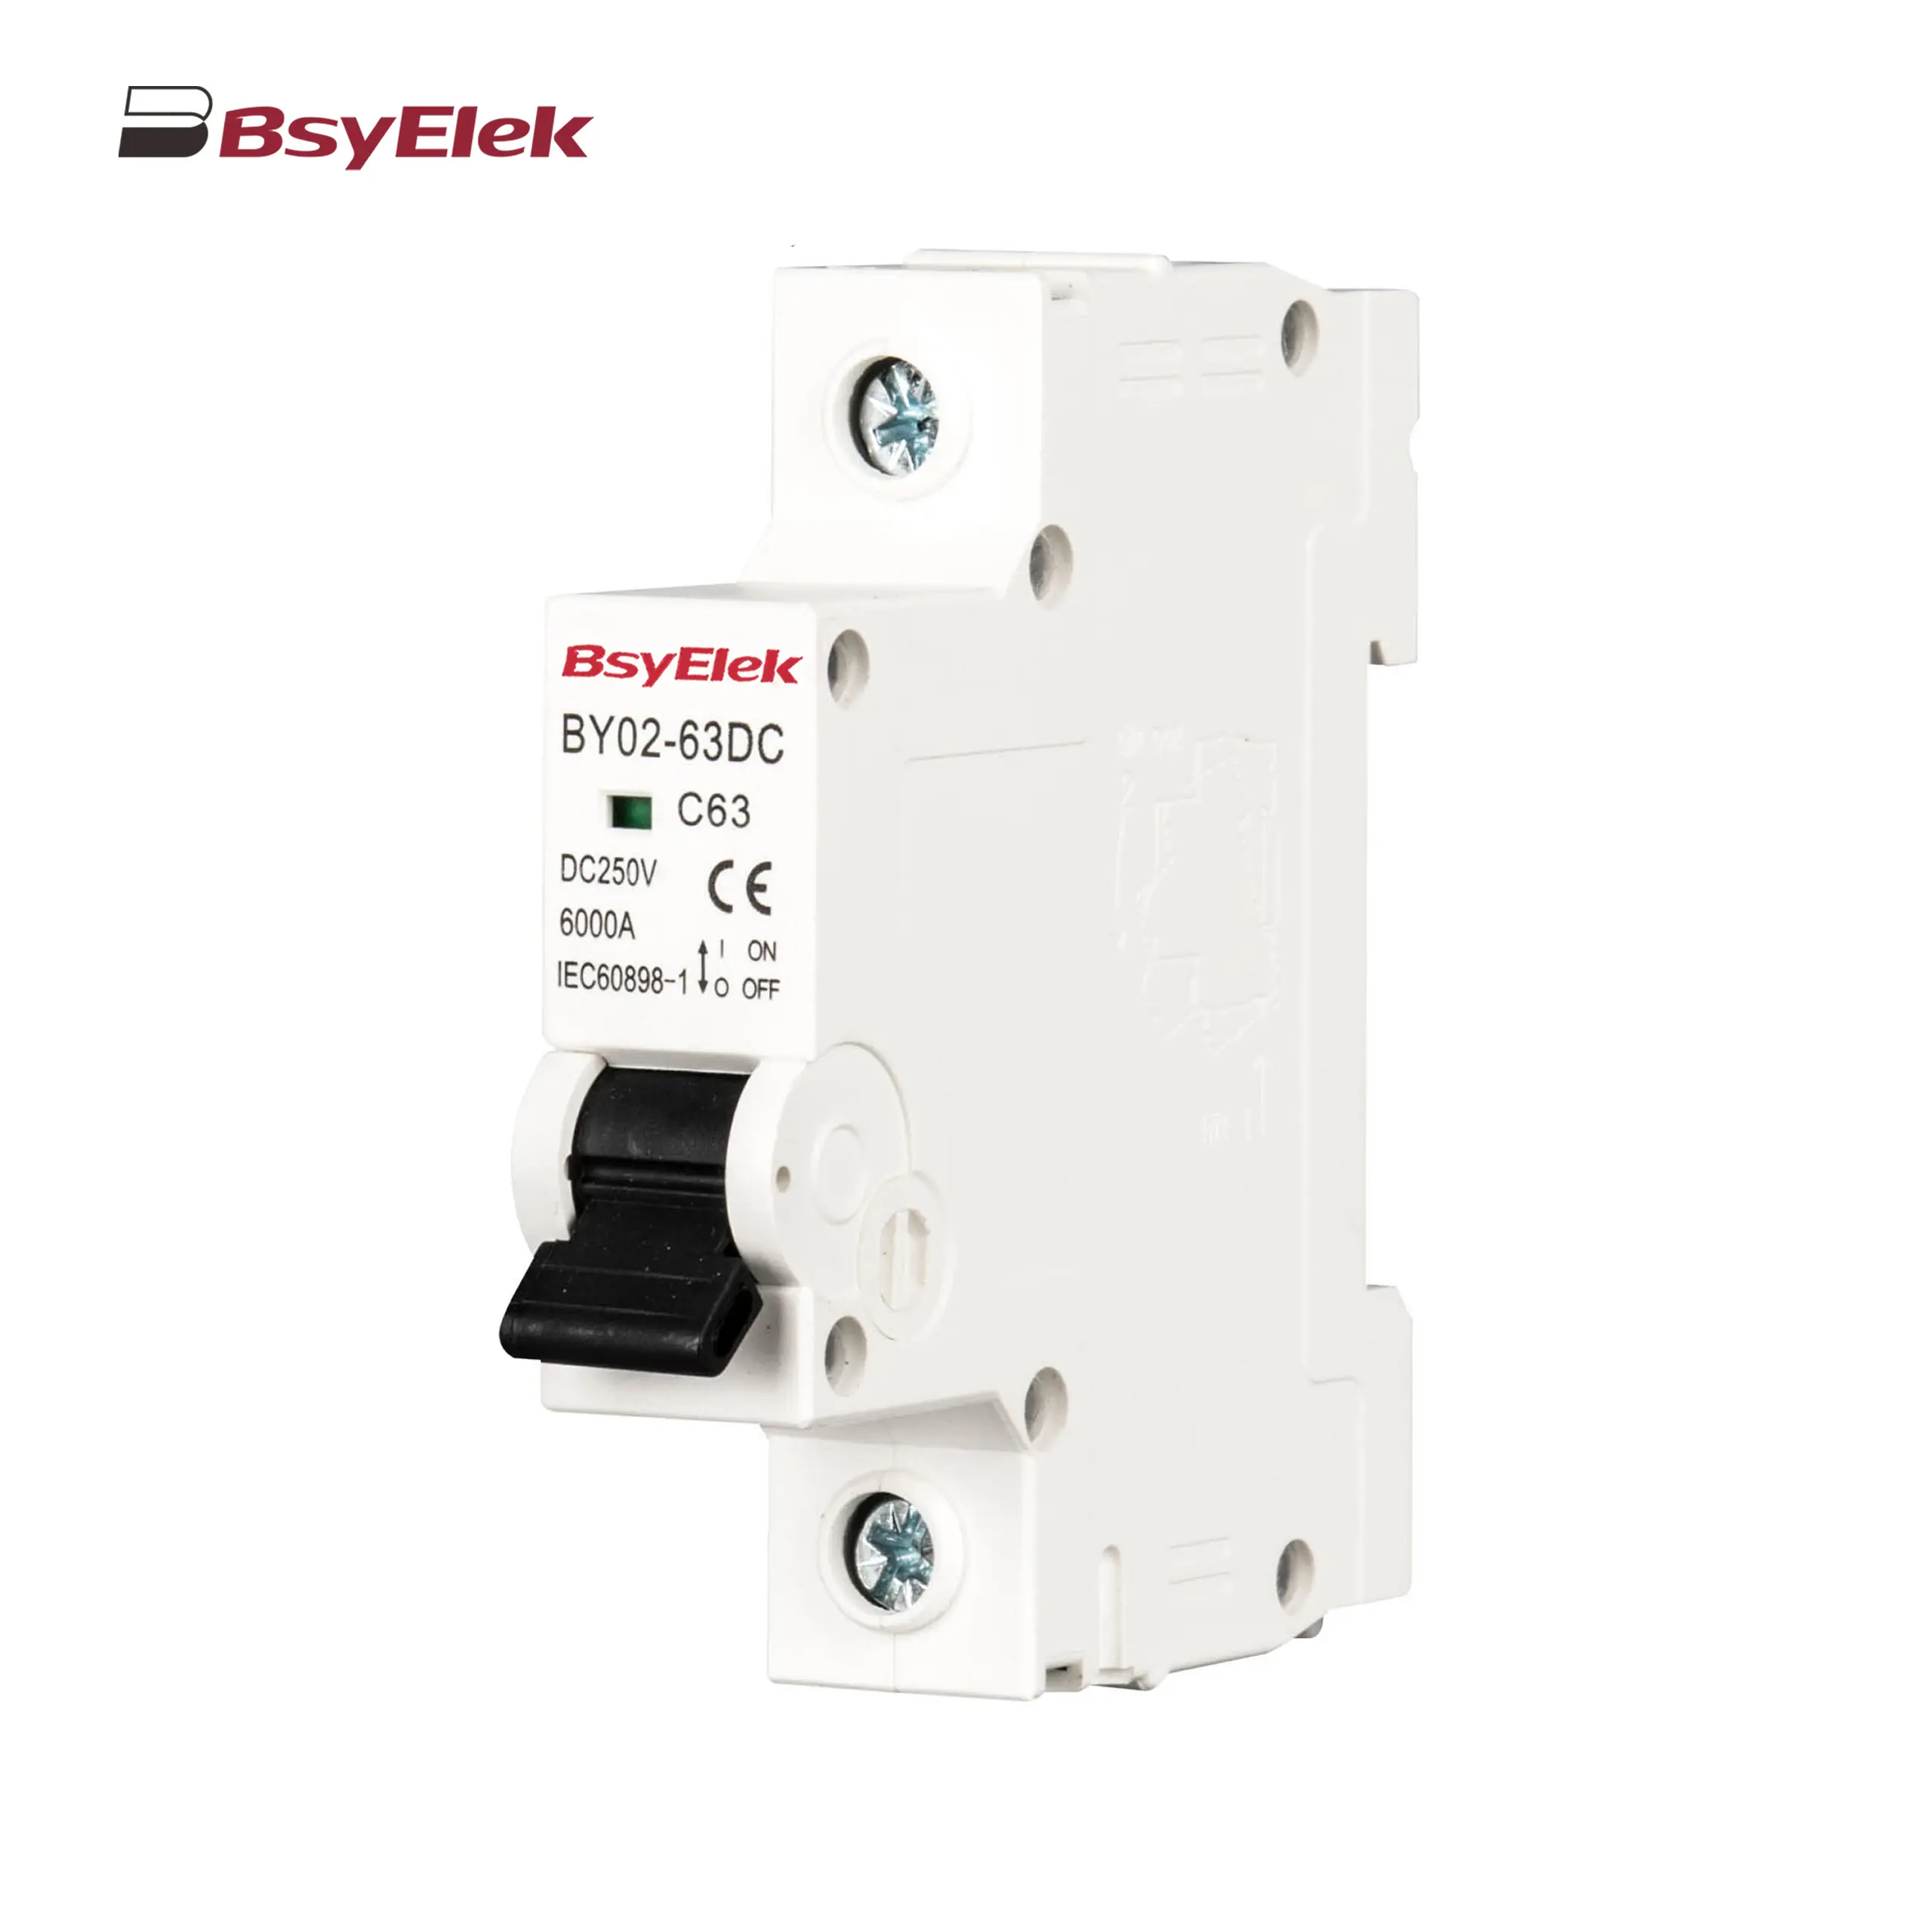 BY02-63DC MCB 3kA DC Miniature Circuit Breaker
-
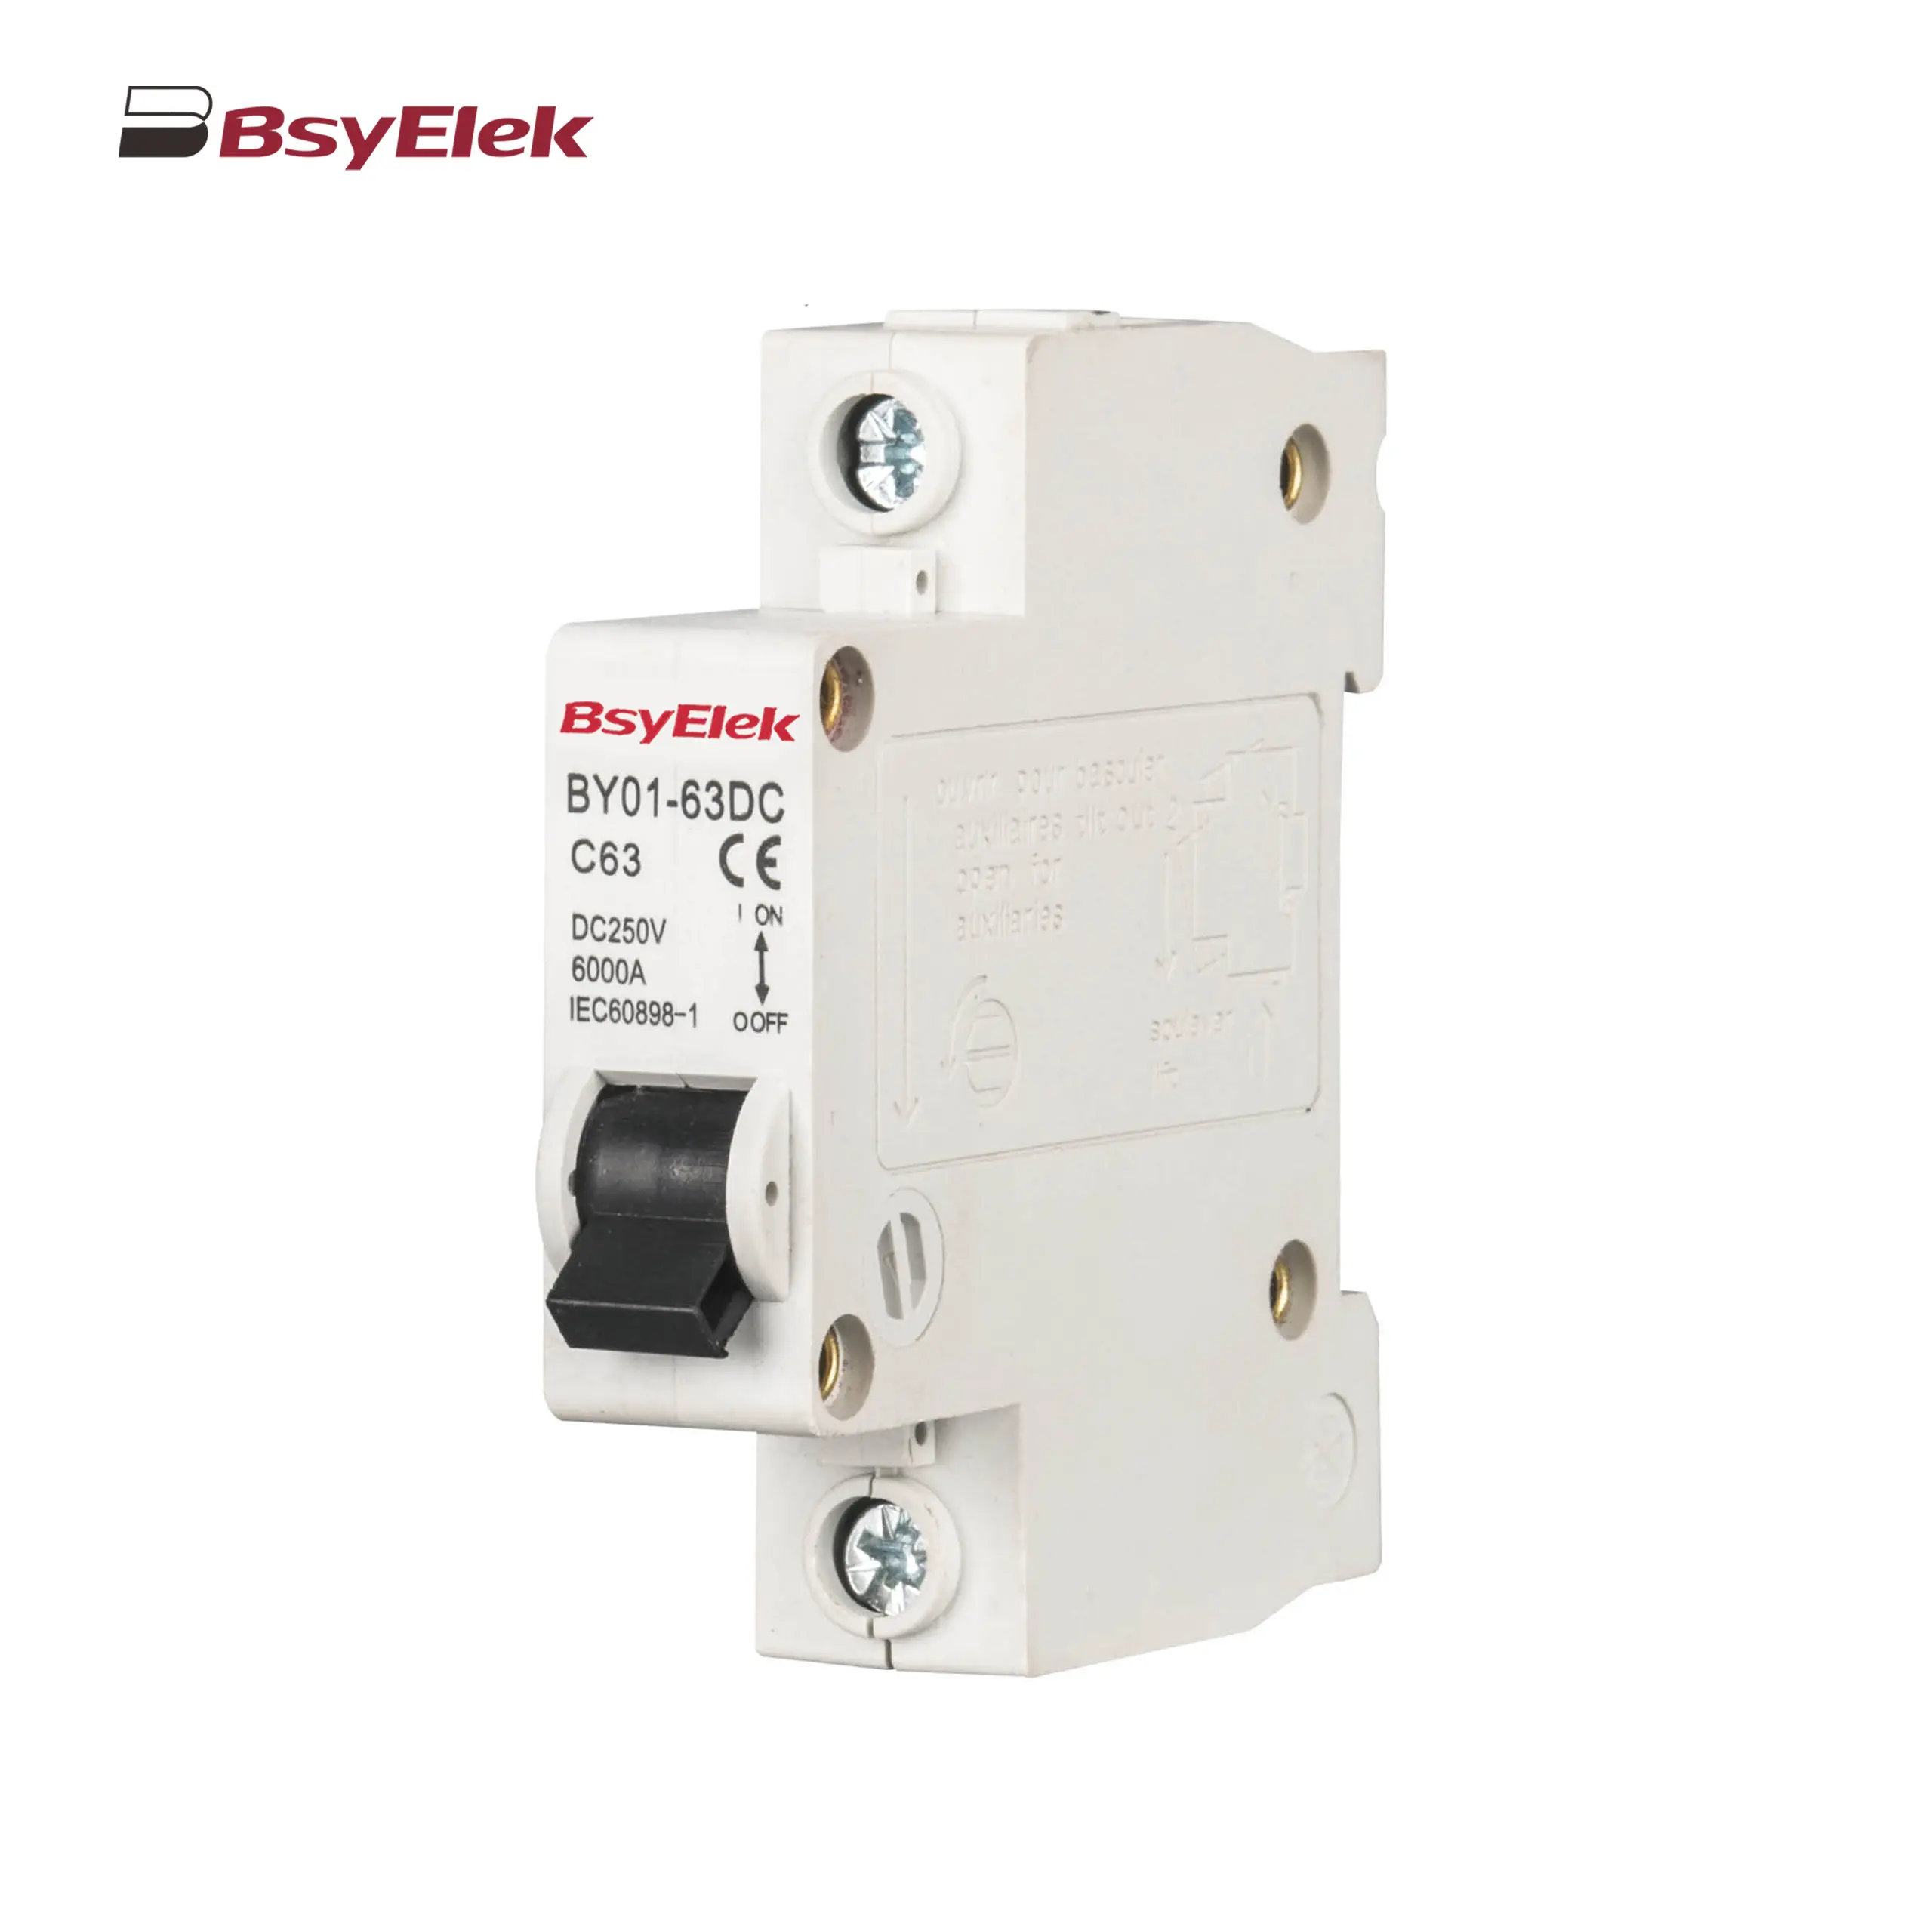 BY01-63DC MCB 3kA DC Miniature Circuit Breaker
-
- RCD
- DC Surge Protective Device
- DC Fuse
- PV Isolator Switch
- PV Connector
- Cable Gland
- PV Cable
- PV Knife Switch
- DC Molded Case Circuit Breaker
-
DC Miniature Circuit Breaker
- Industrial Power Distribution Electric
- Distribution Box
-
Air Conditioning System
- Definite Purpose Magnetic Contactor
-
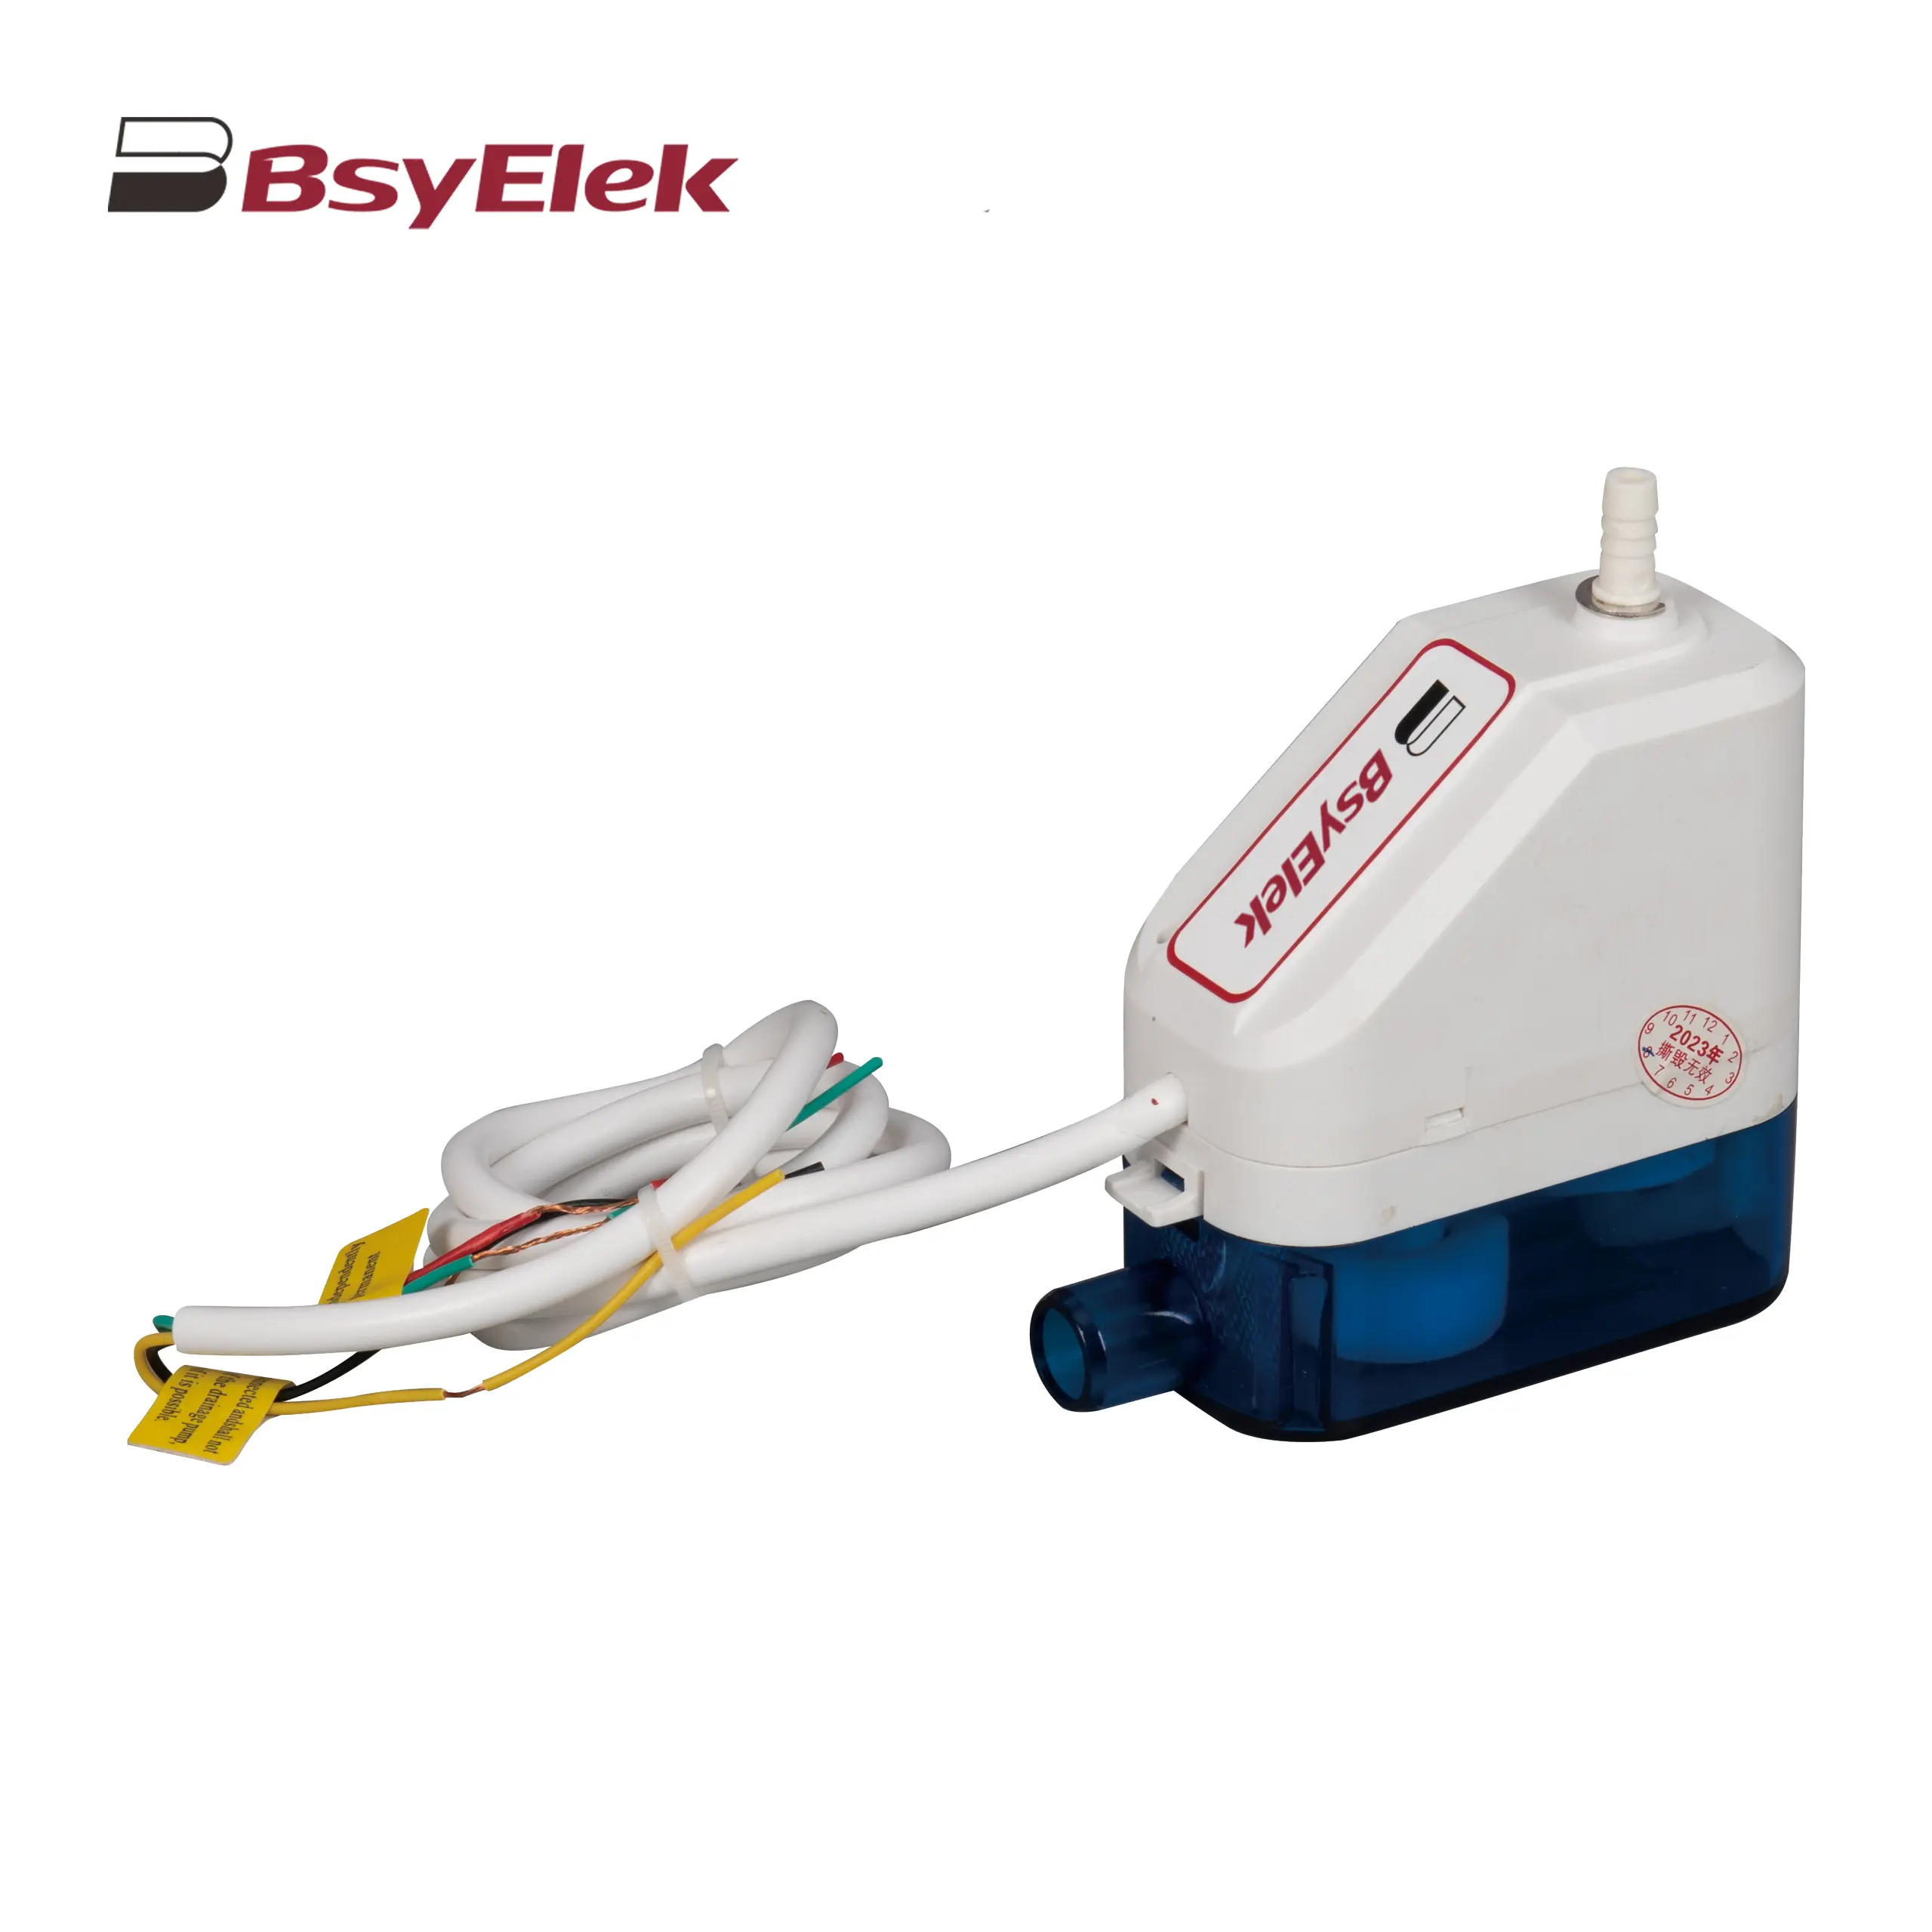
Condensate Pump
-
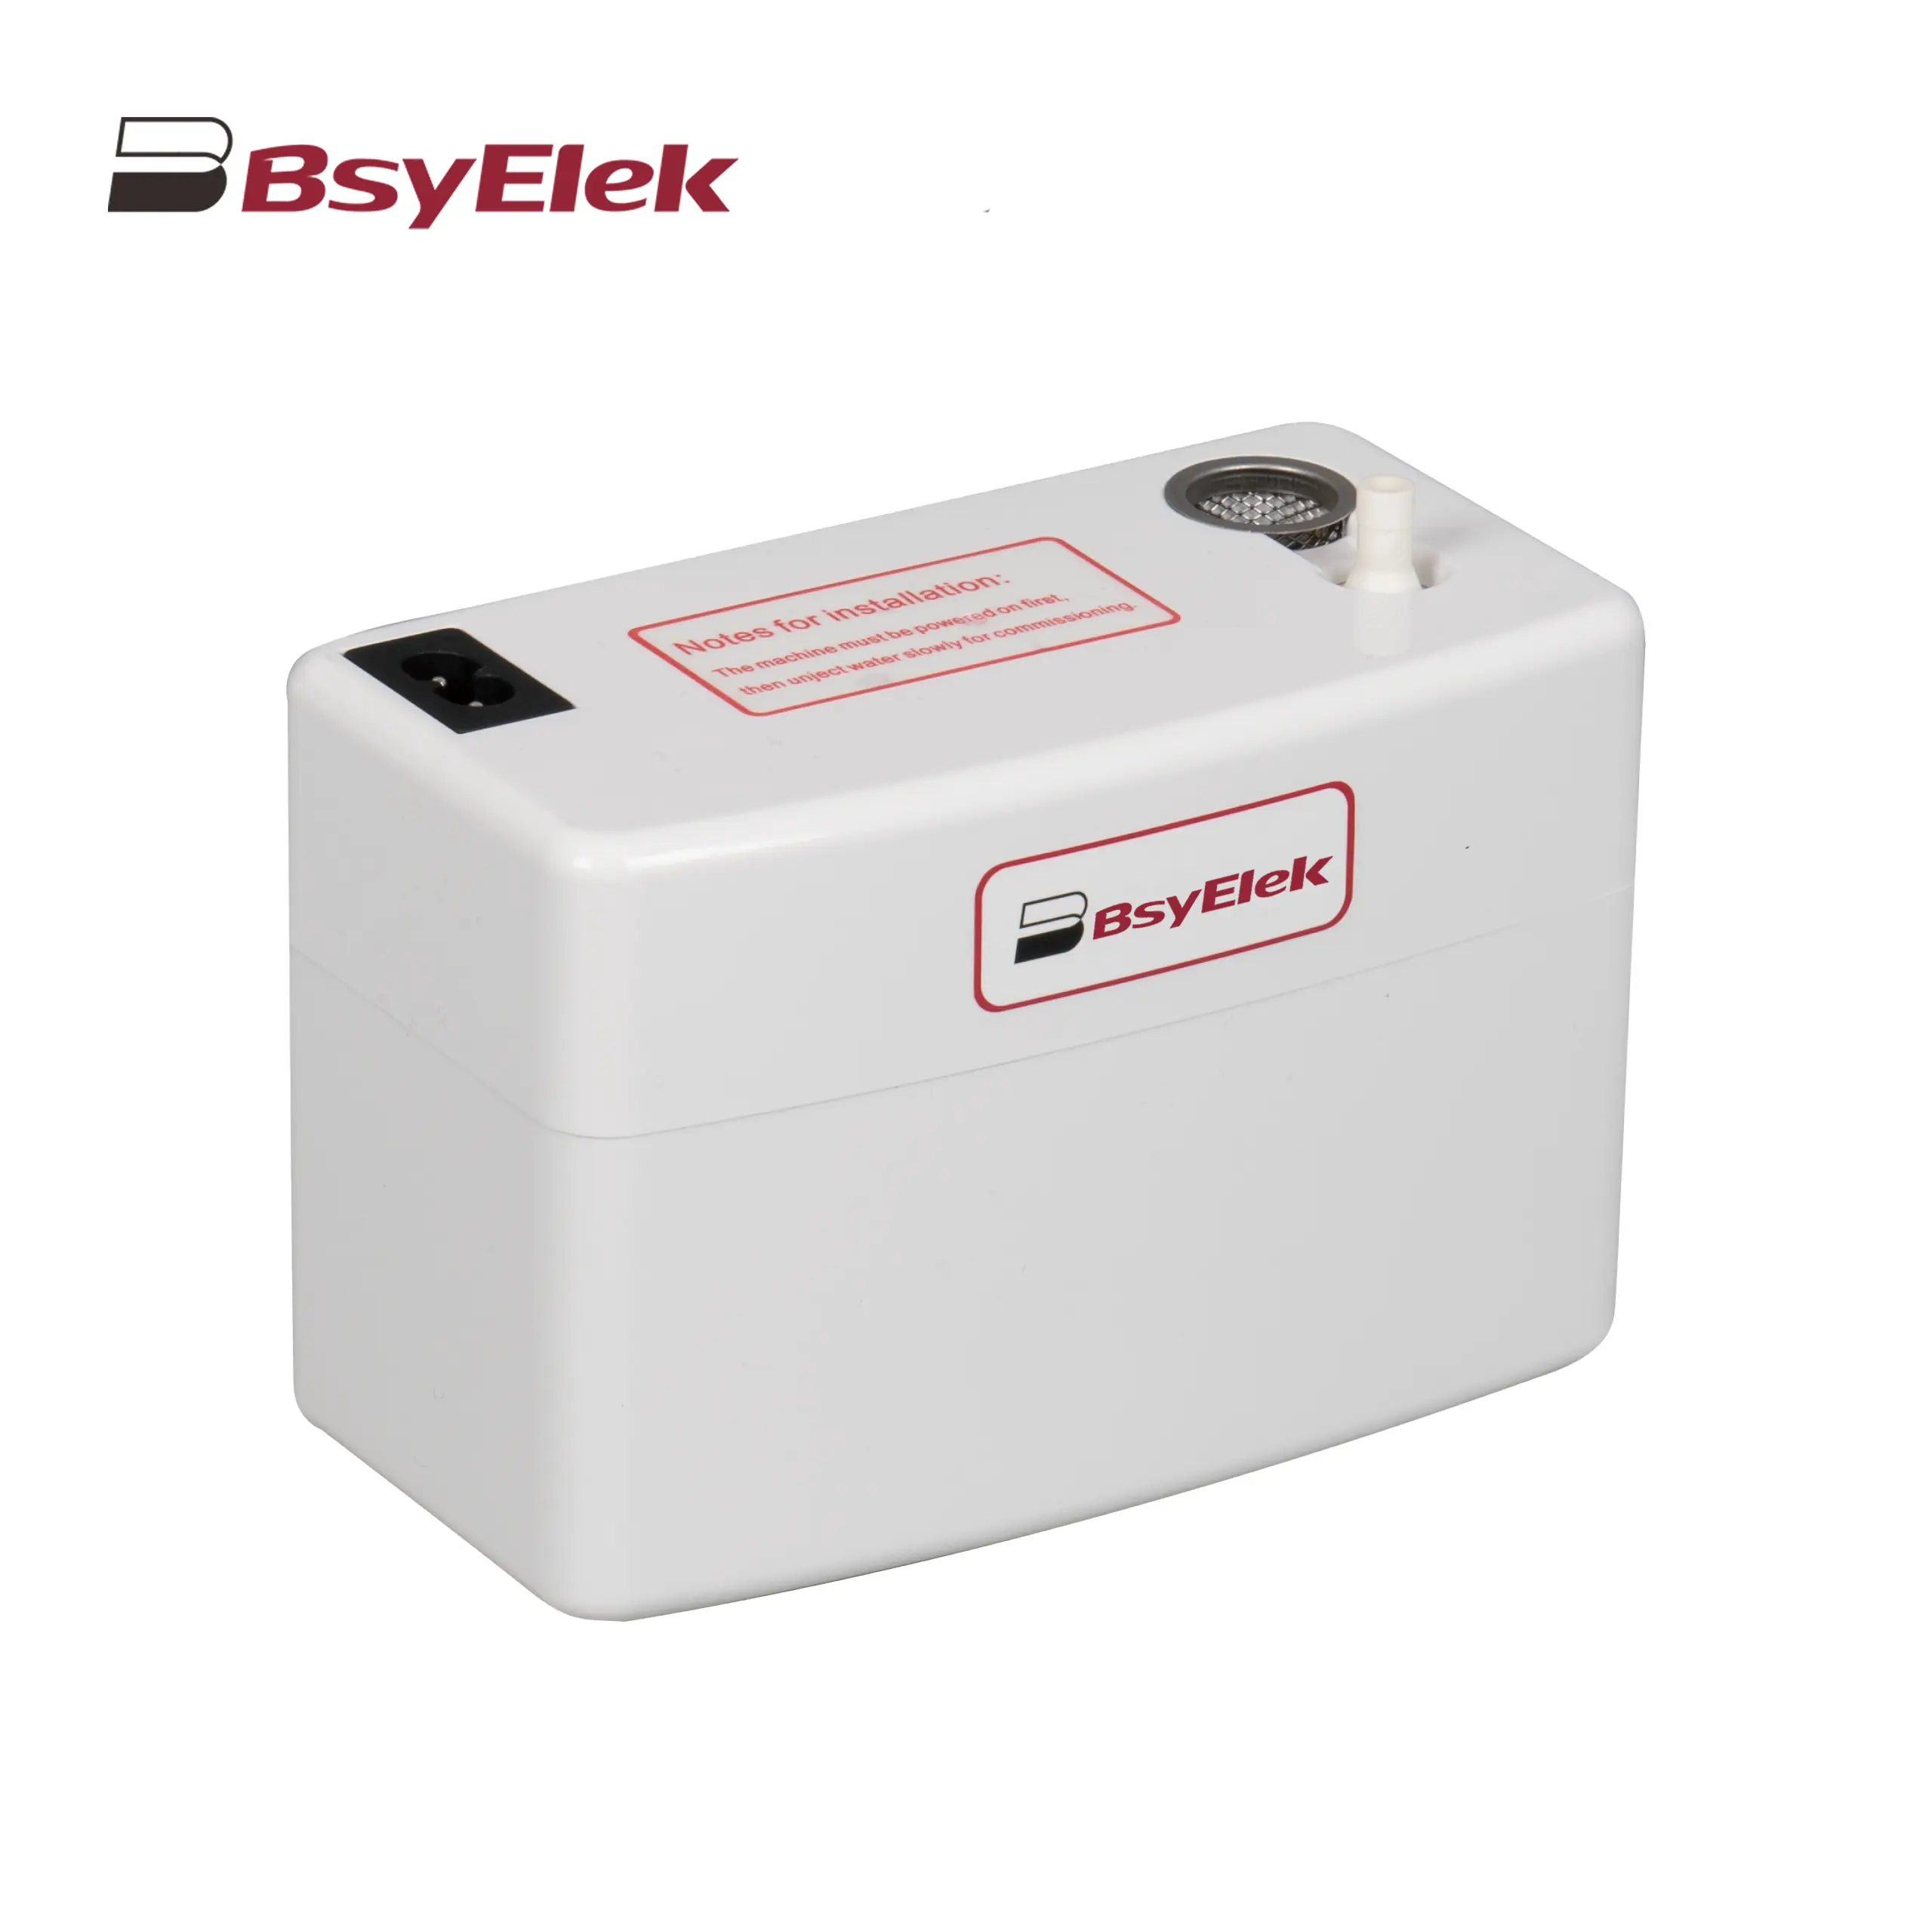
 BY-5018 1.8M Engineering Drainage Pump
-
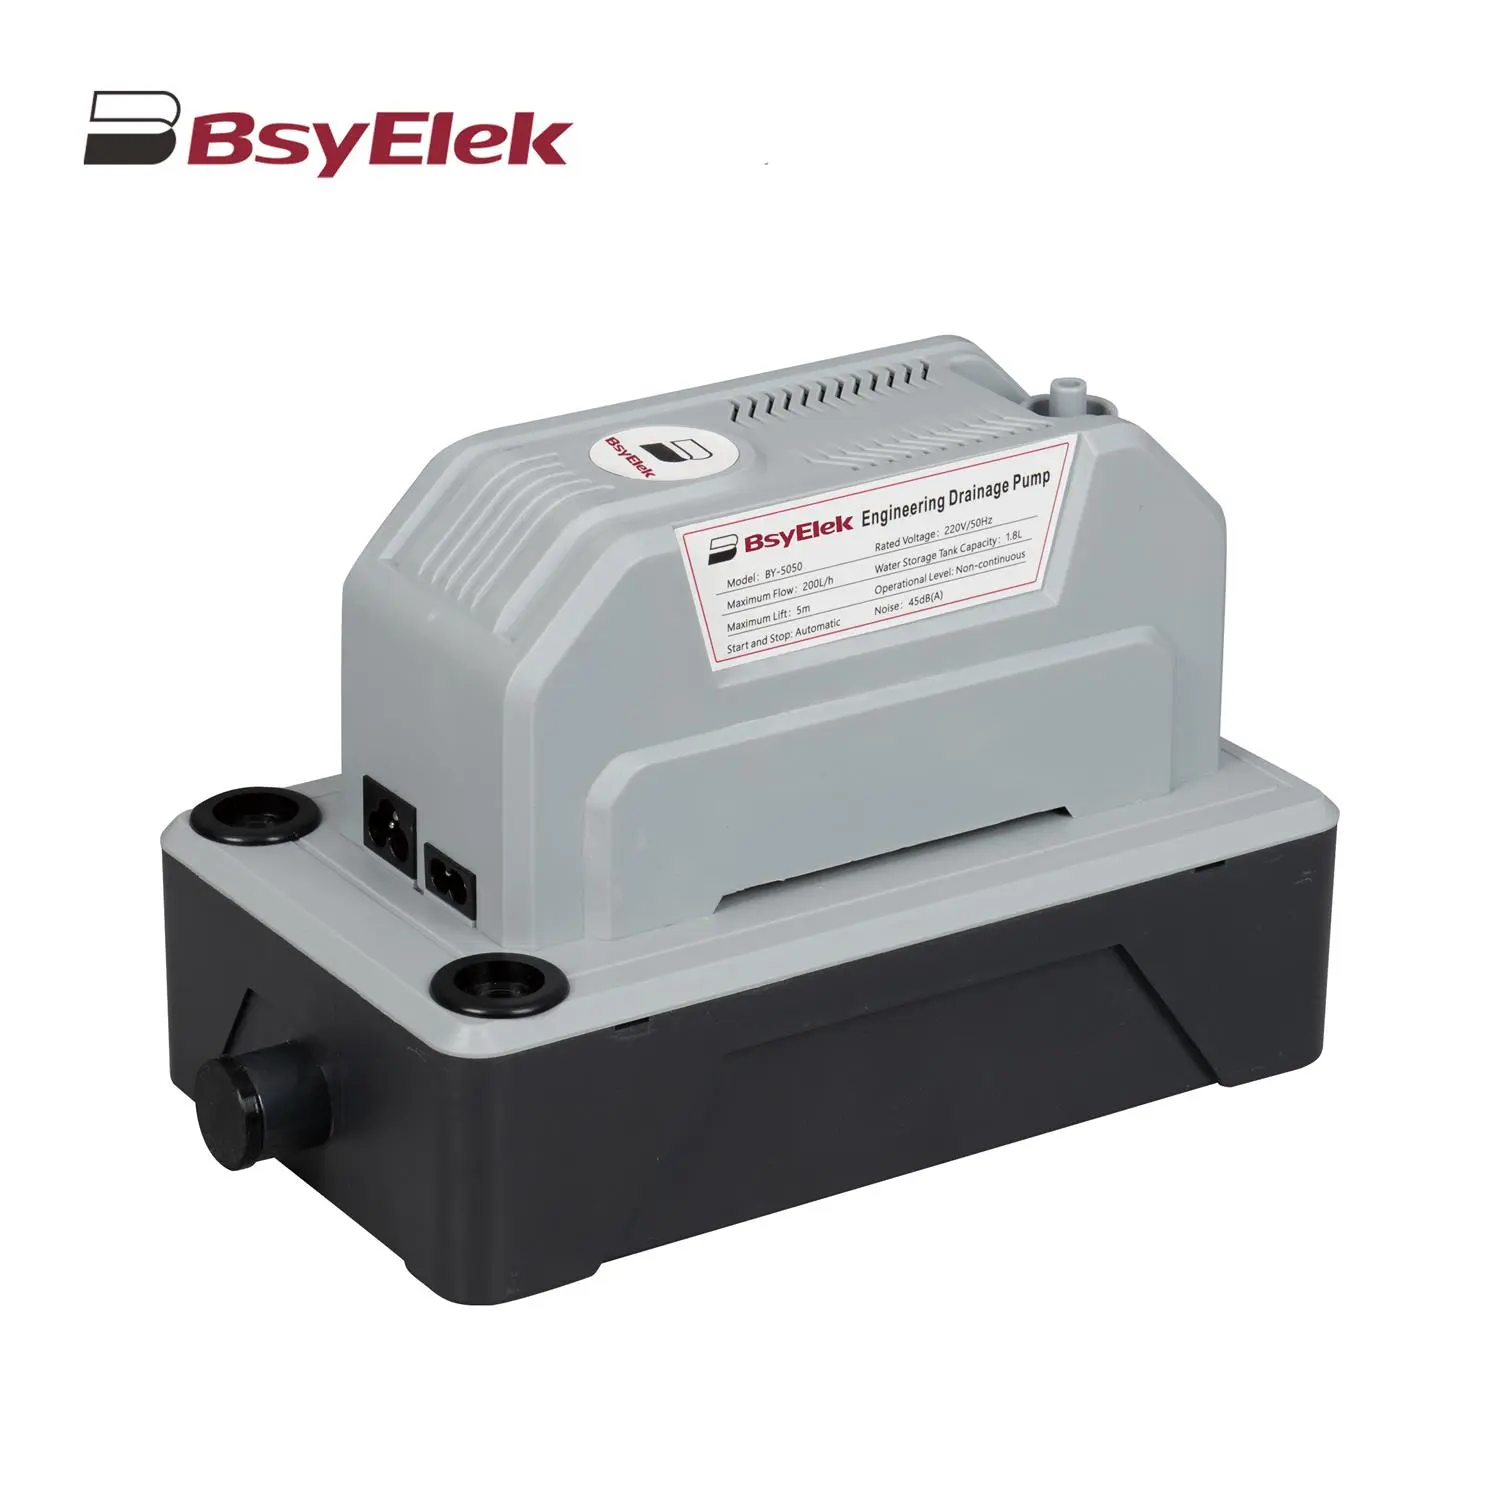 BY-5050 5M Engineering Drainage Pump
-
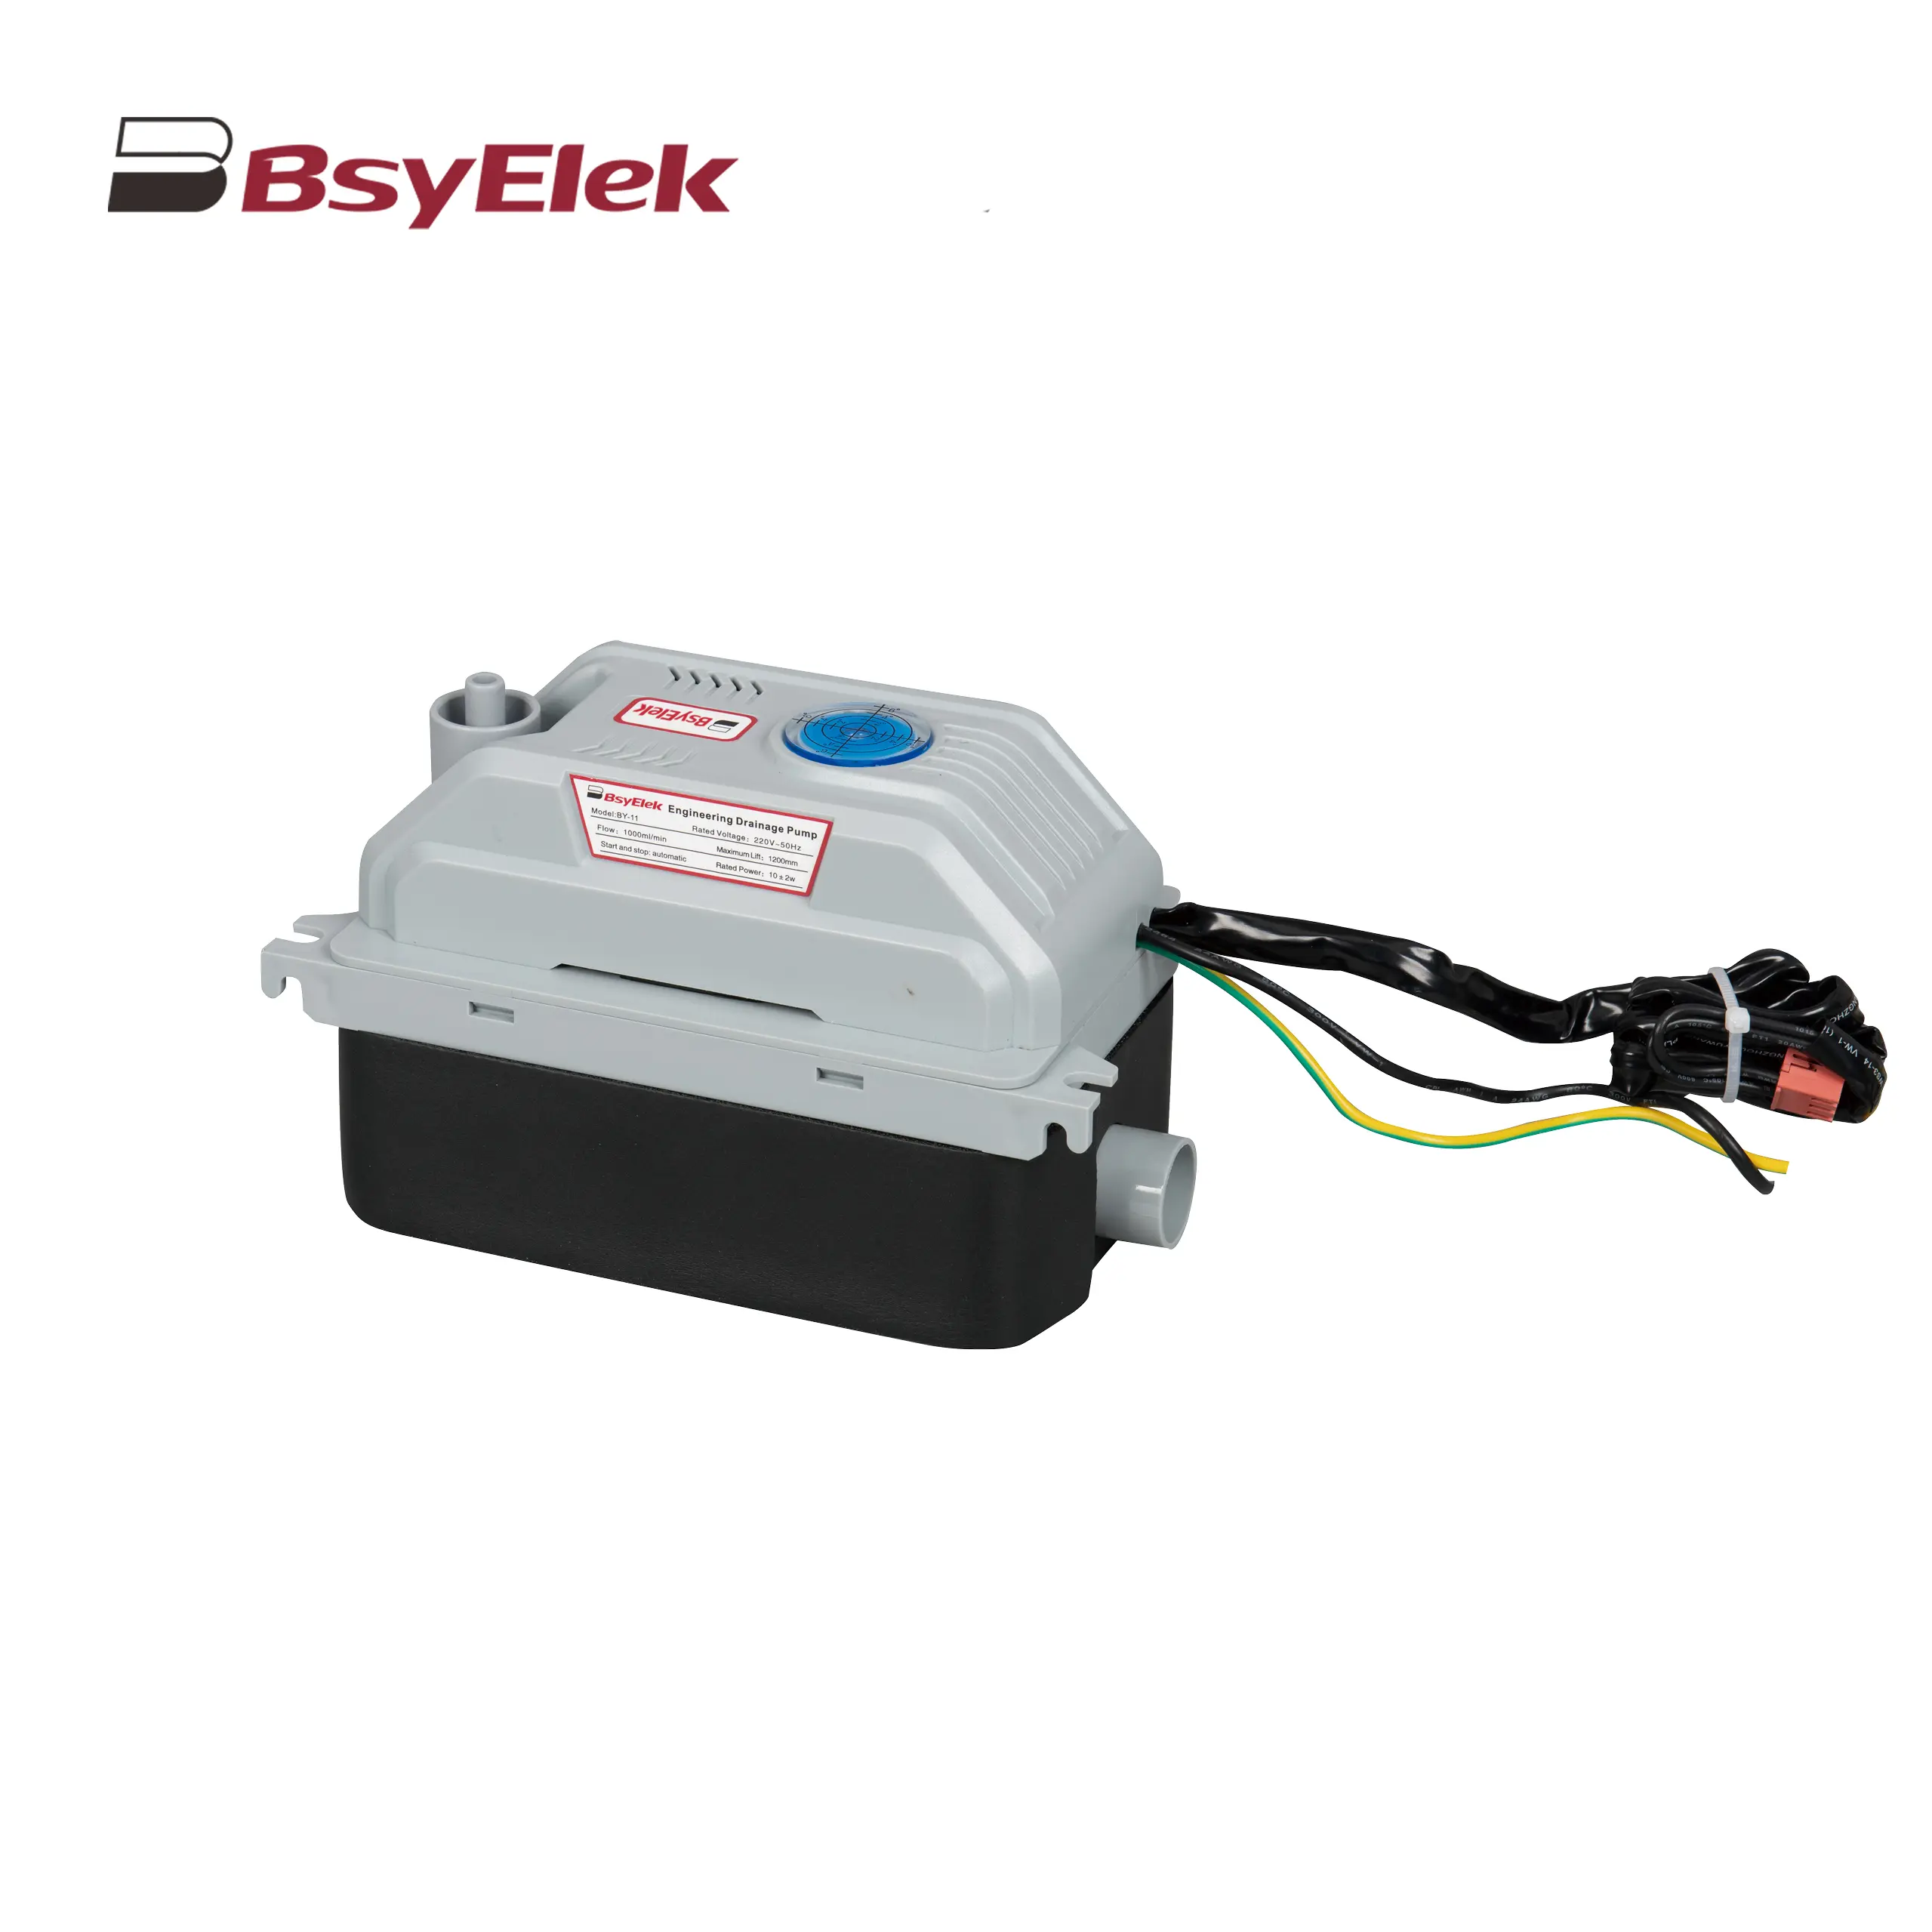 BY-11 1.2M Engineering Drainage Pump
-
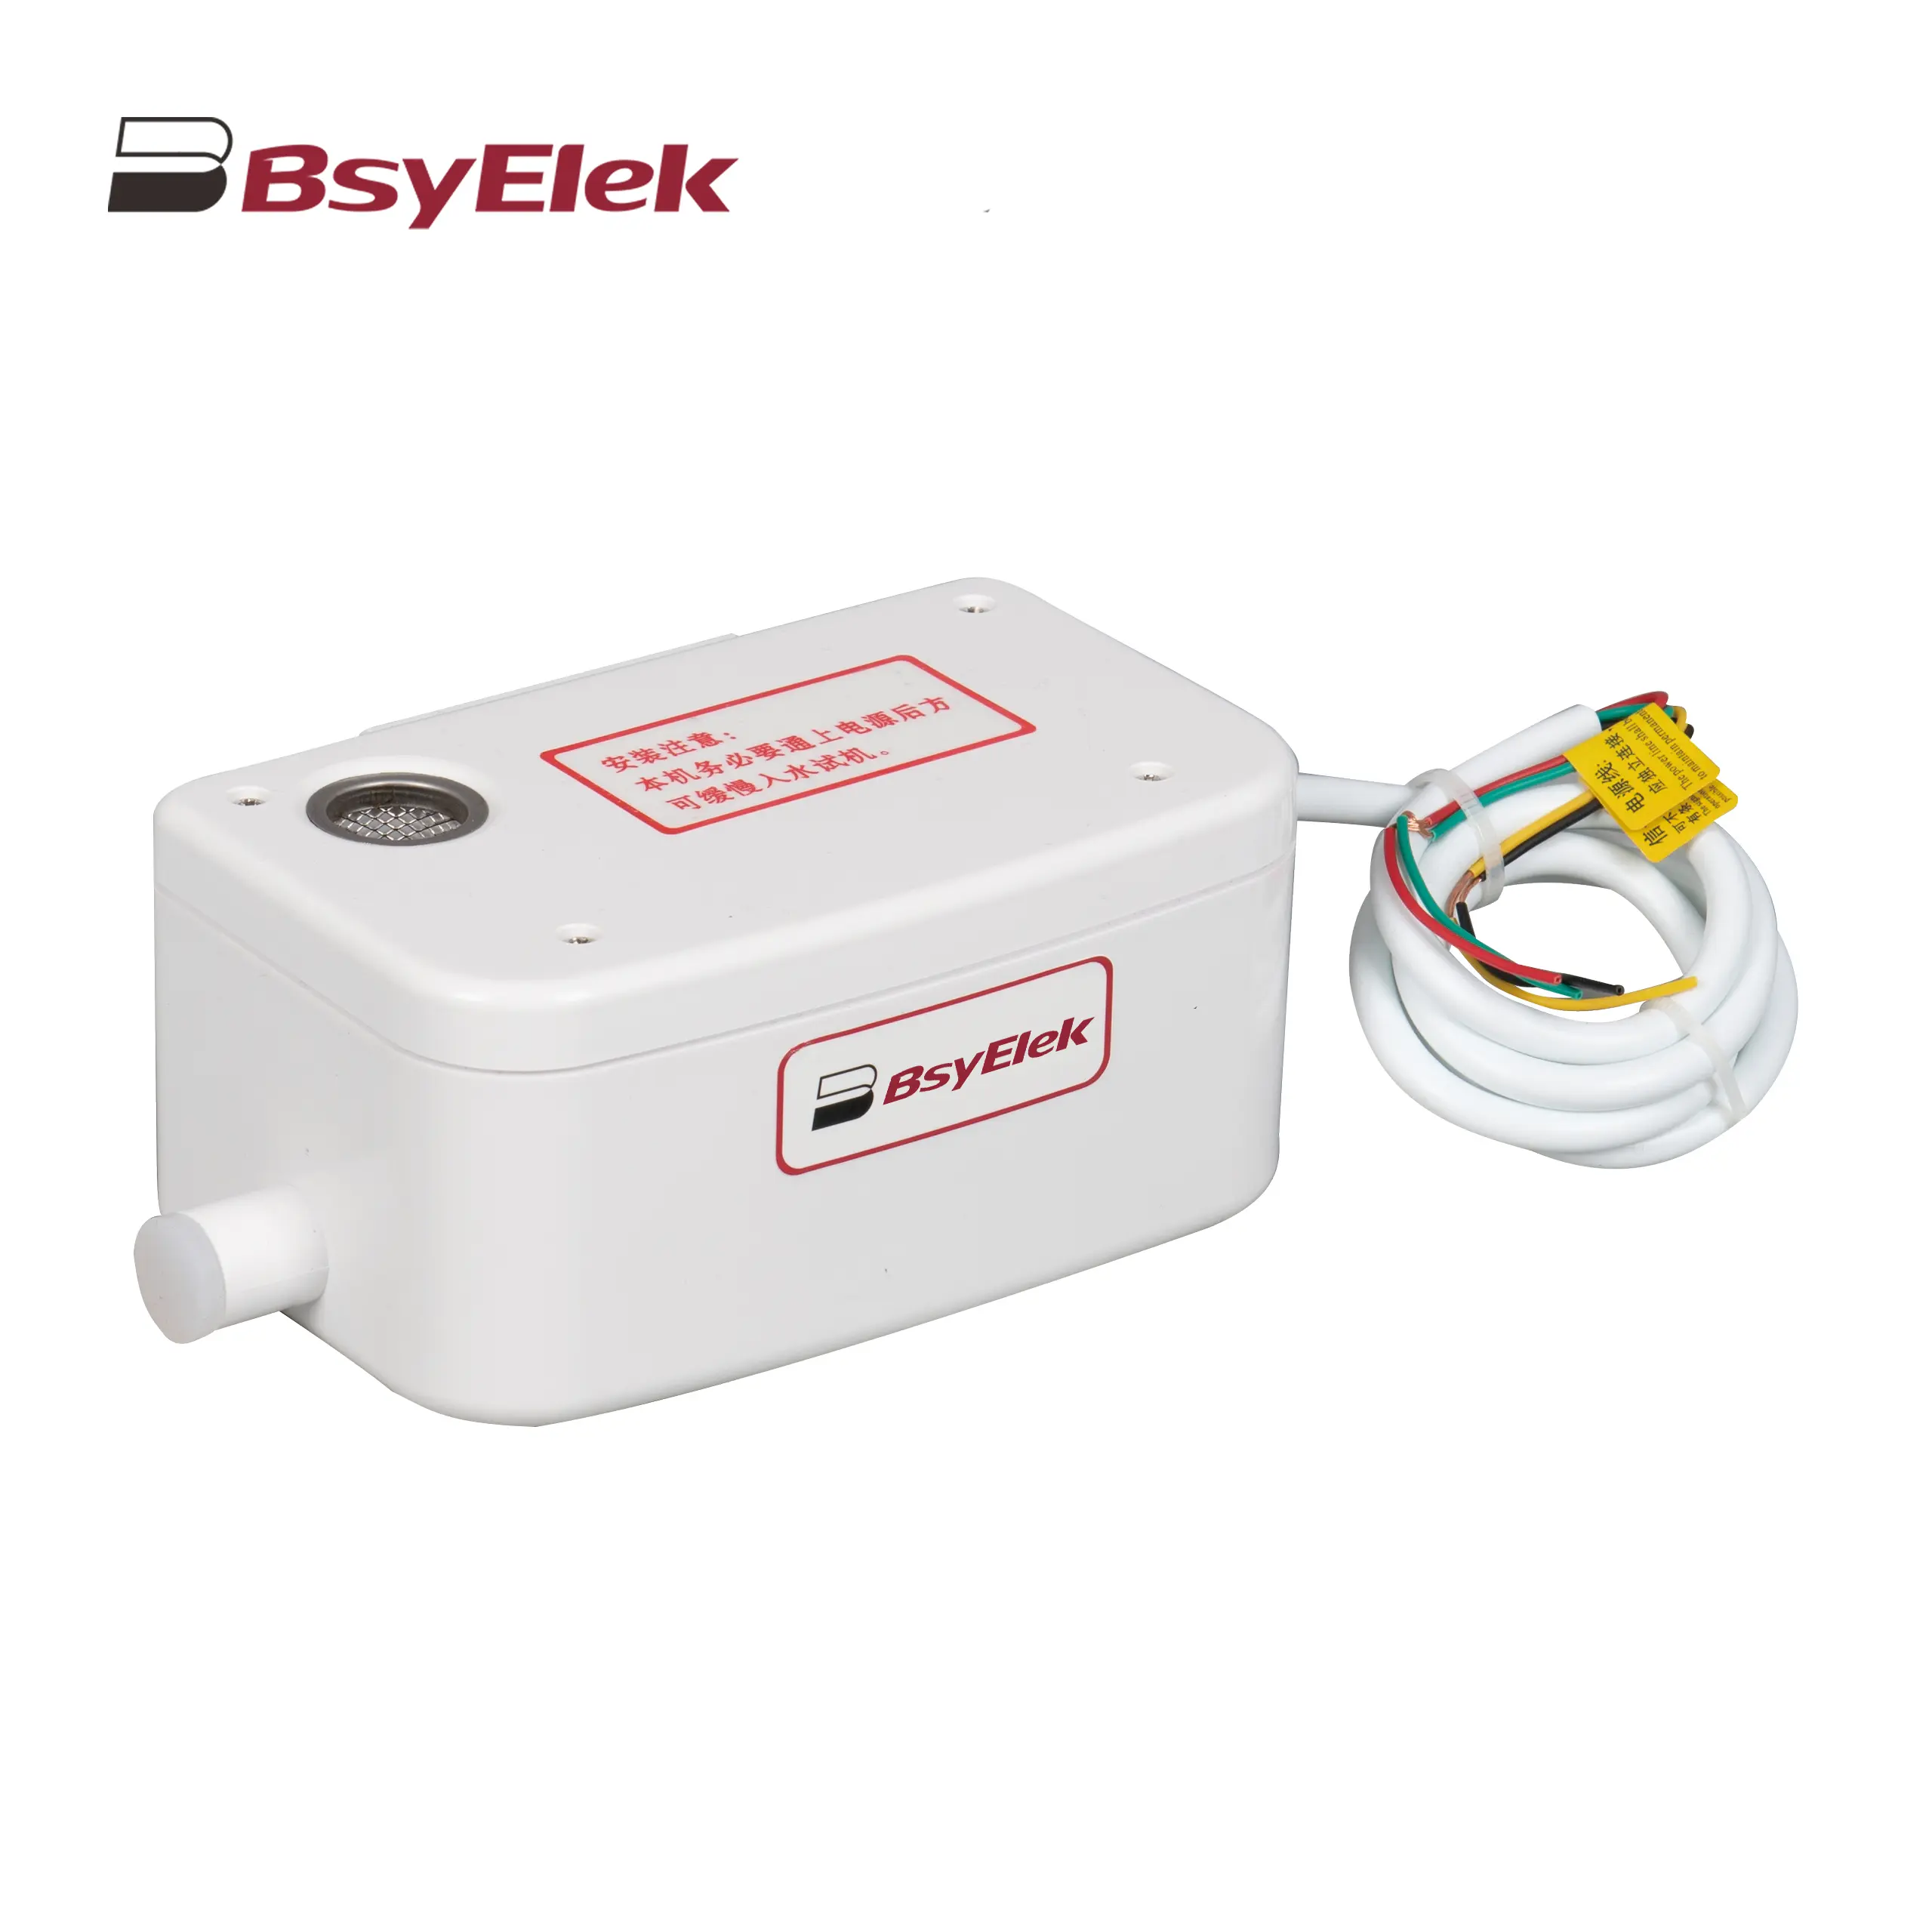
 SBH-05 0.7M Original Drainage Pump of Duct Type Air Conditioner
-
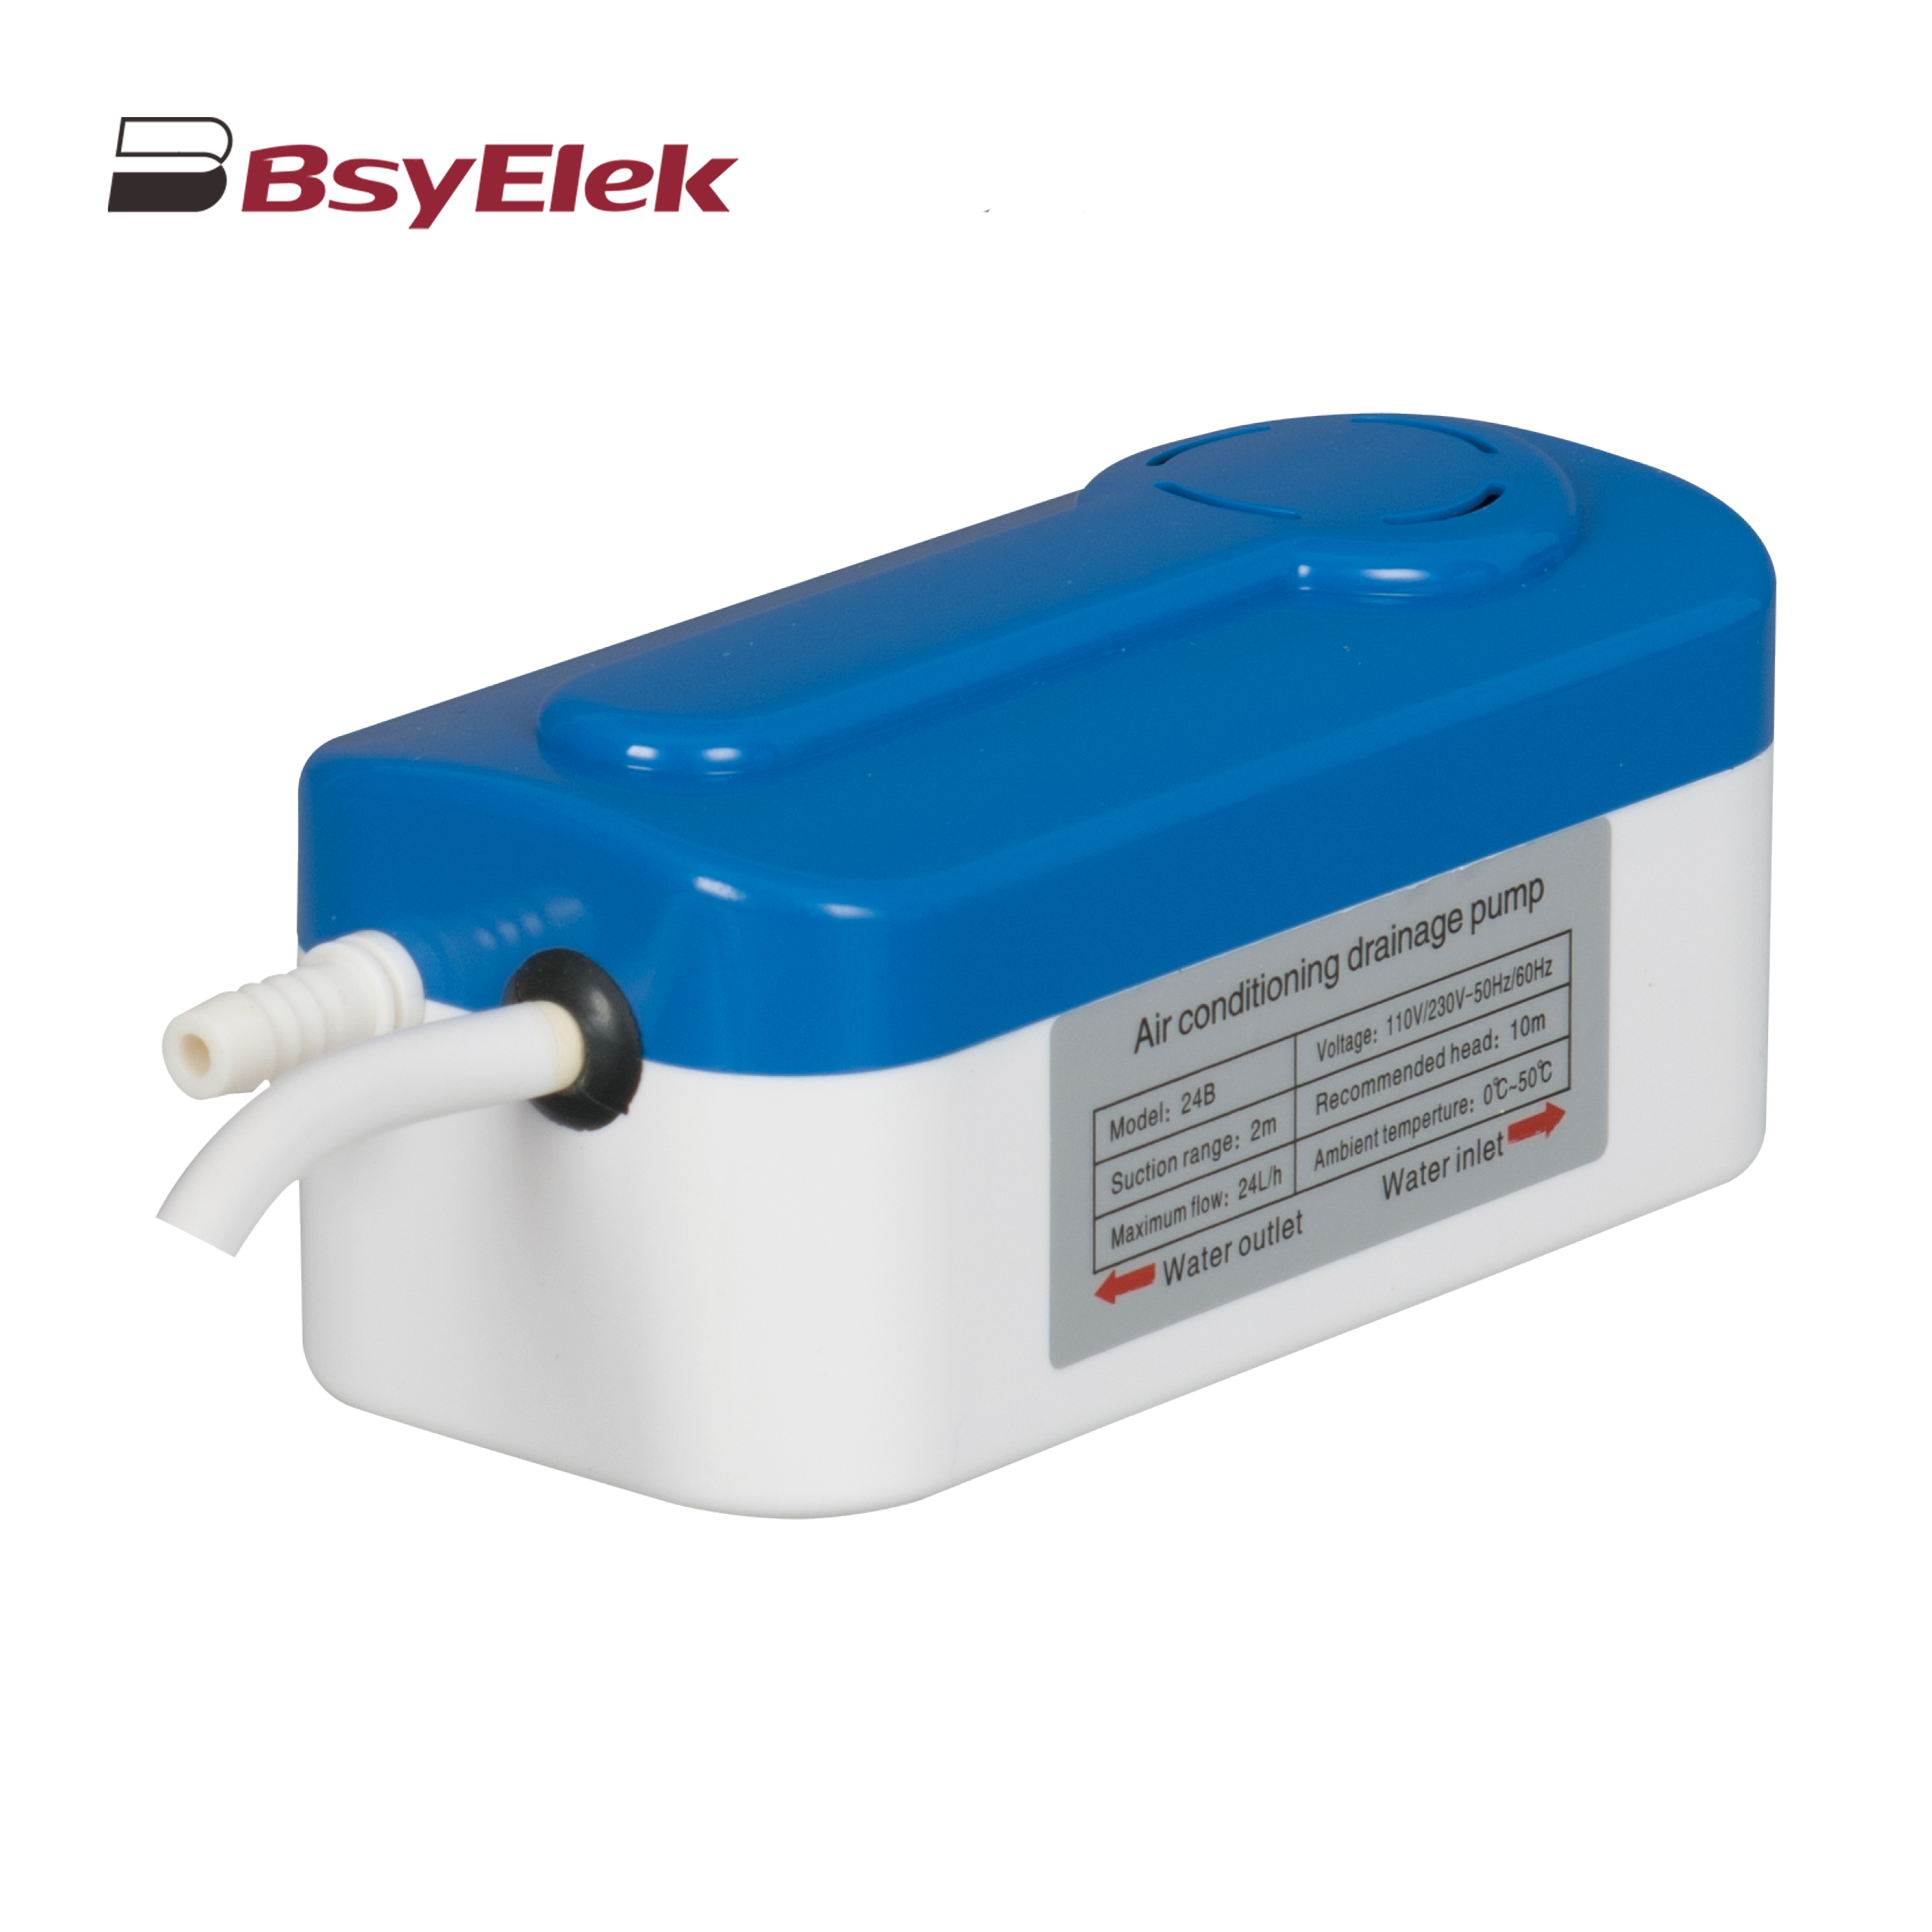
 BY-24A/40A 10M Drainage Pump of Air Conditioner
-
 BY-50A 12M Drainage Pump of Air Conditioner
-
 BY-24B/40B 10M Split Type Drainage Pump
-
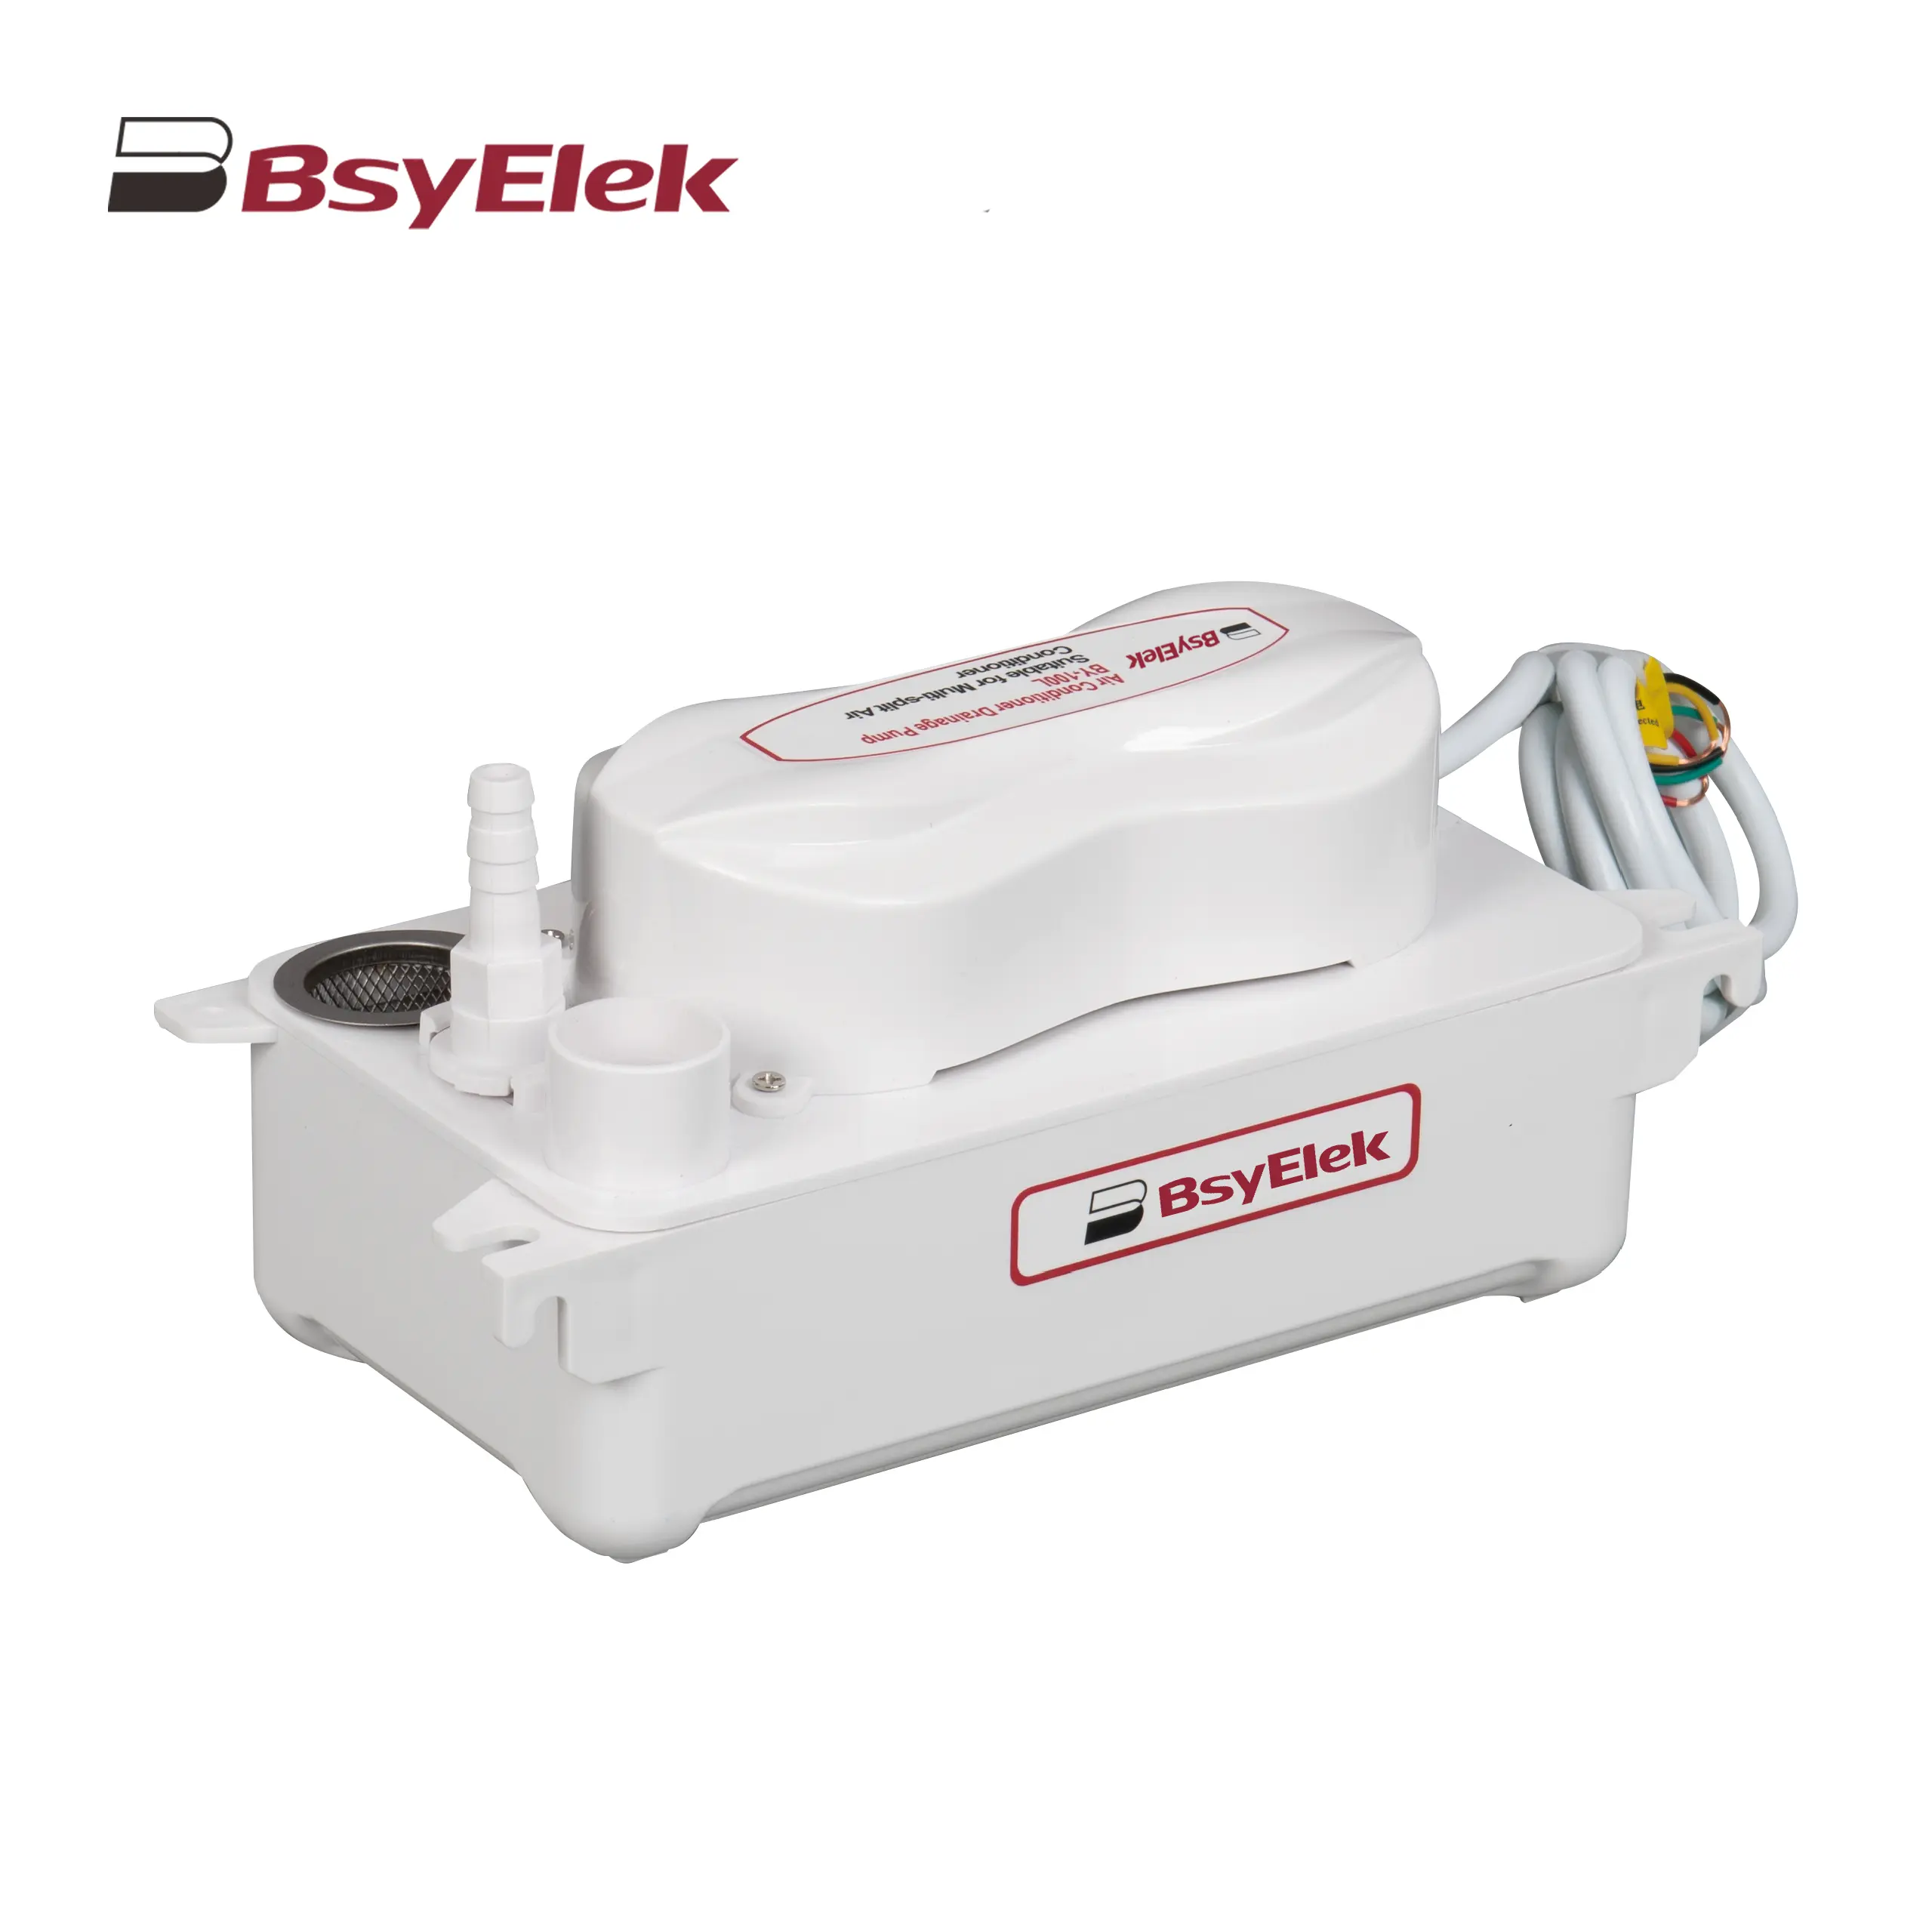 BY-100L 2M Drainage Pump of Air Conditioner
-
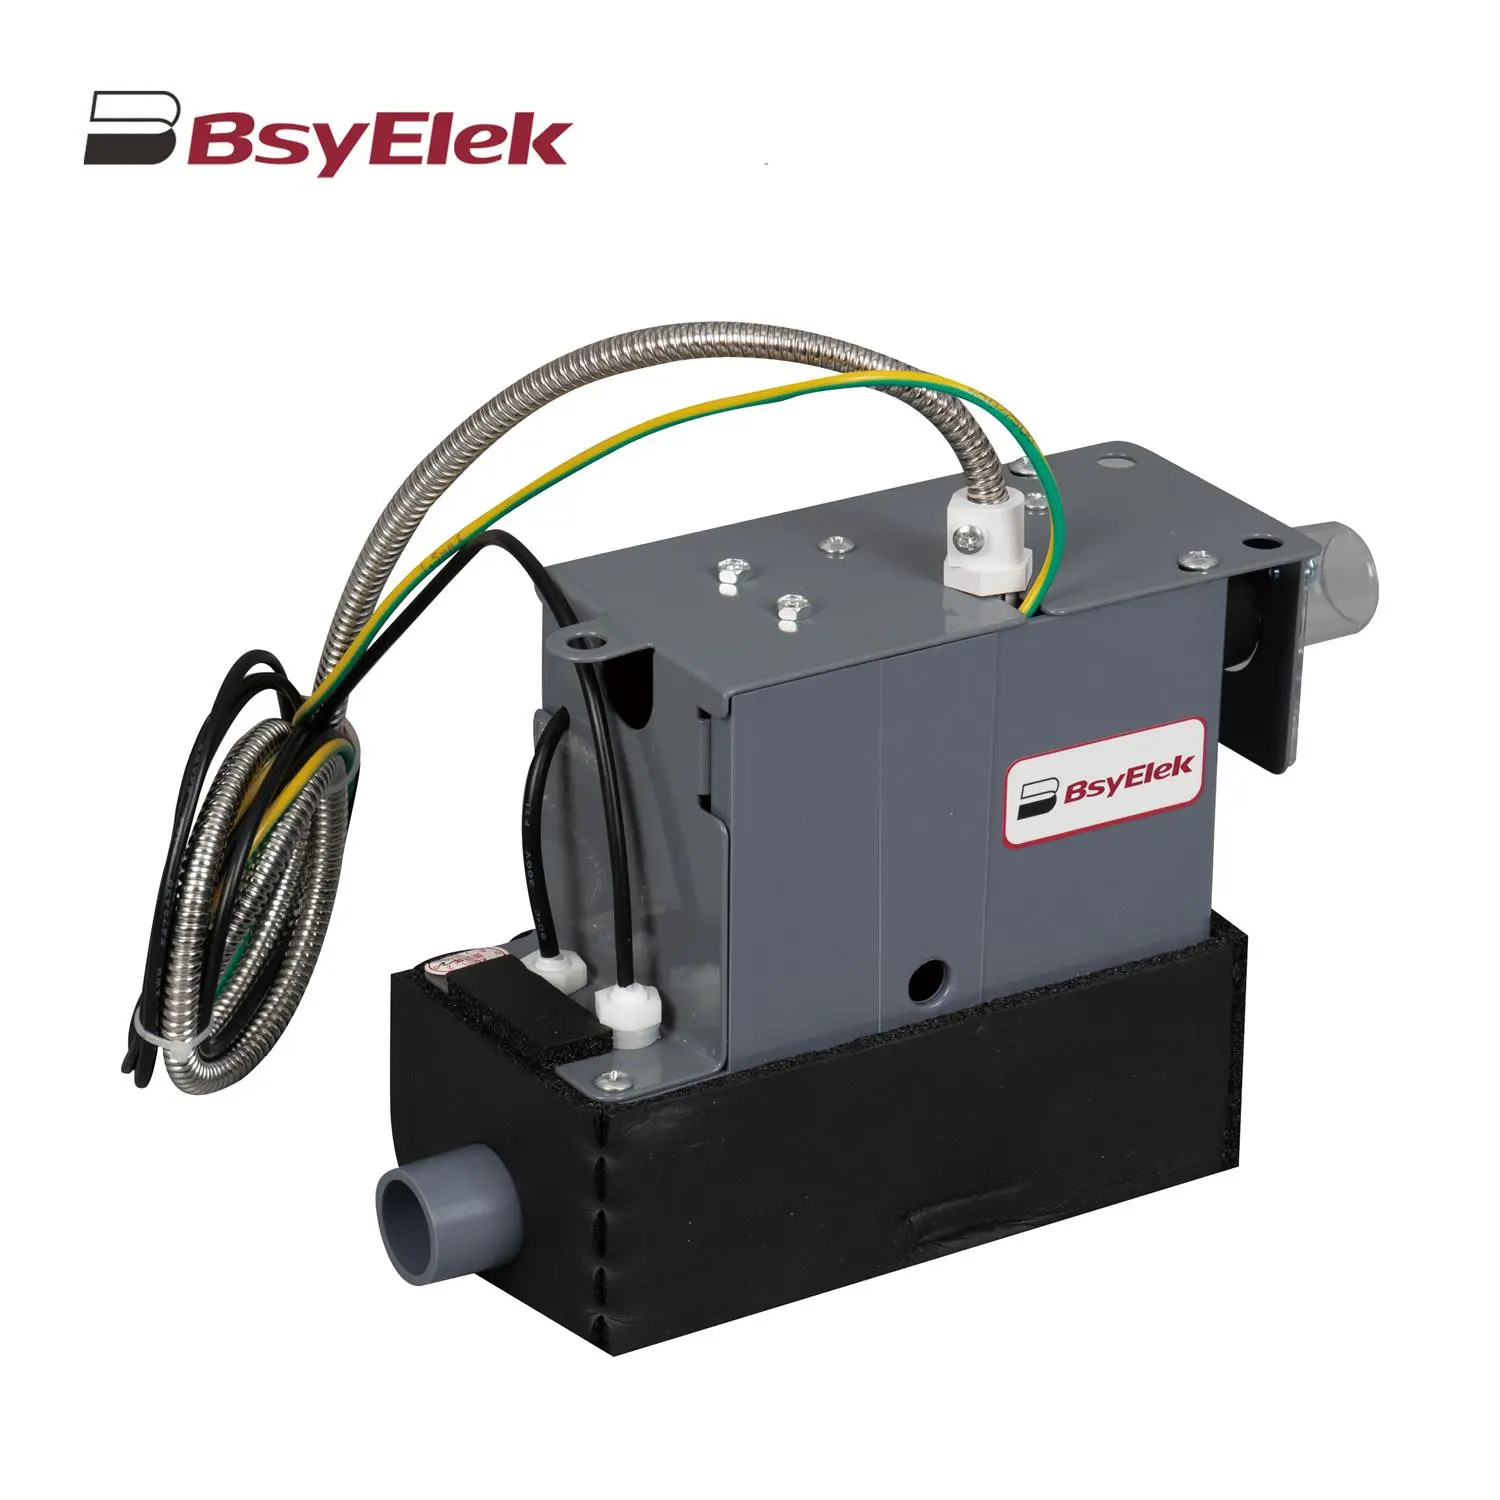
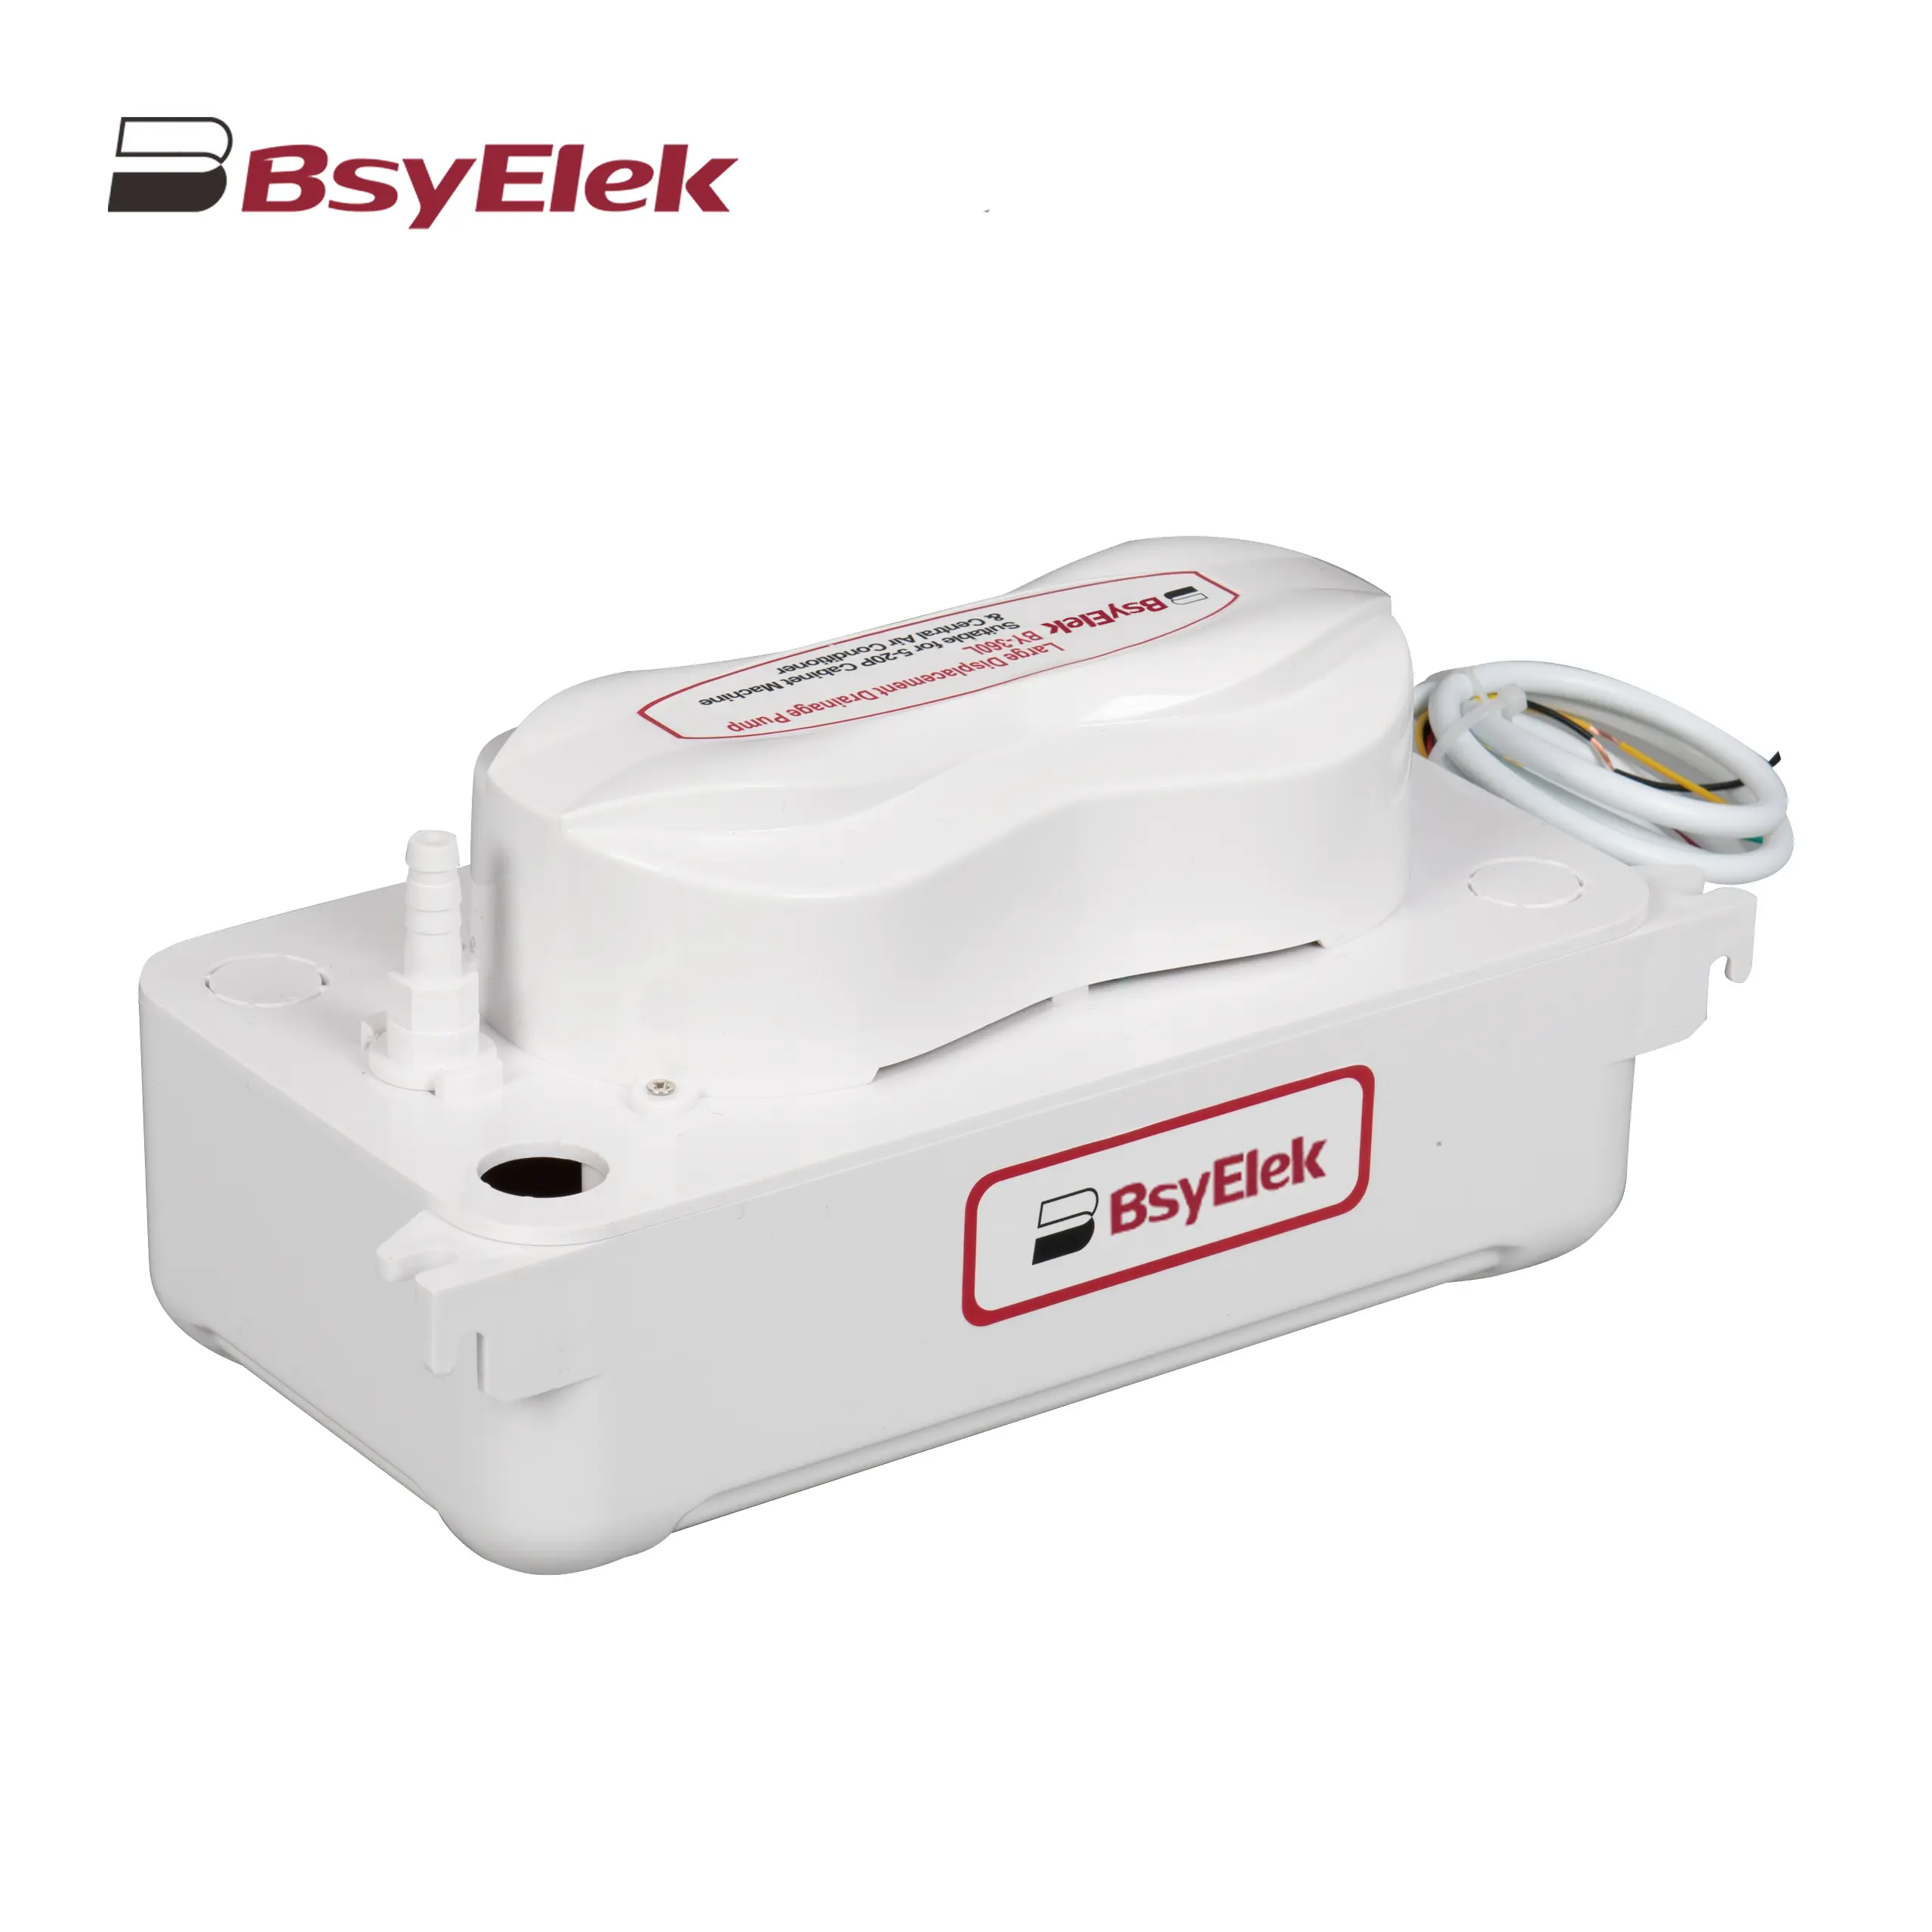 BY-360L 6M Large Displacement Drainage Pump
-
 BY-24C/40C 10M Corner Drainage Pump
-
-
Terminal Power Distribution Electric
-
News
- Top Blog
- Company News
-
Industry Dynamics
-
What is a miniature circuit breaker (MCB)?
-
-
-
-
-
-
-
-
- Support
- Blog
- Contact Us
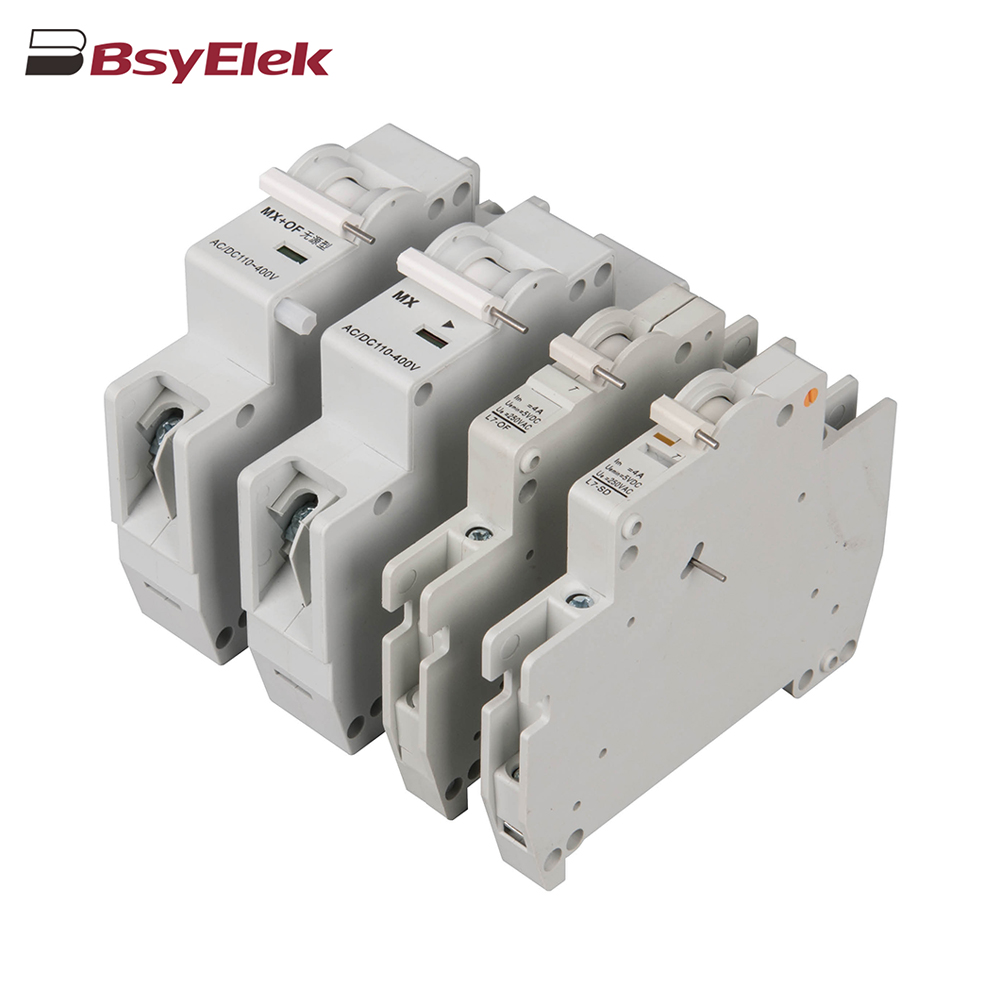 OF SD MX OF MCB Miniature Circuit Breaker Accessories
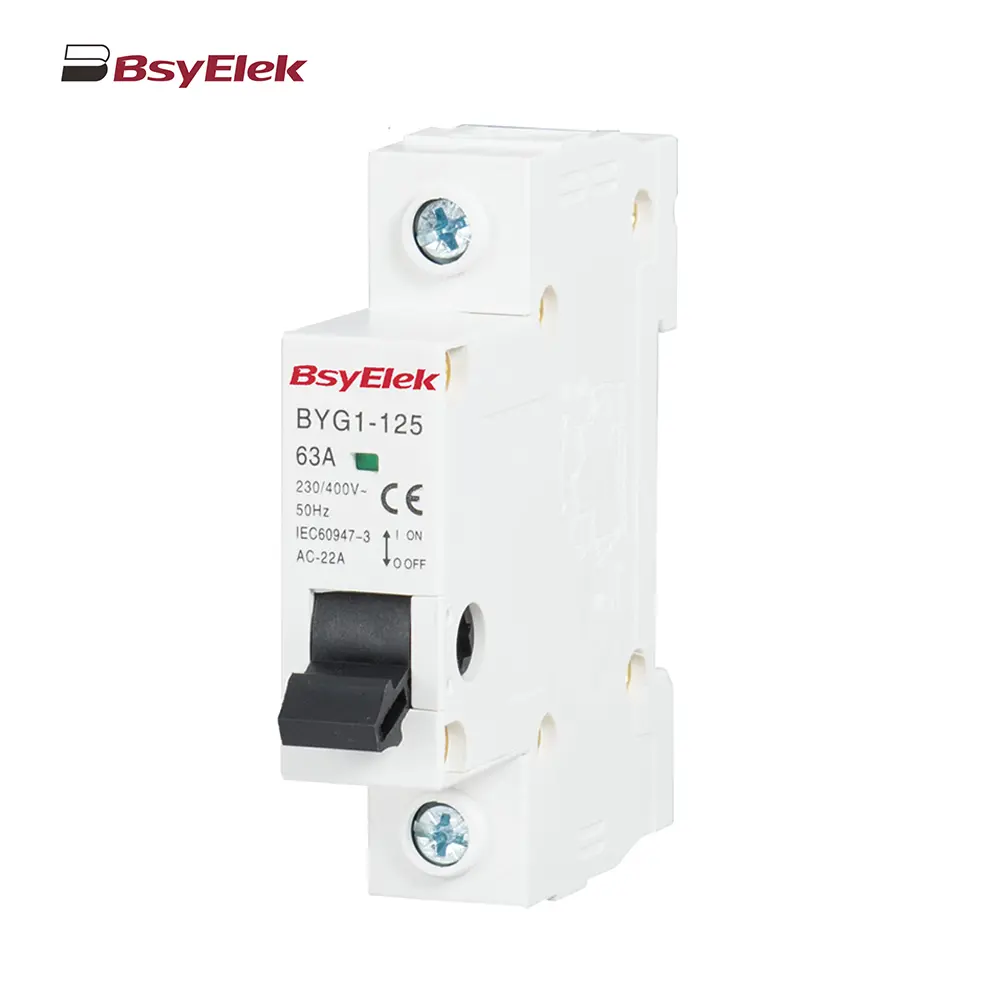 BYG1-125 Main Switch MCB Isolator Switch
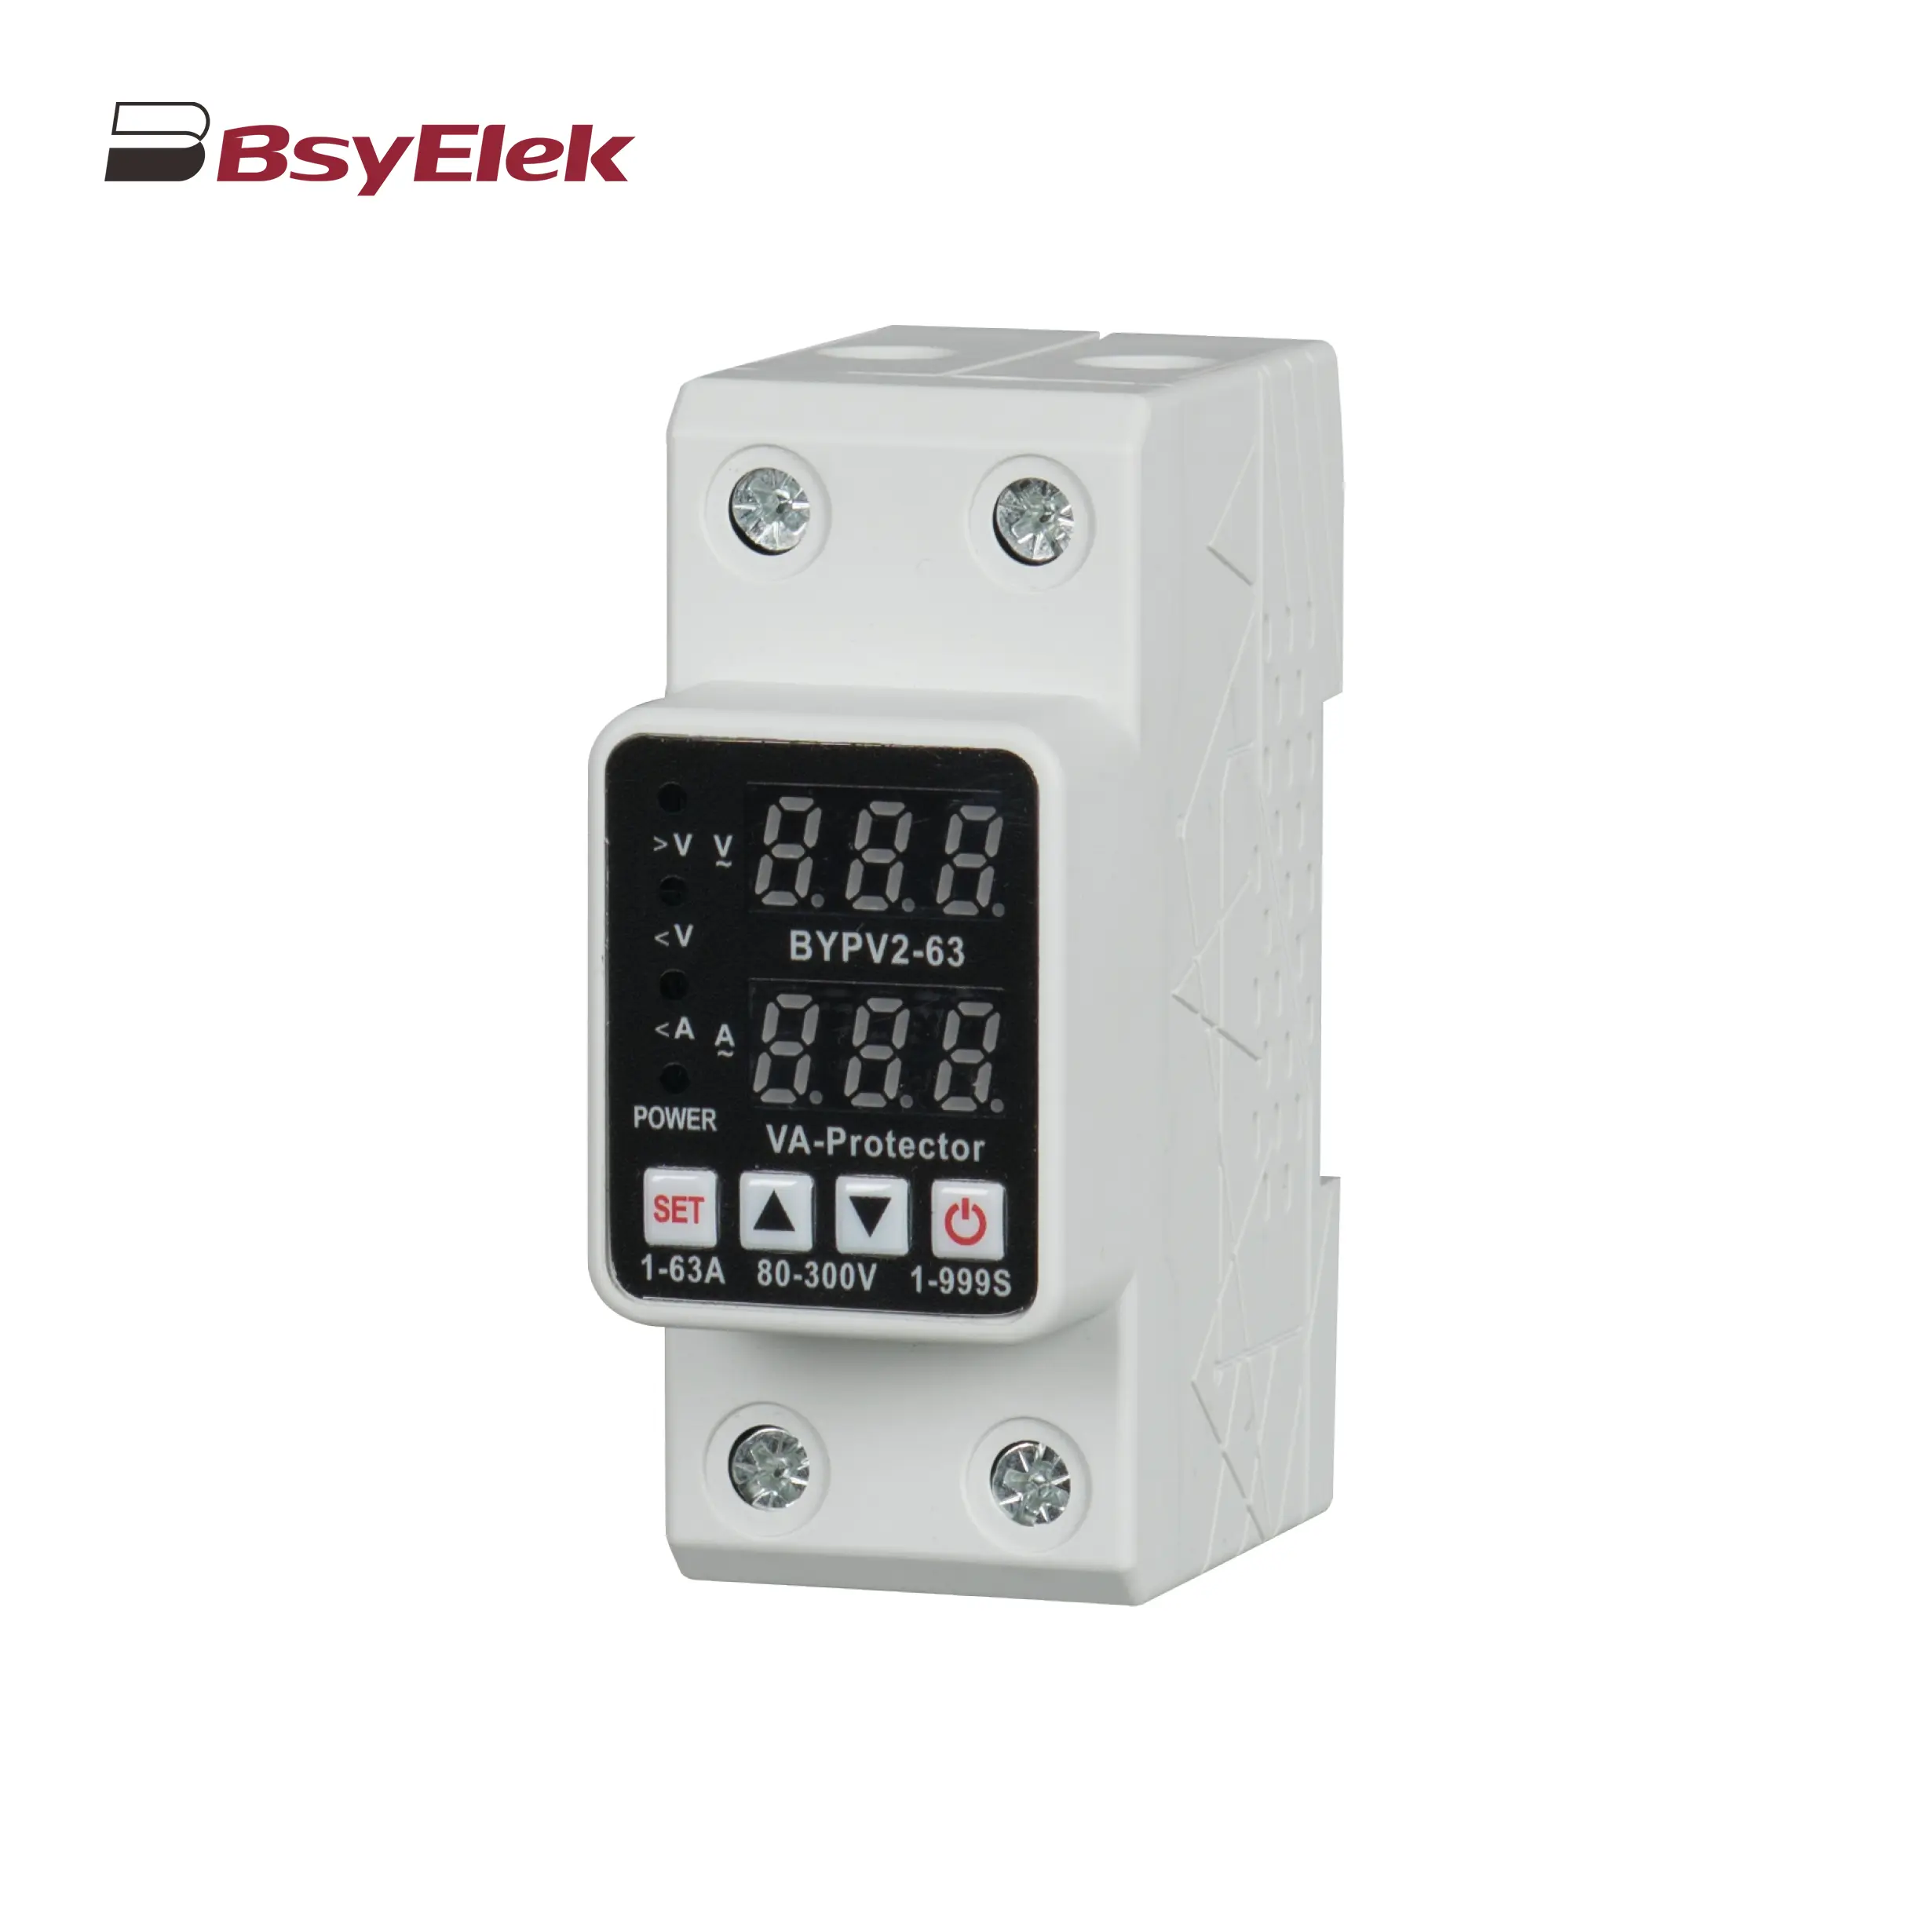 BYVP2-63 40A 63A Adjustable Dual Display Overvoltage and Undervoltage Protector
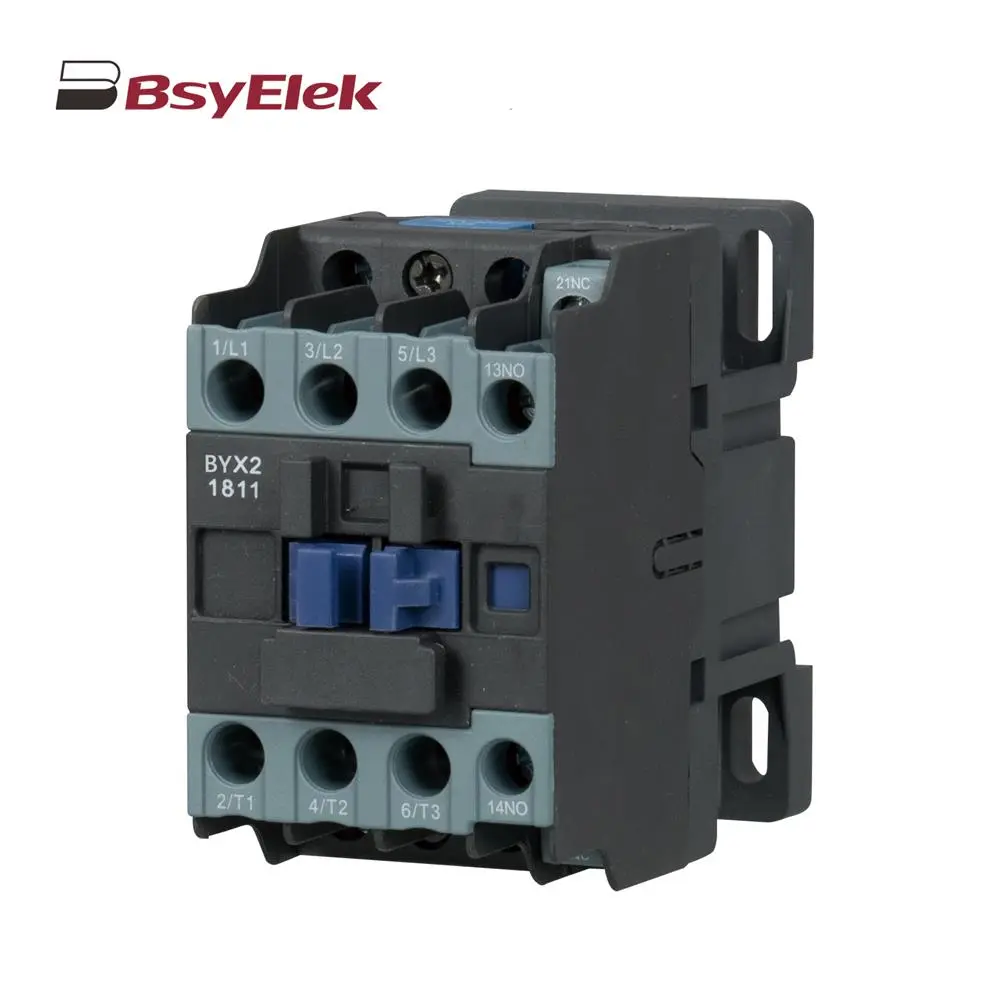 BYX2 6-95A AC Contactor
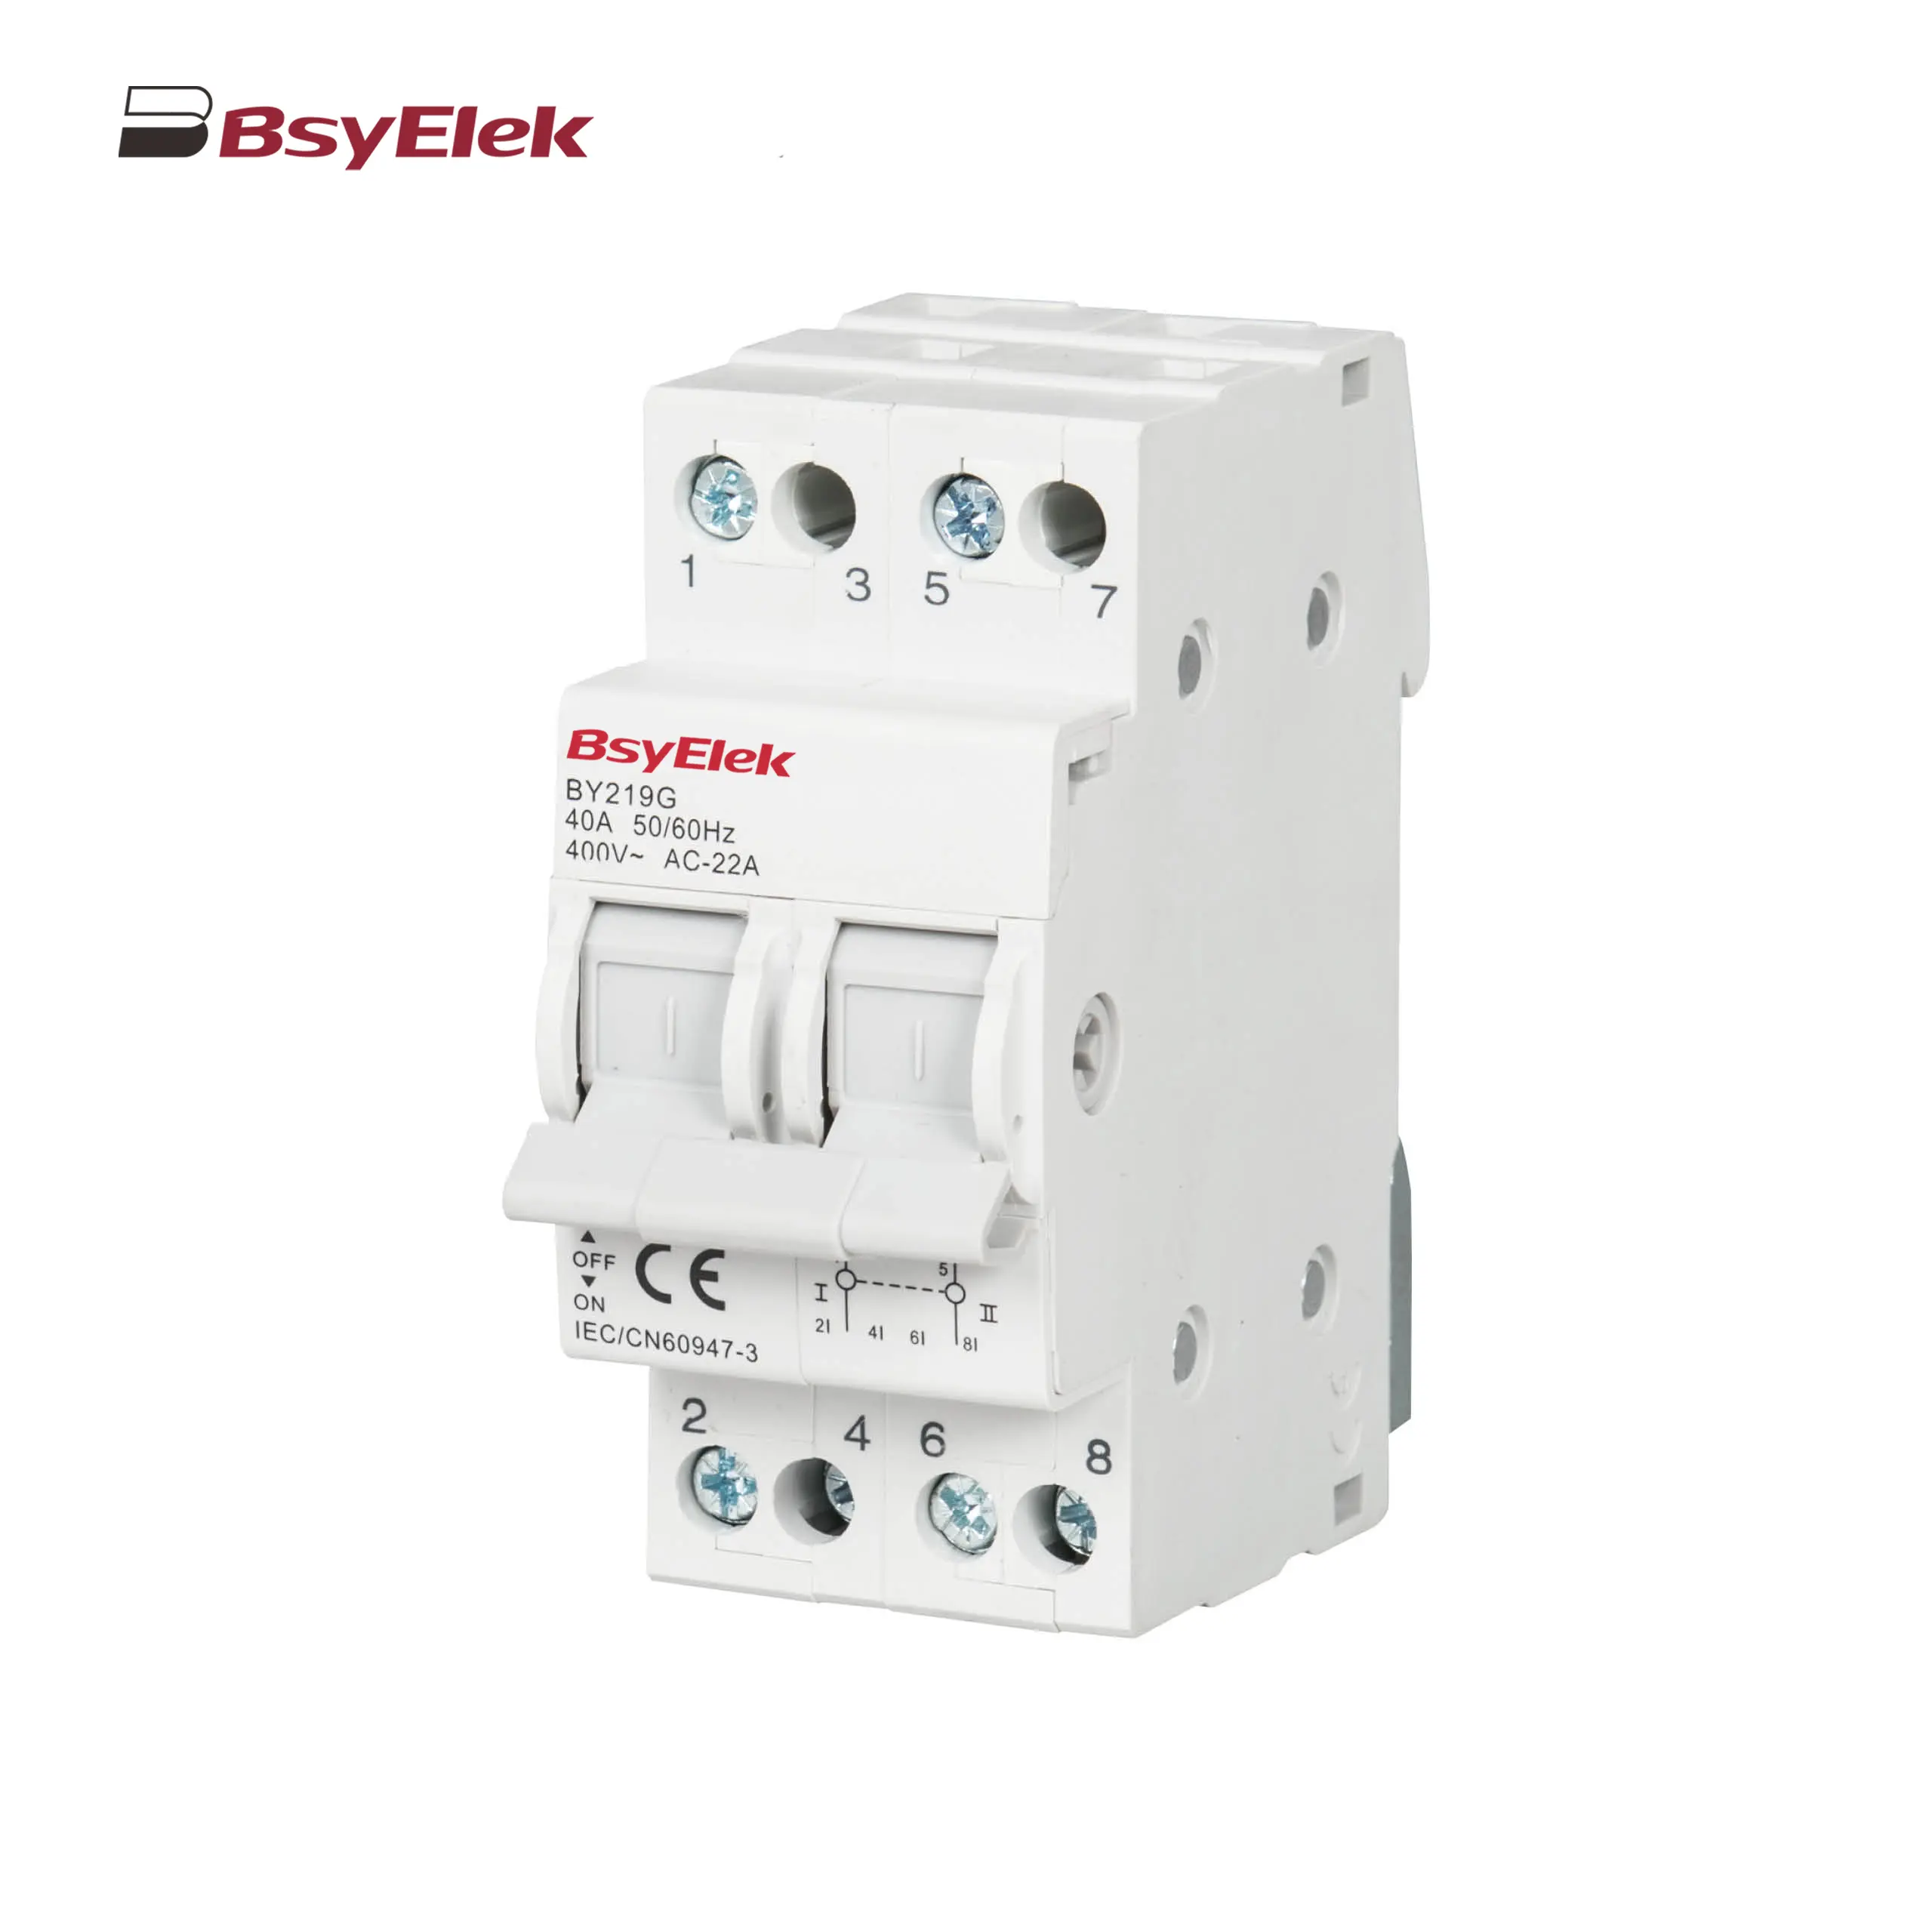 BY19G 63A Manual Changeover Switch
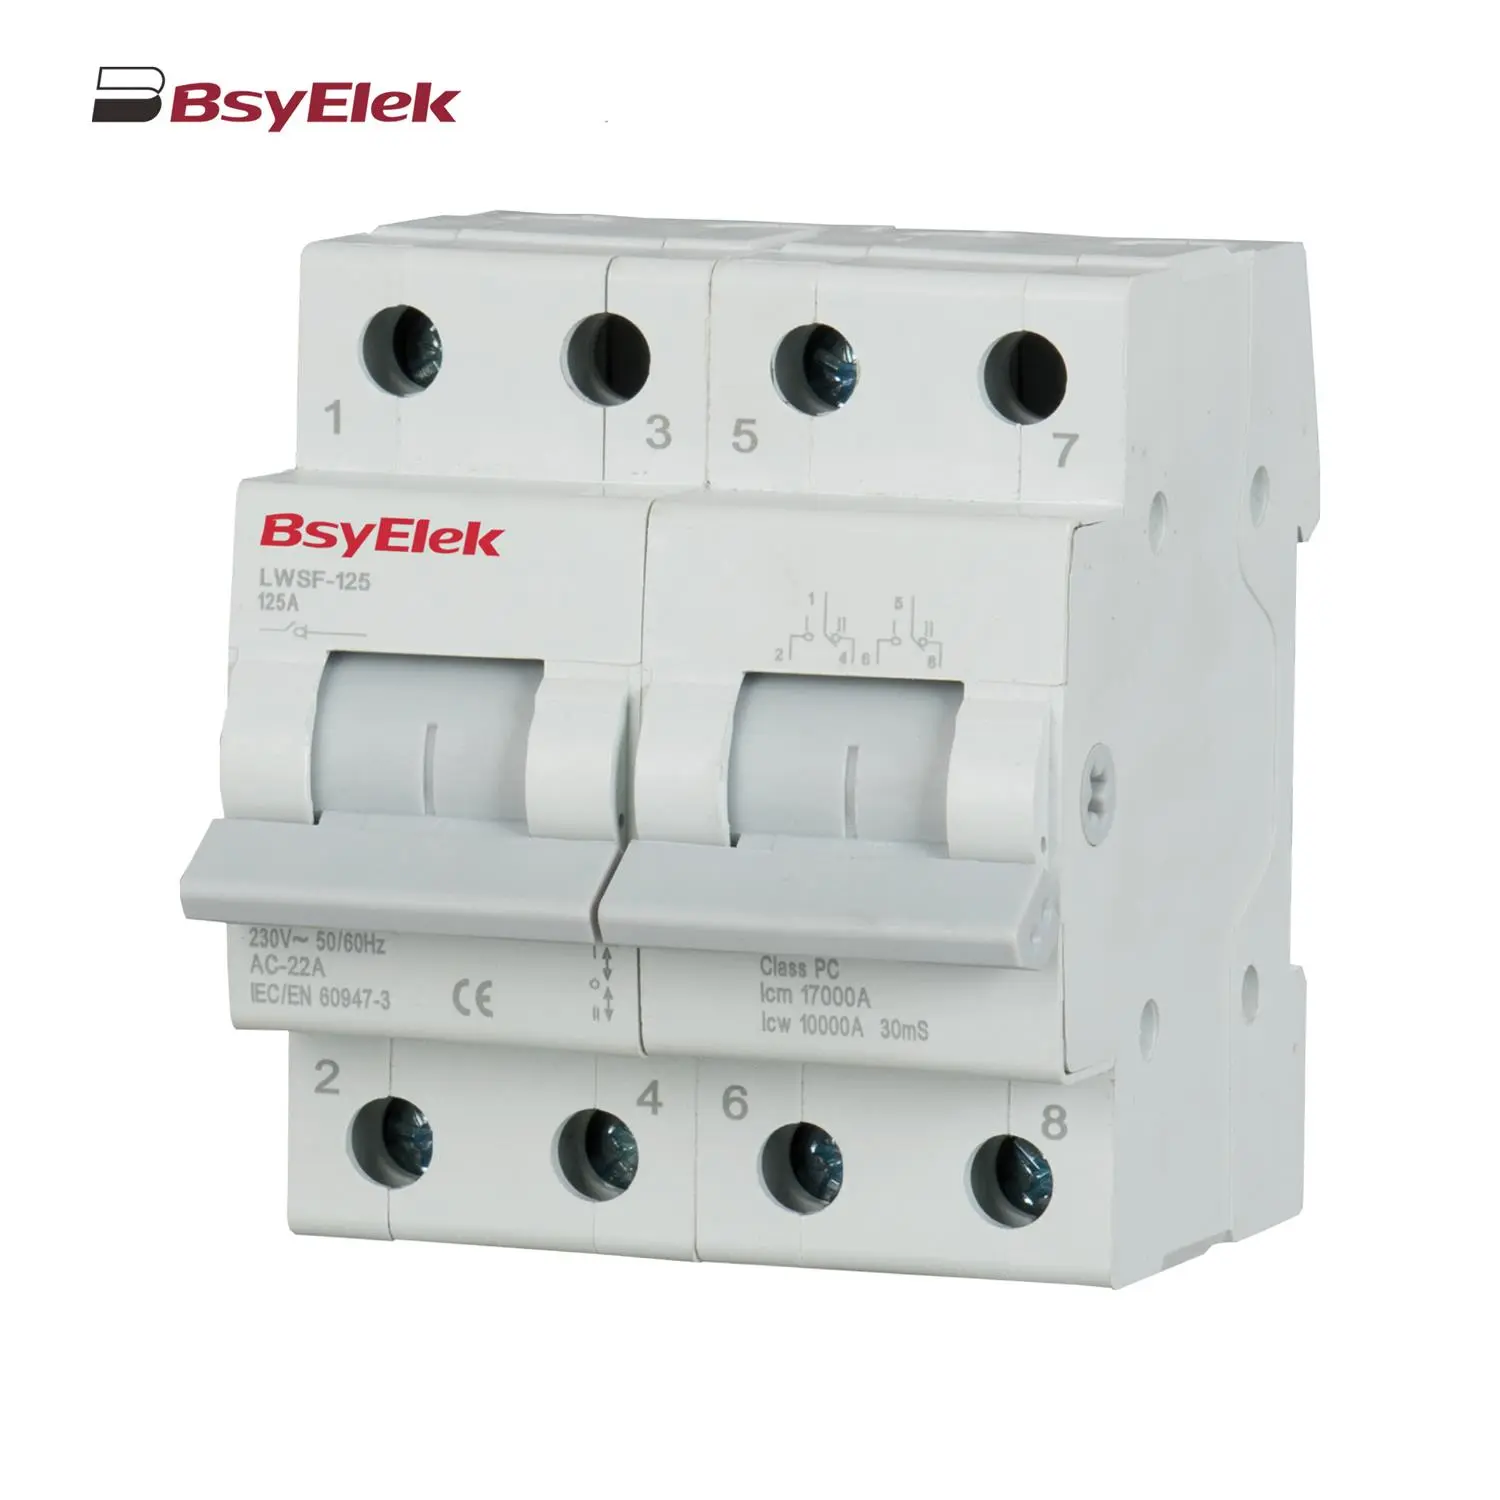 LWSF-125 125A Manual Changeover Switch
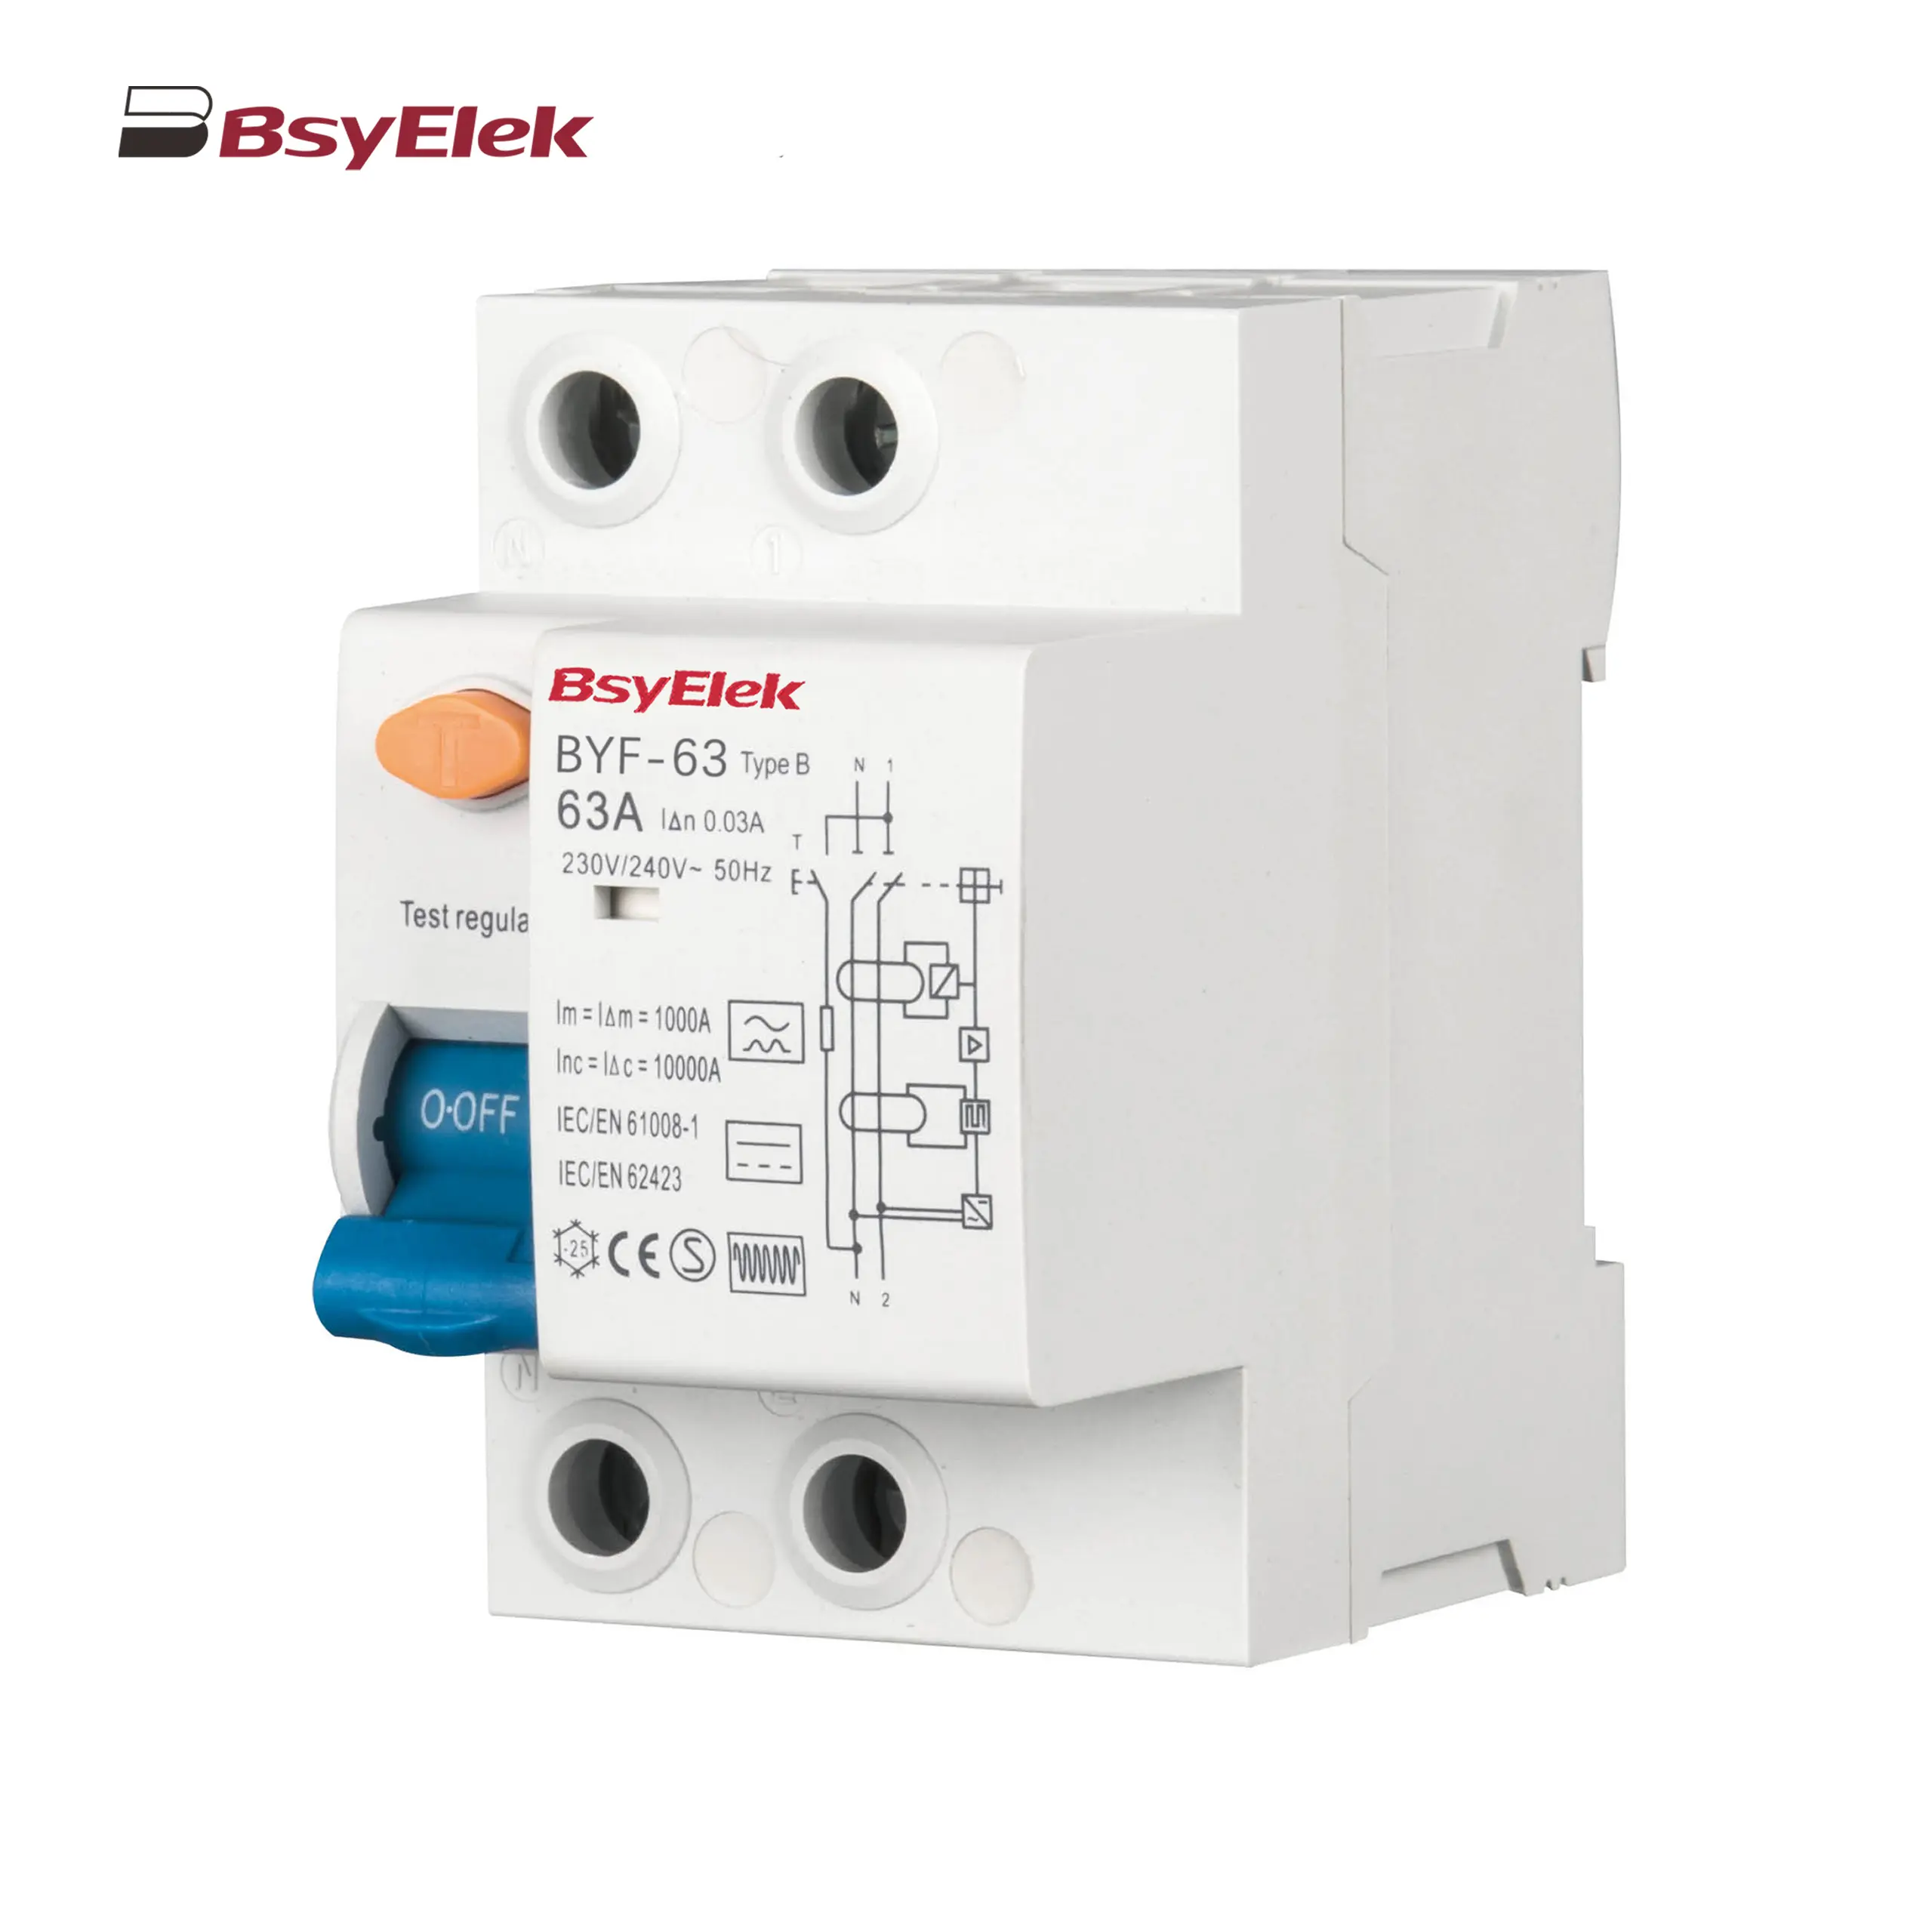 BYF-63 RCD 10KA Type B AC+A+Smoothing DC Residual Current Device
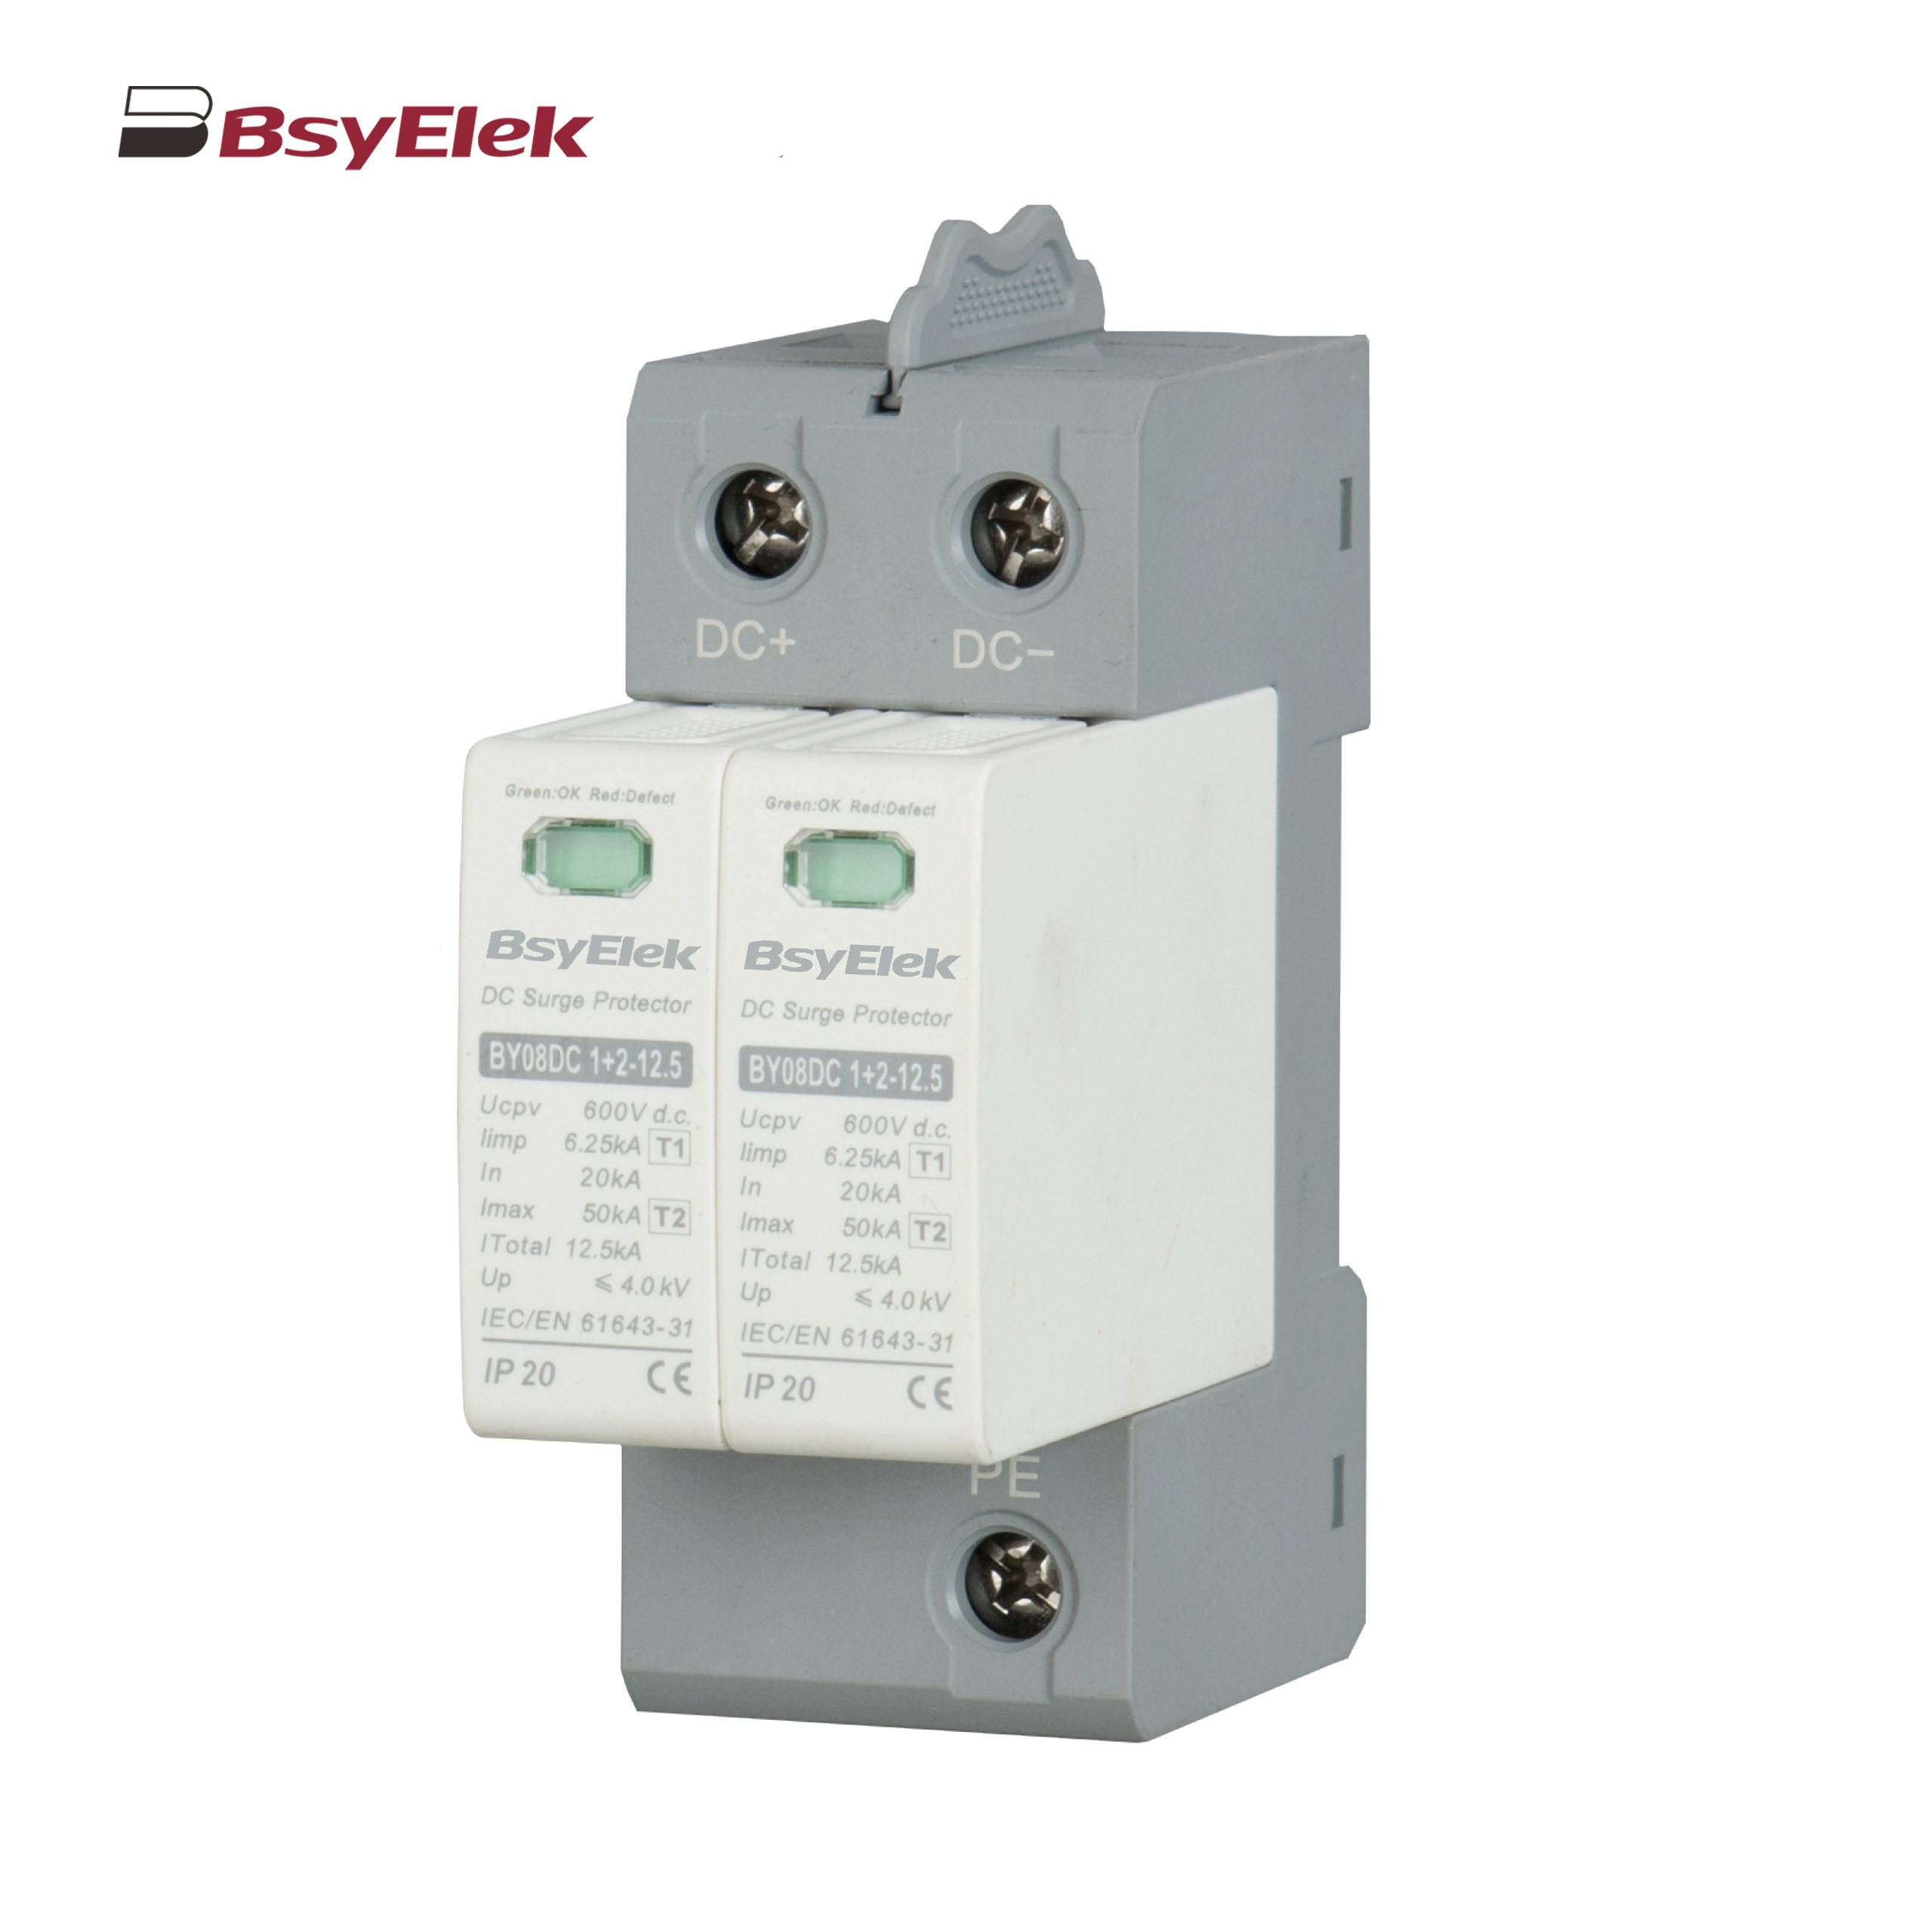 BY08DC 1+2-12.5 SPD Class T1+T2 40KA DC Surge Protective Device
 BY08IIDC-40 SPD Class T2 40KA DC Surge Protective Device
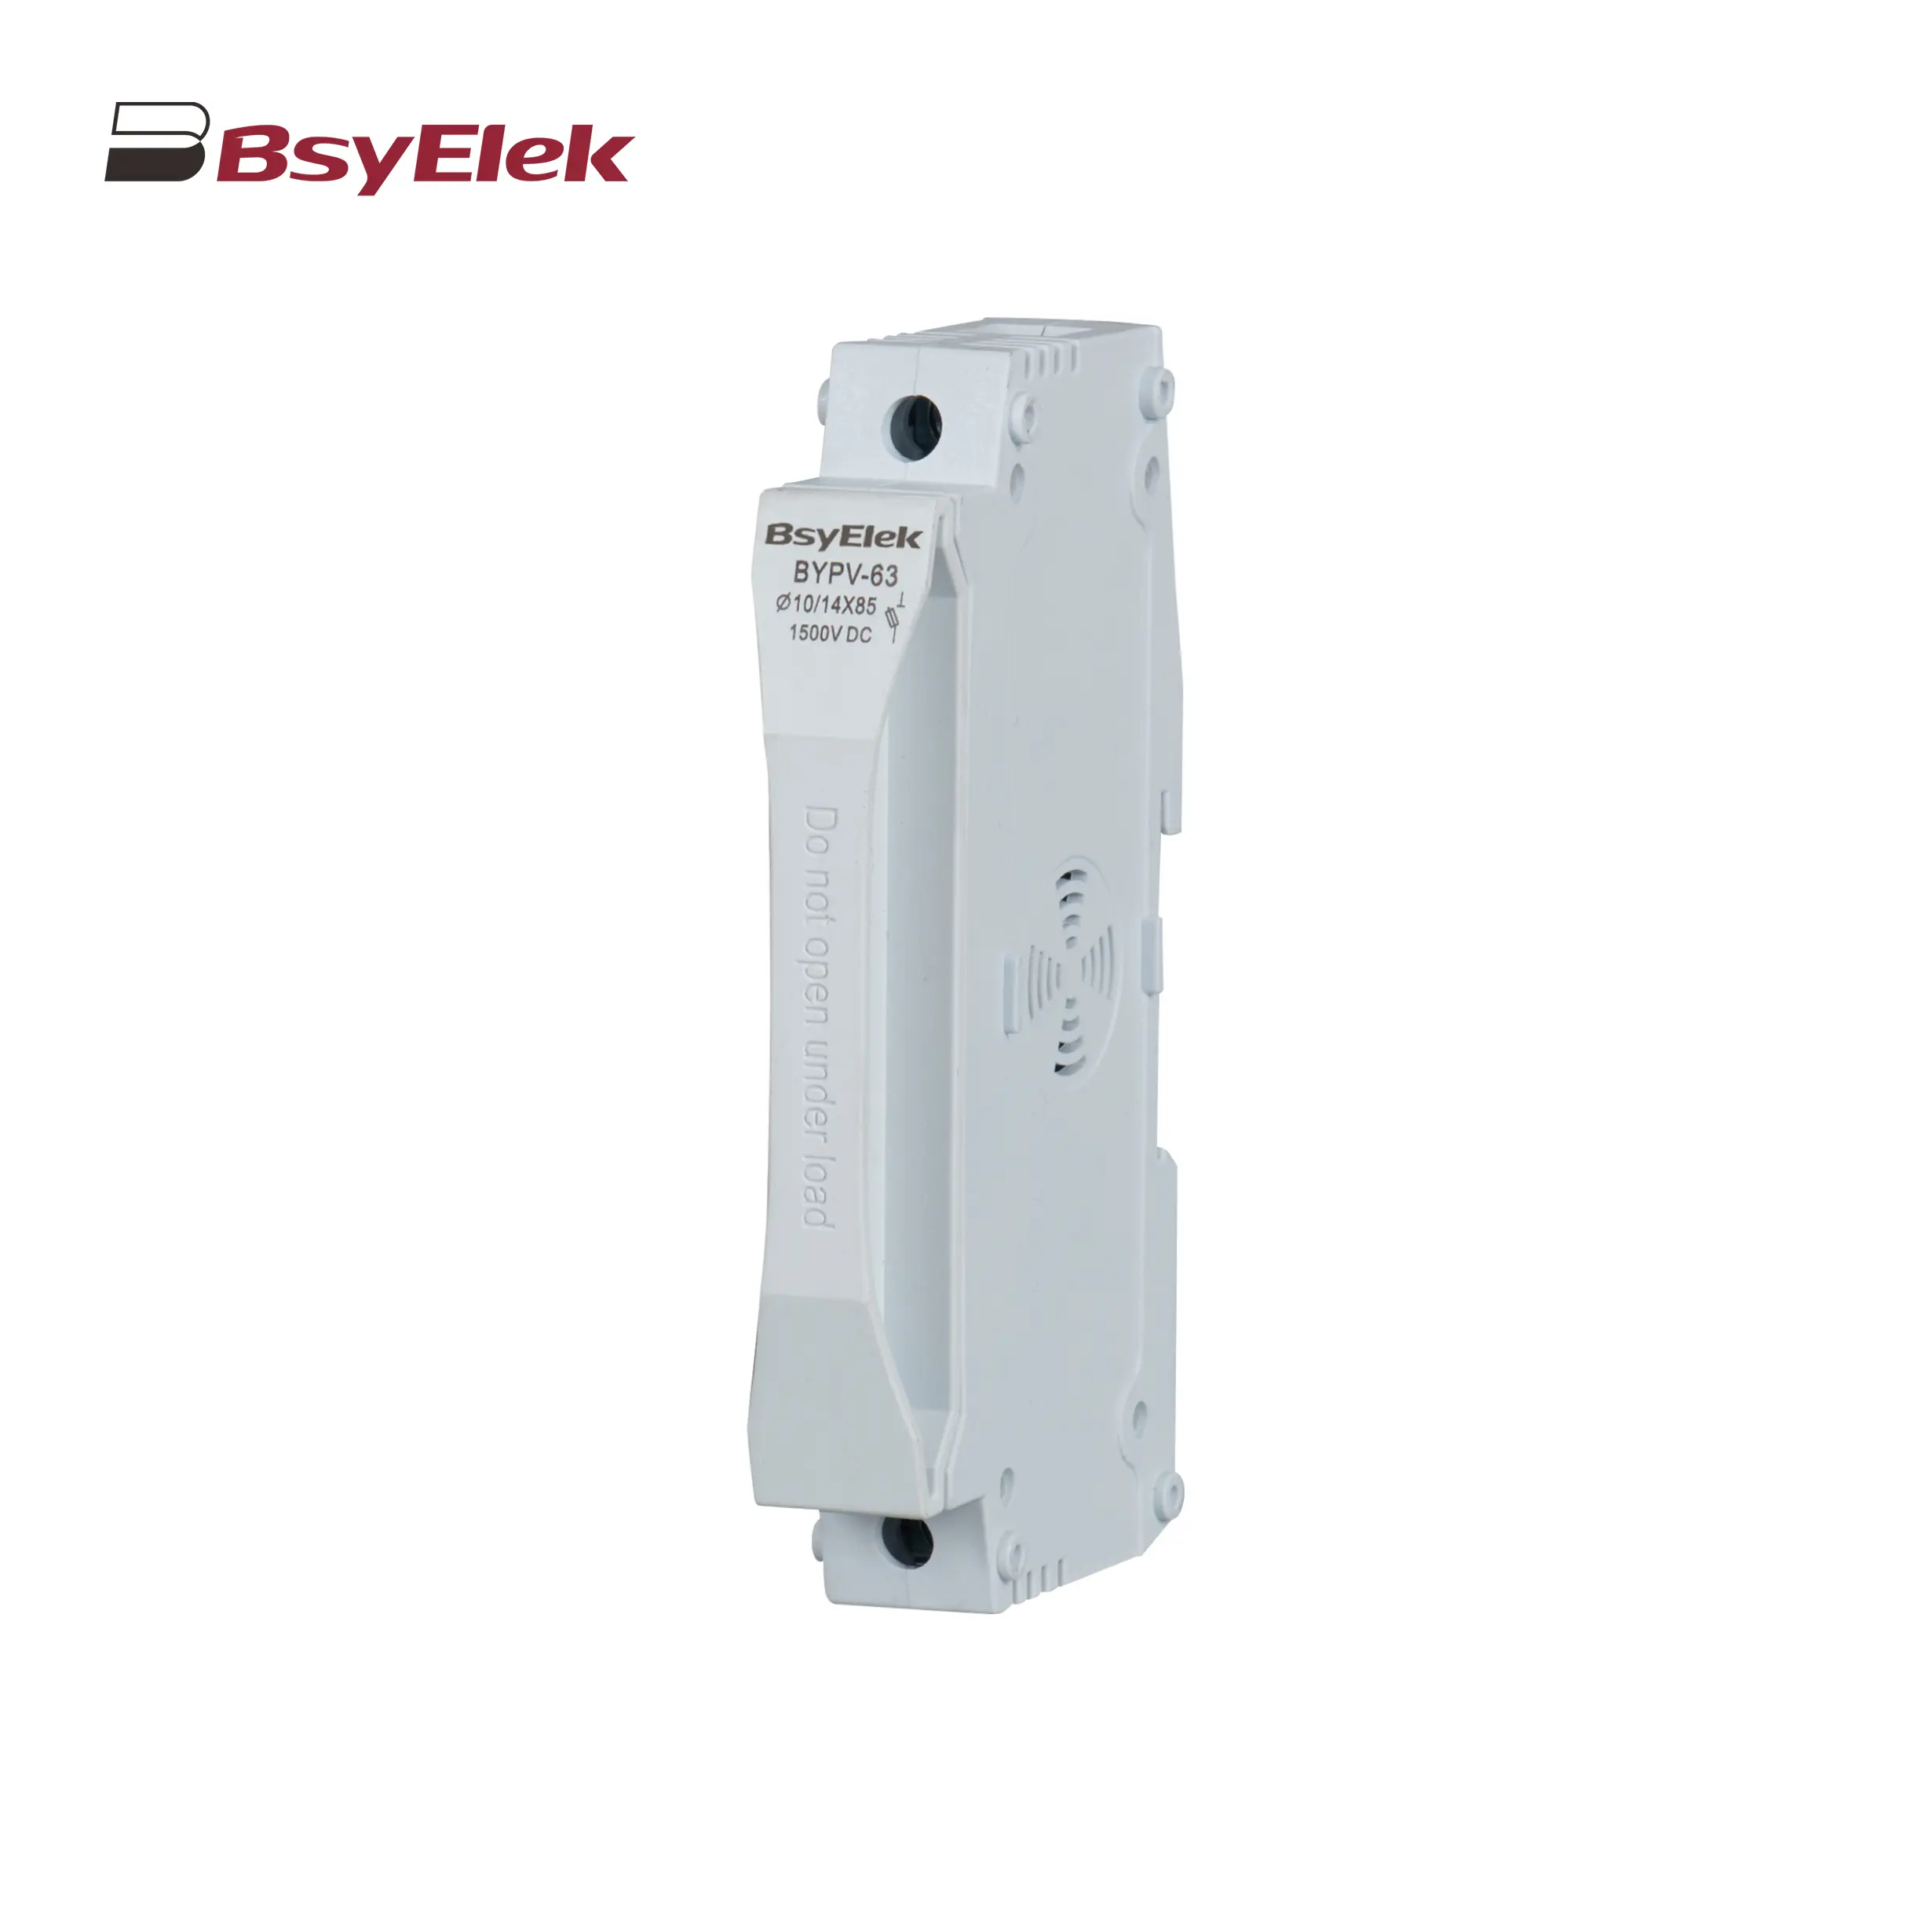 BYPV-63 1500VDC 50A Fuse Holder with 10x85mm 14x85mm Fuse Link
 BYPV-30 1000VDC 32A Fuse Holder with 10x38mm Fuse Link
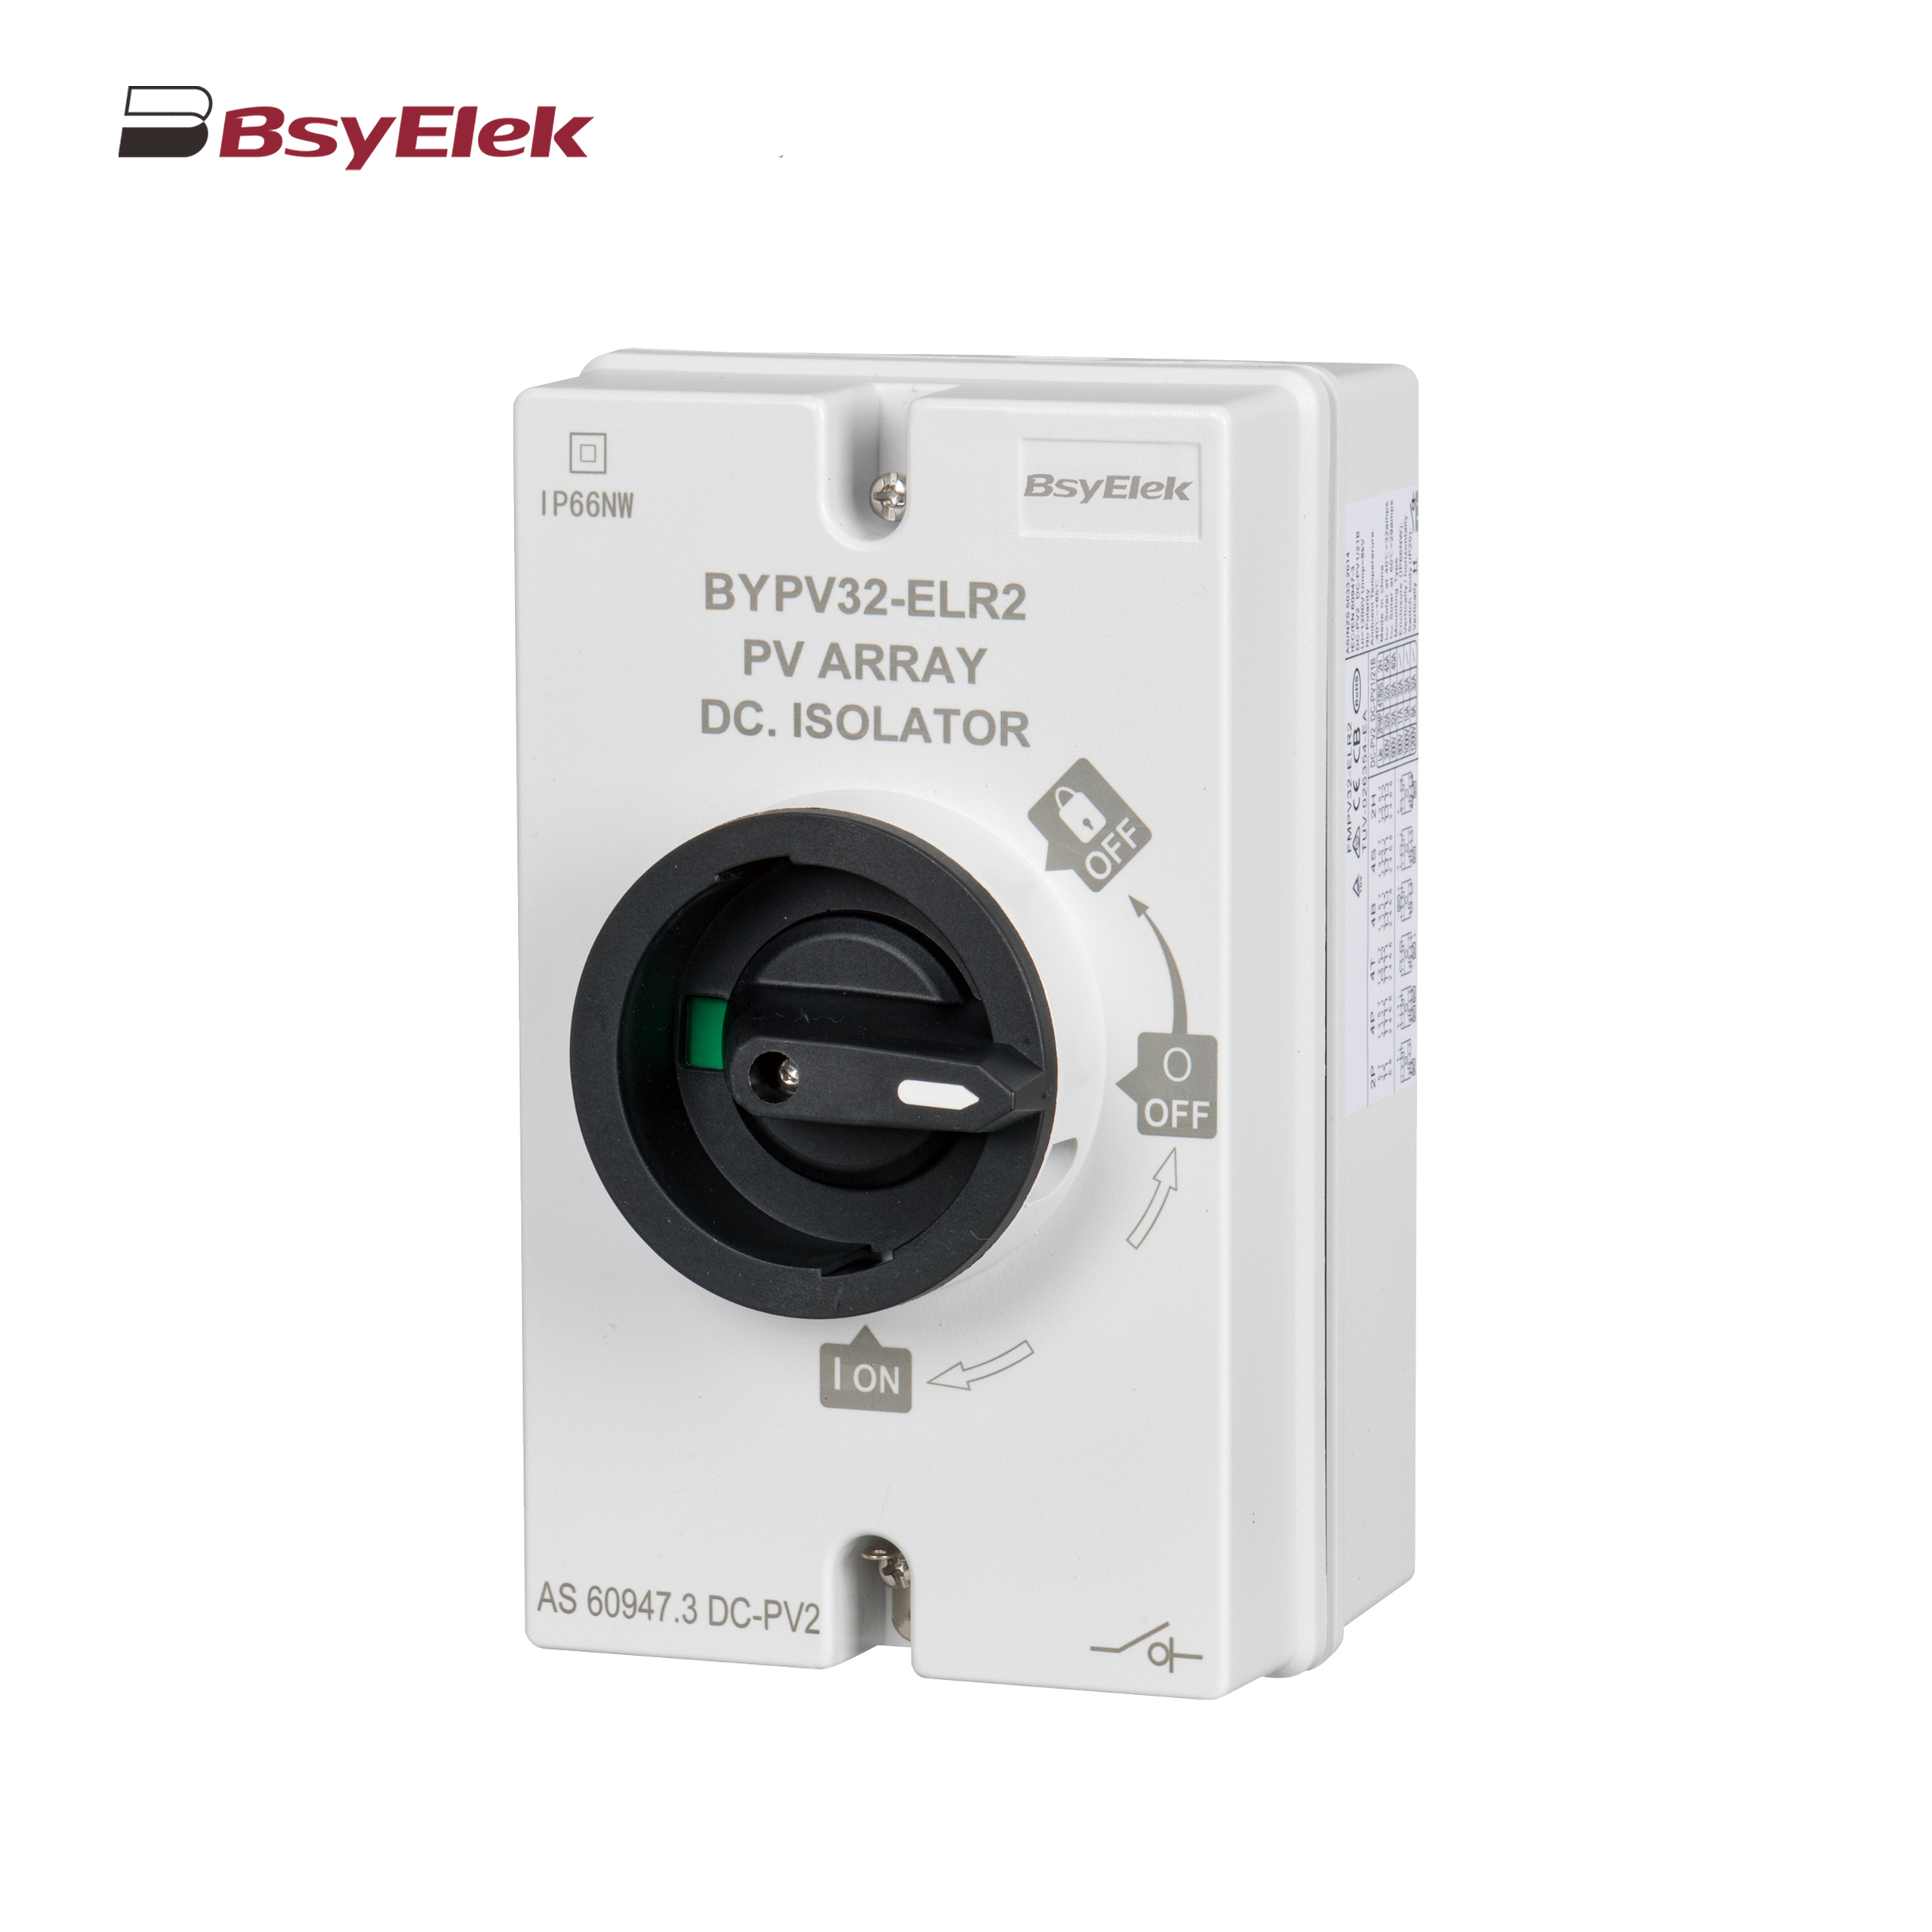 BYPV-ELR2 PV Isolator Switch with Enclosed Version
 BYPV-ELR1 PV Isolator Switch with Enclosed Version
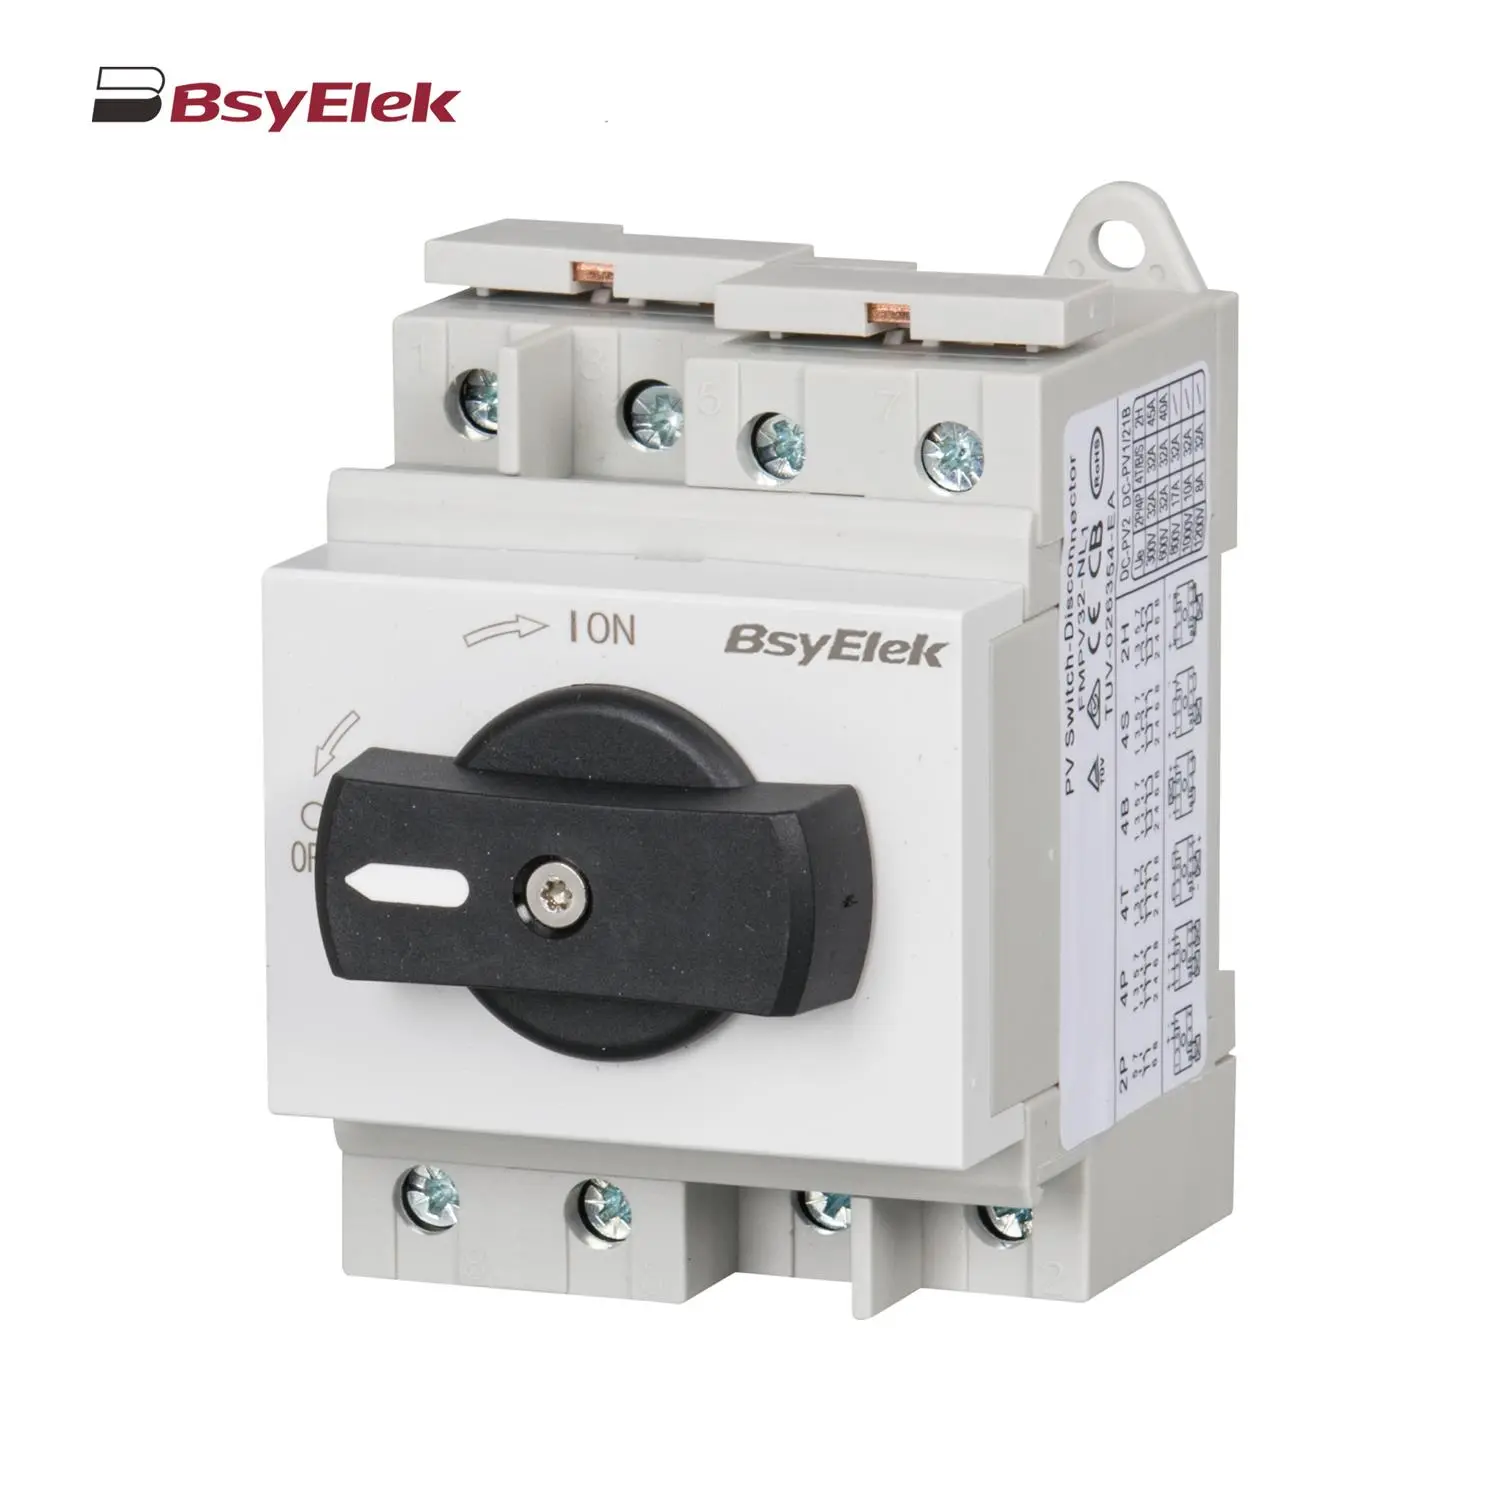 BYPV-NL1/T PV Isolator Switch with Ultra-thin Lever Handle
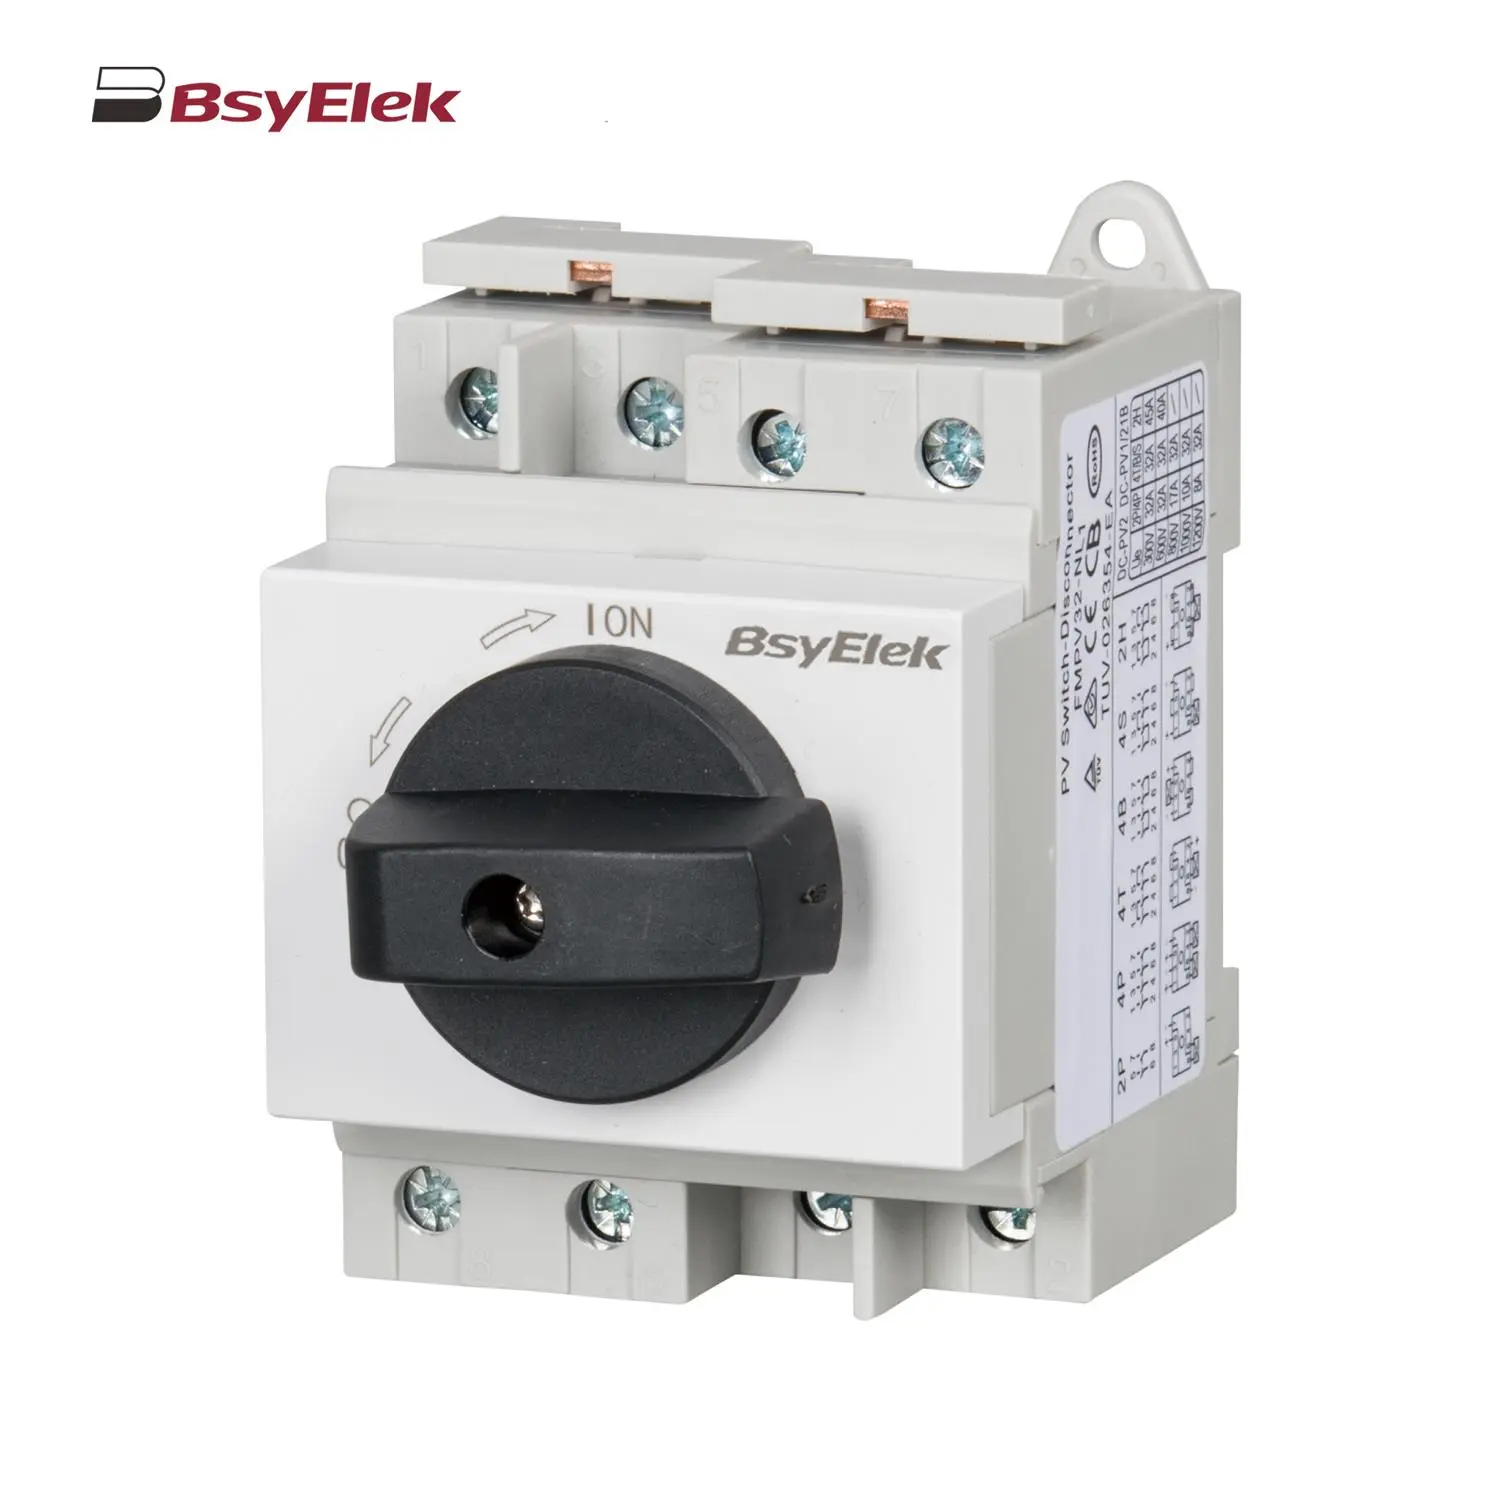 BYPV-NL1 PV Isolator Switch with Lever Handle
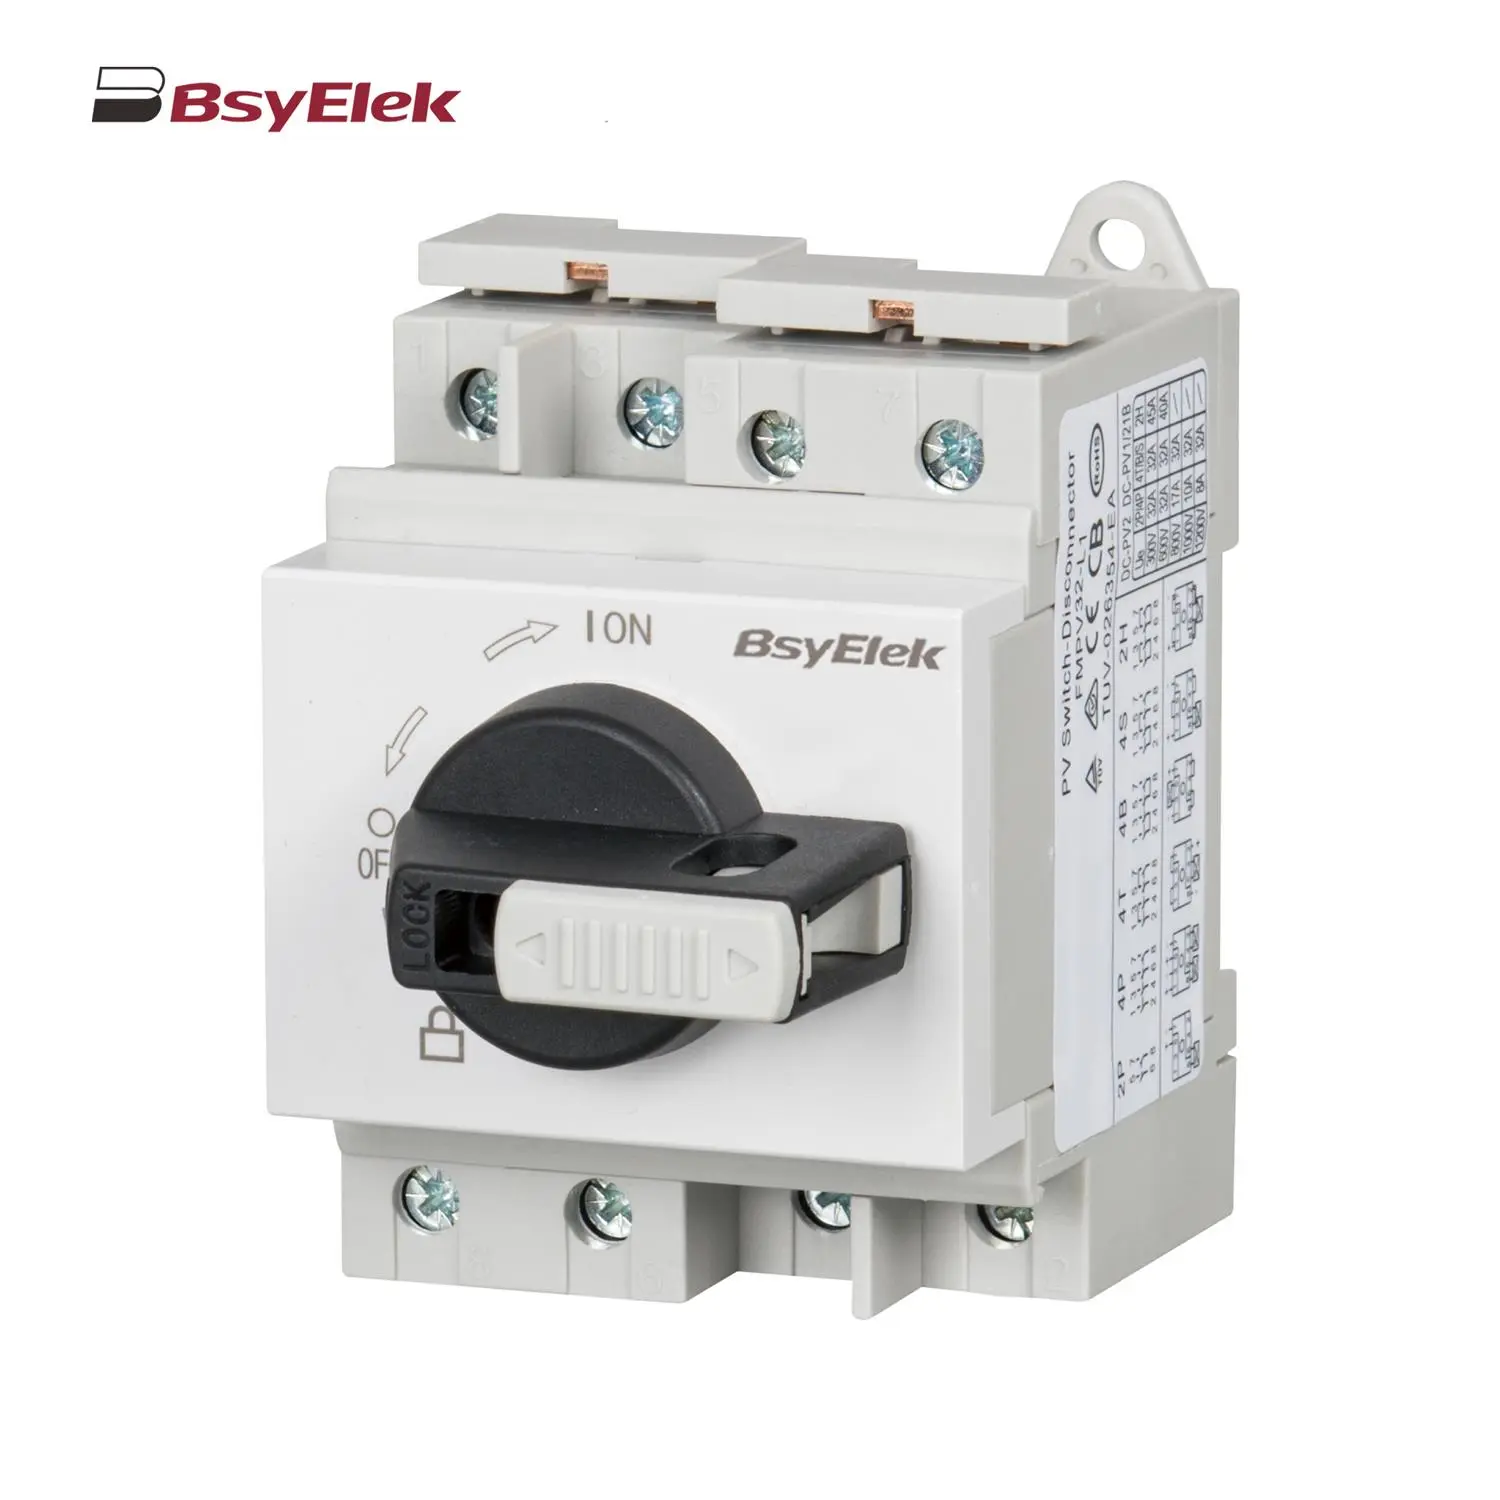 BYPV-L1/L2 PV Isolator Switch with Lockable Lever Handle
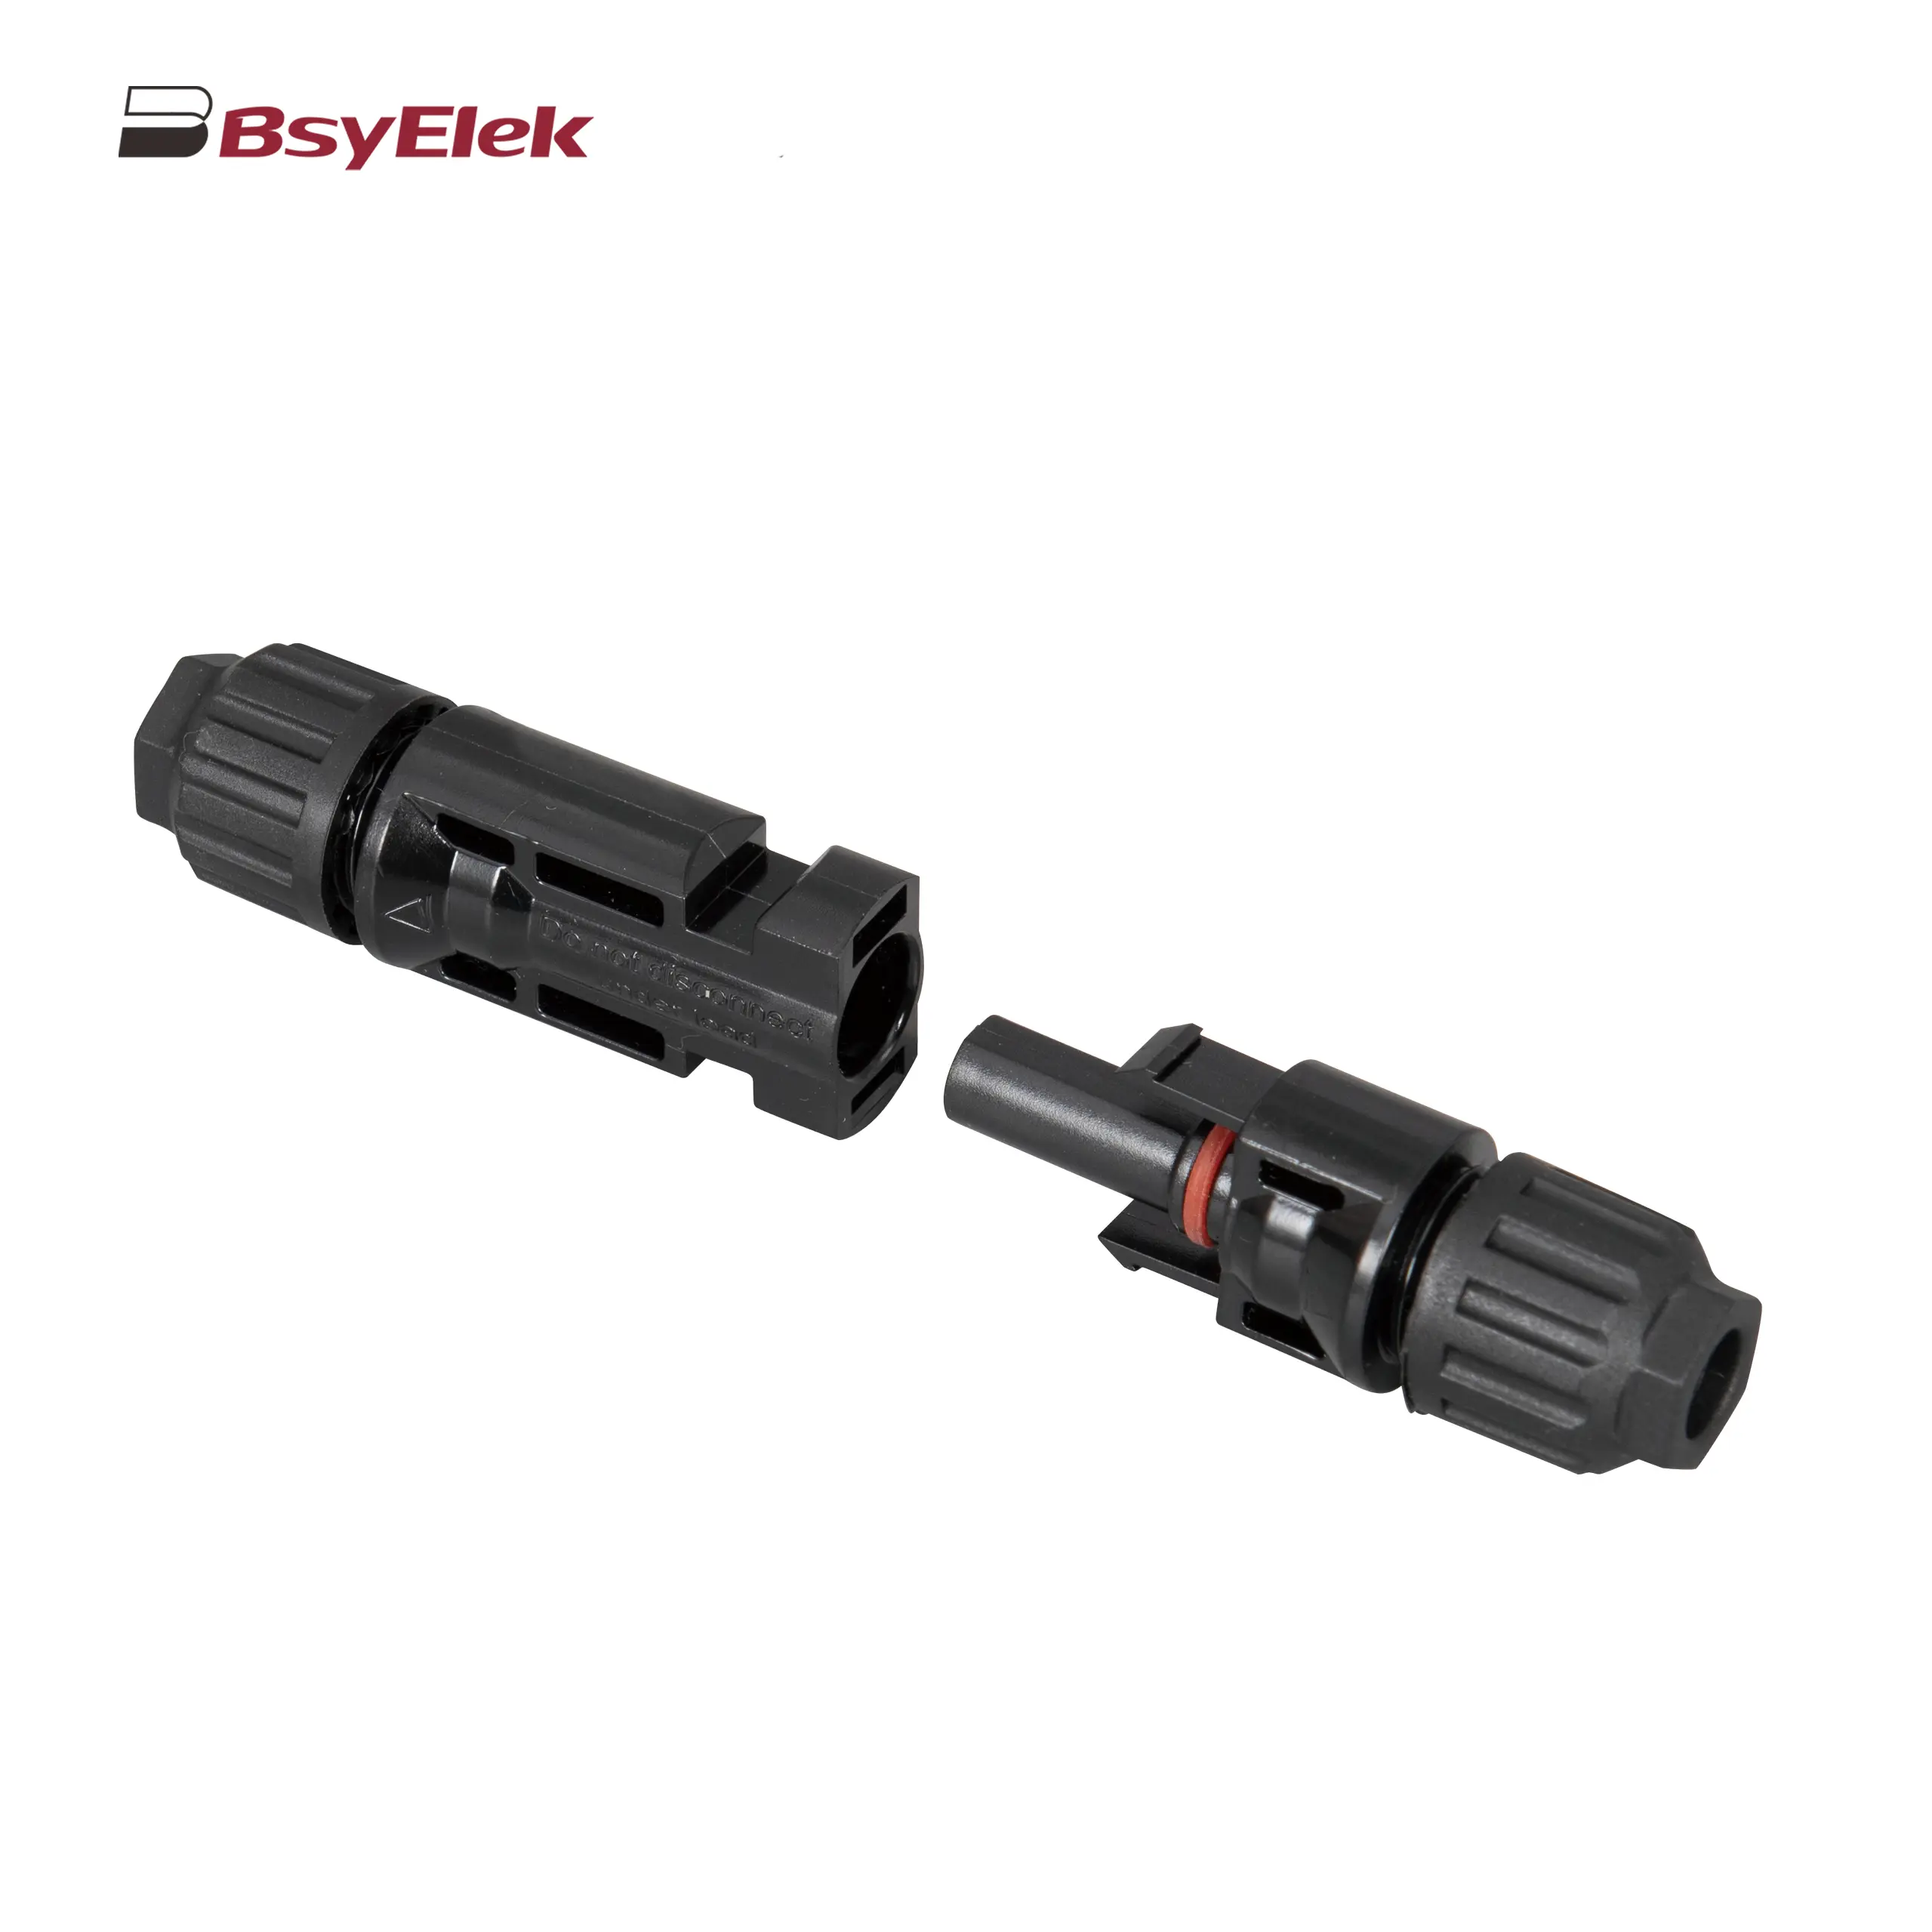 PV-BY-01 30A/50A 1000V Photovoltaic Connector
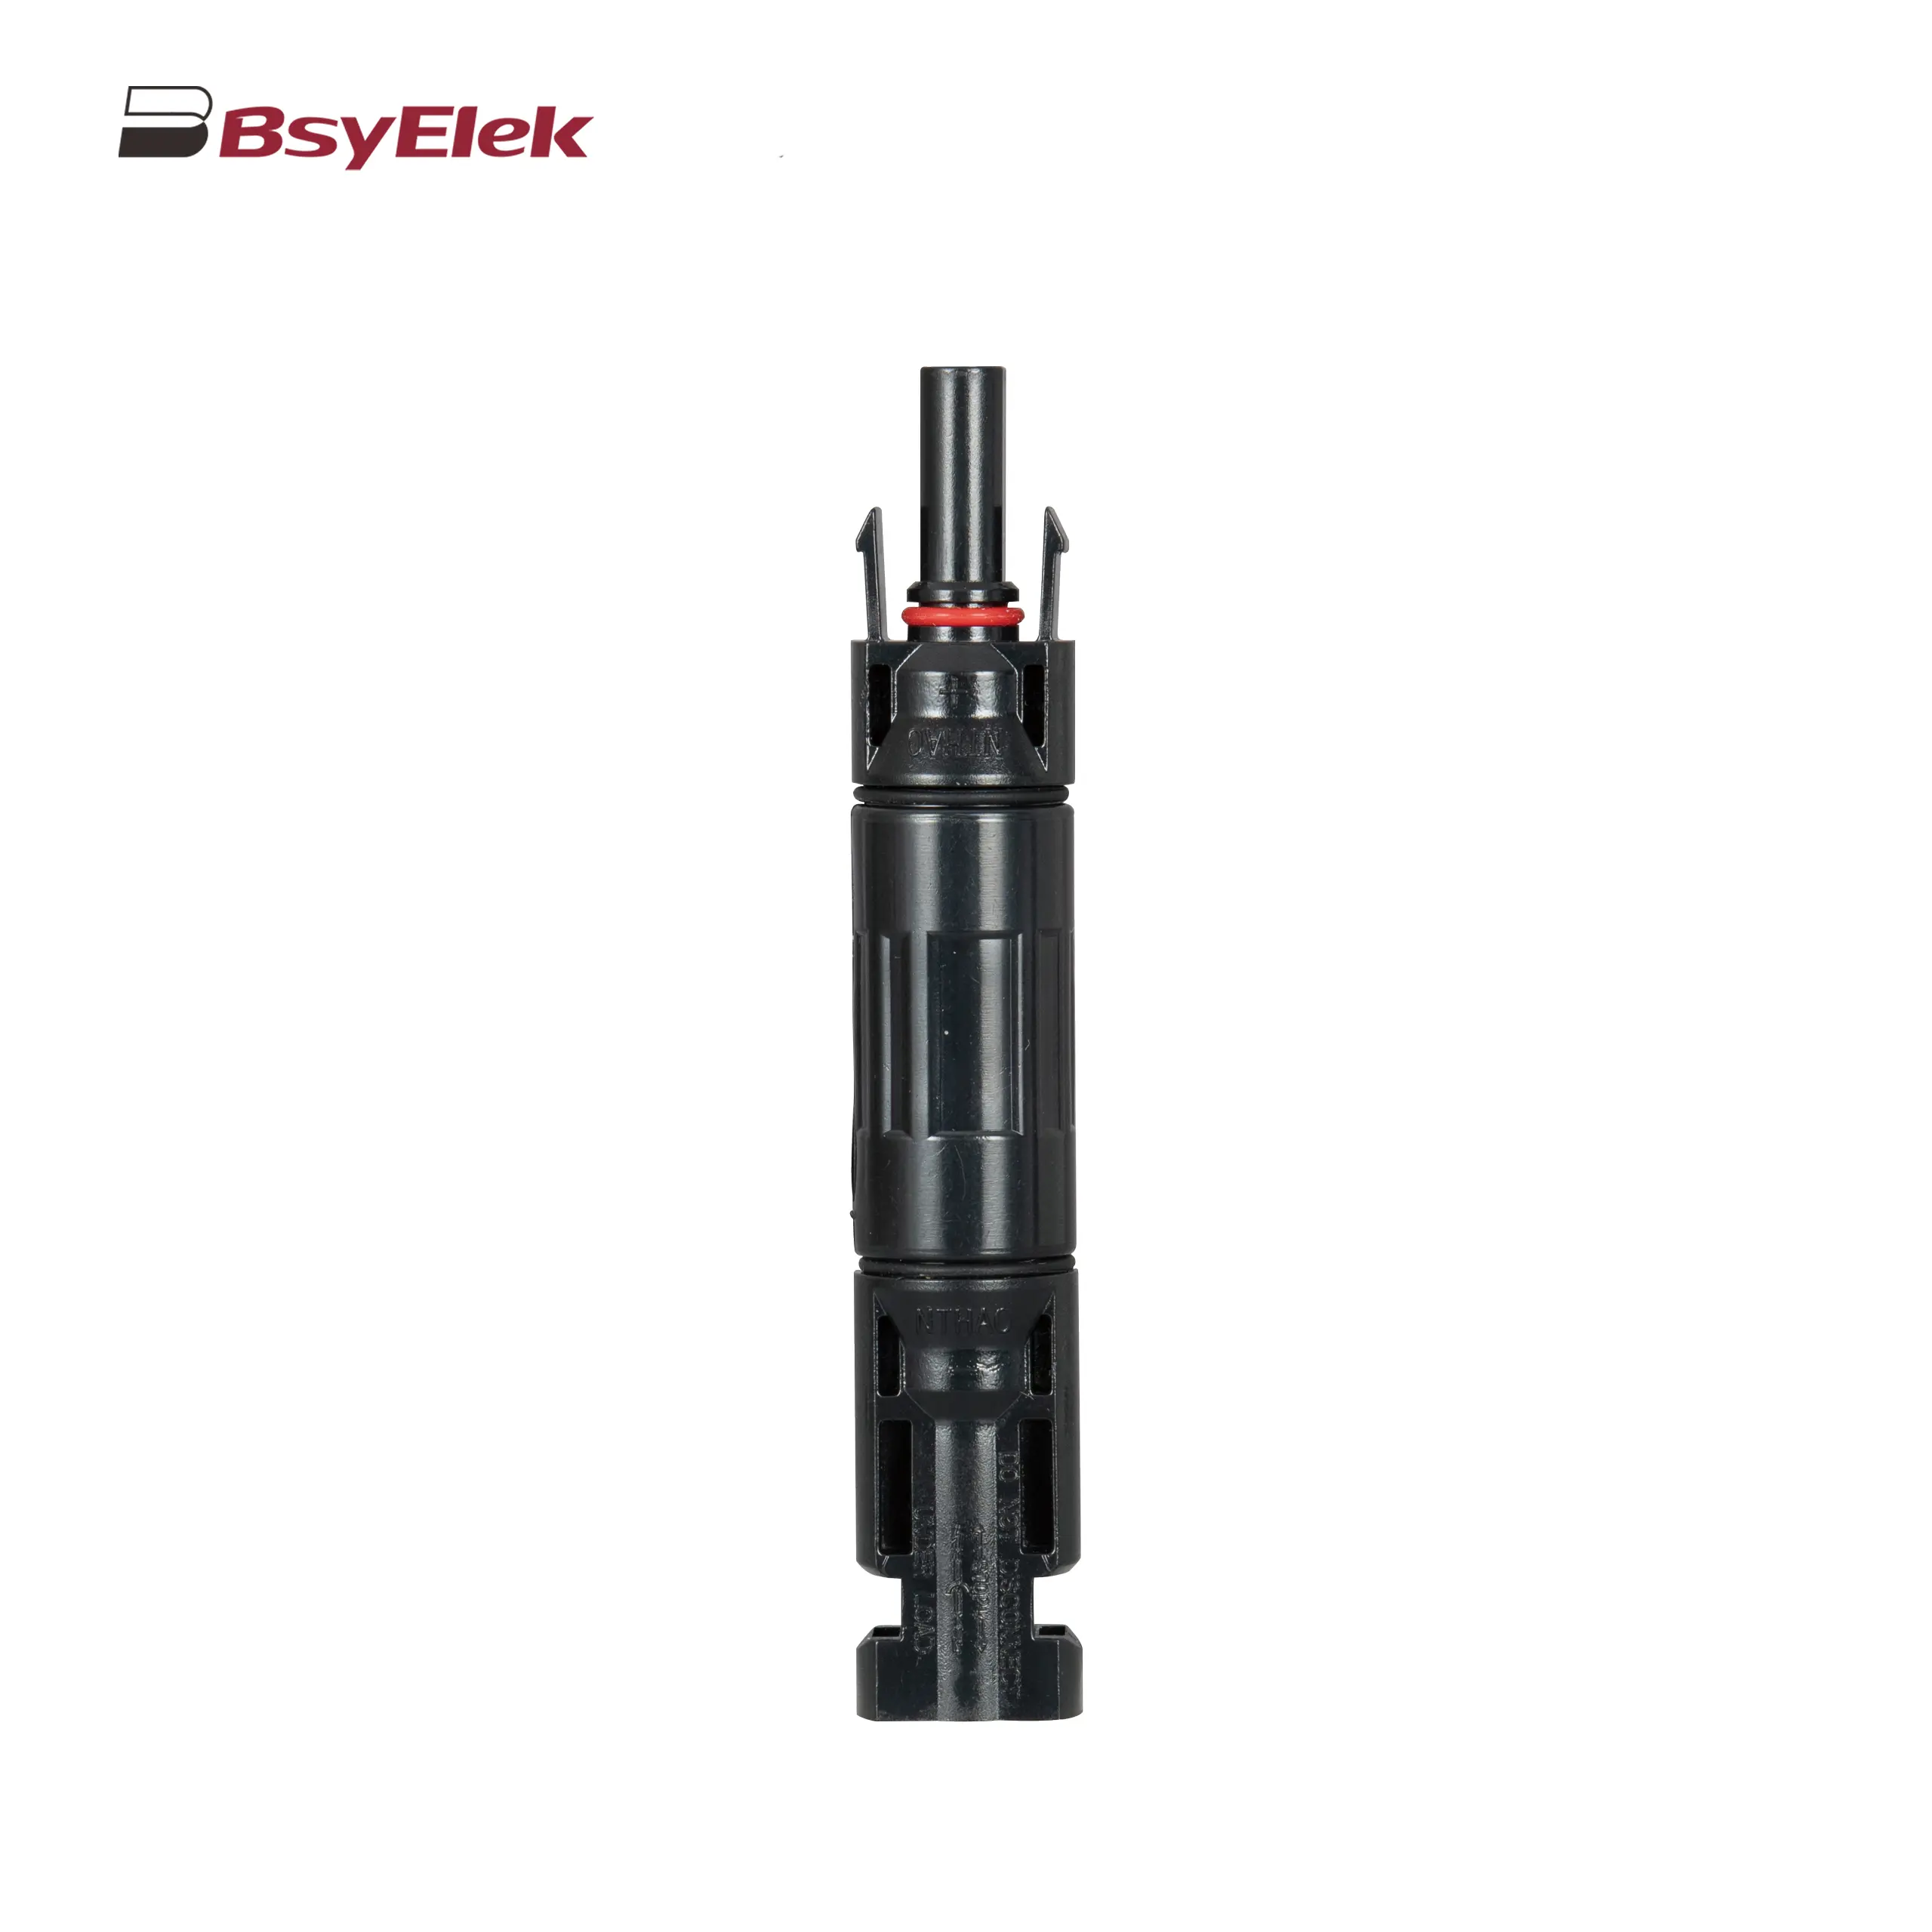 PV-BY-F01 30A 1500V Diode/Fuse Type Connector
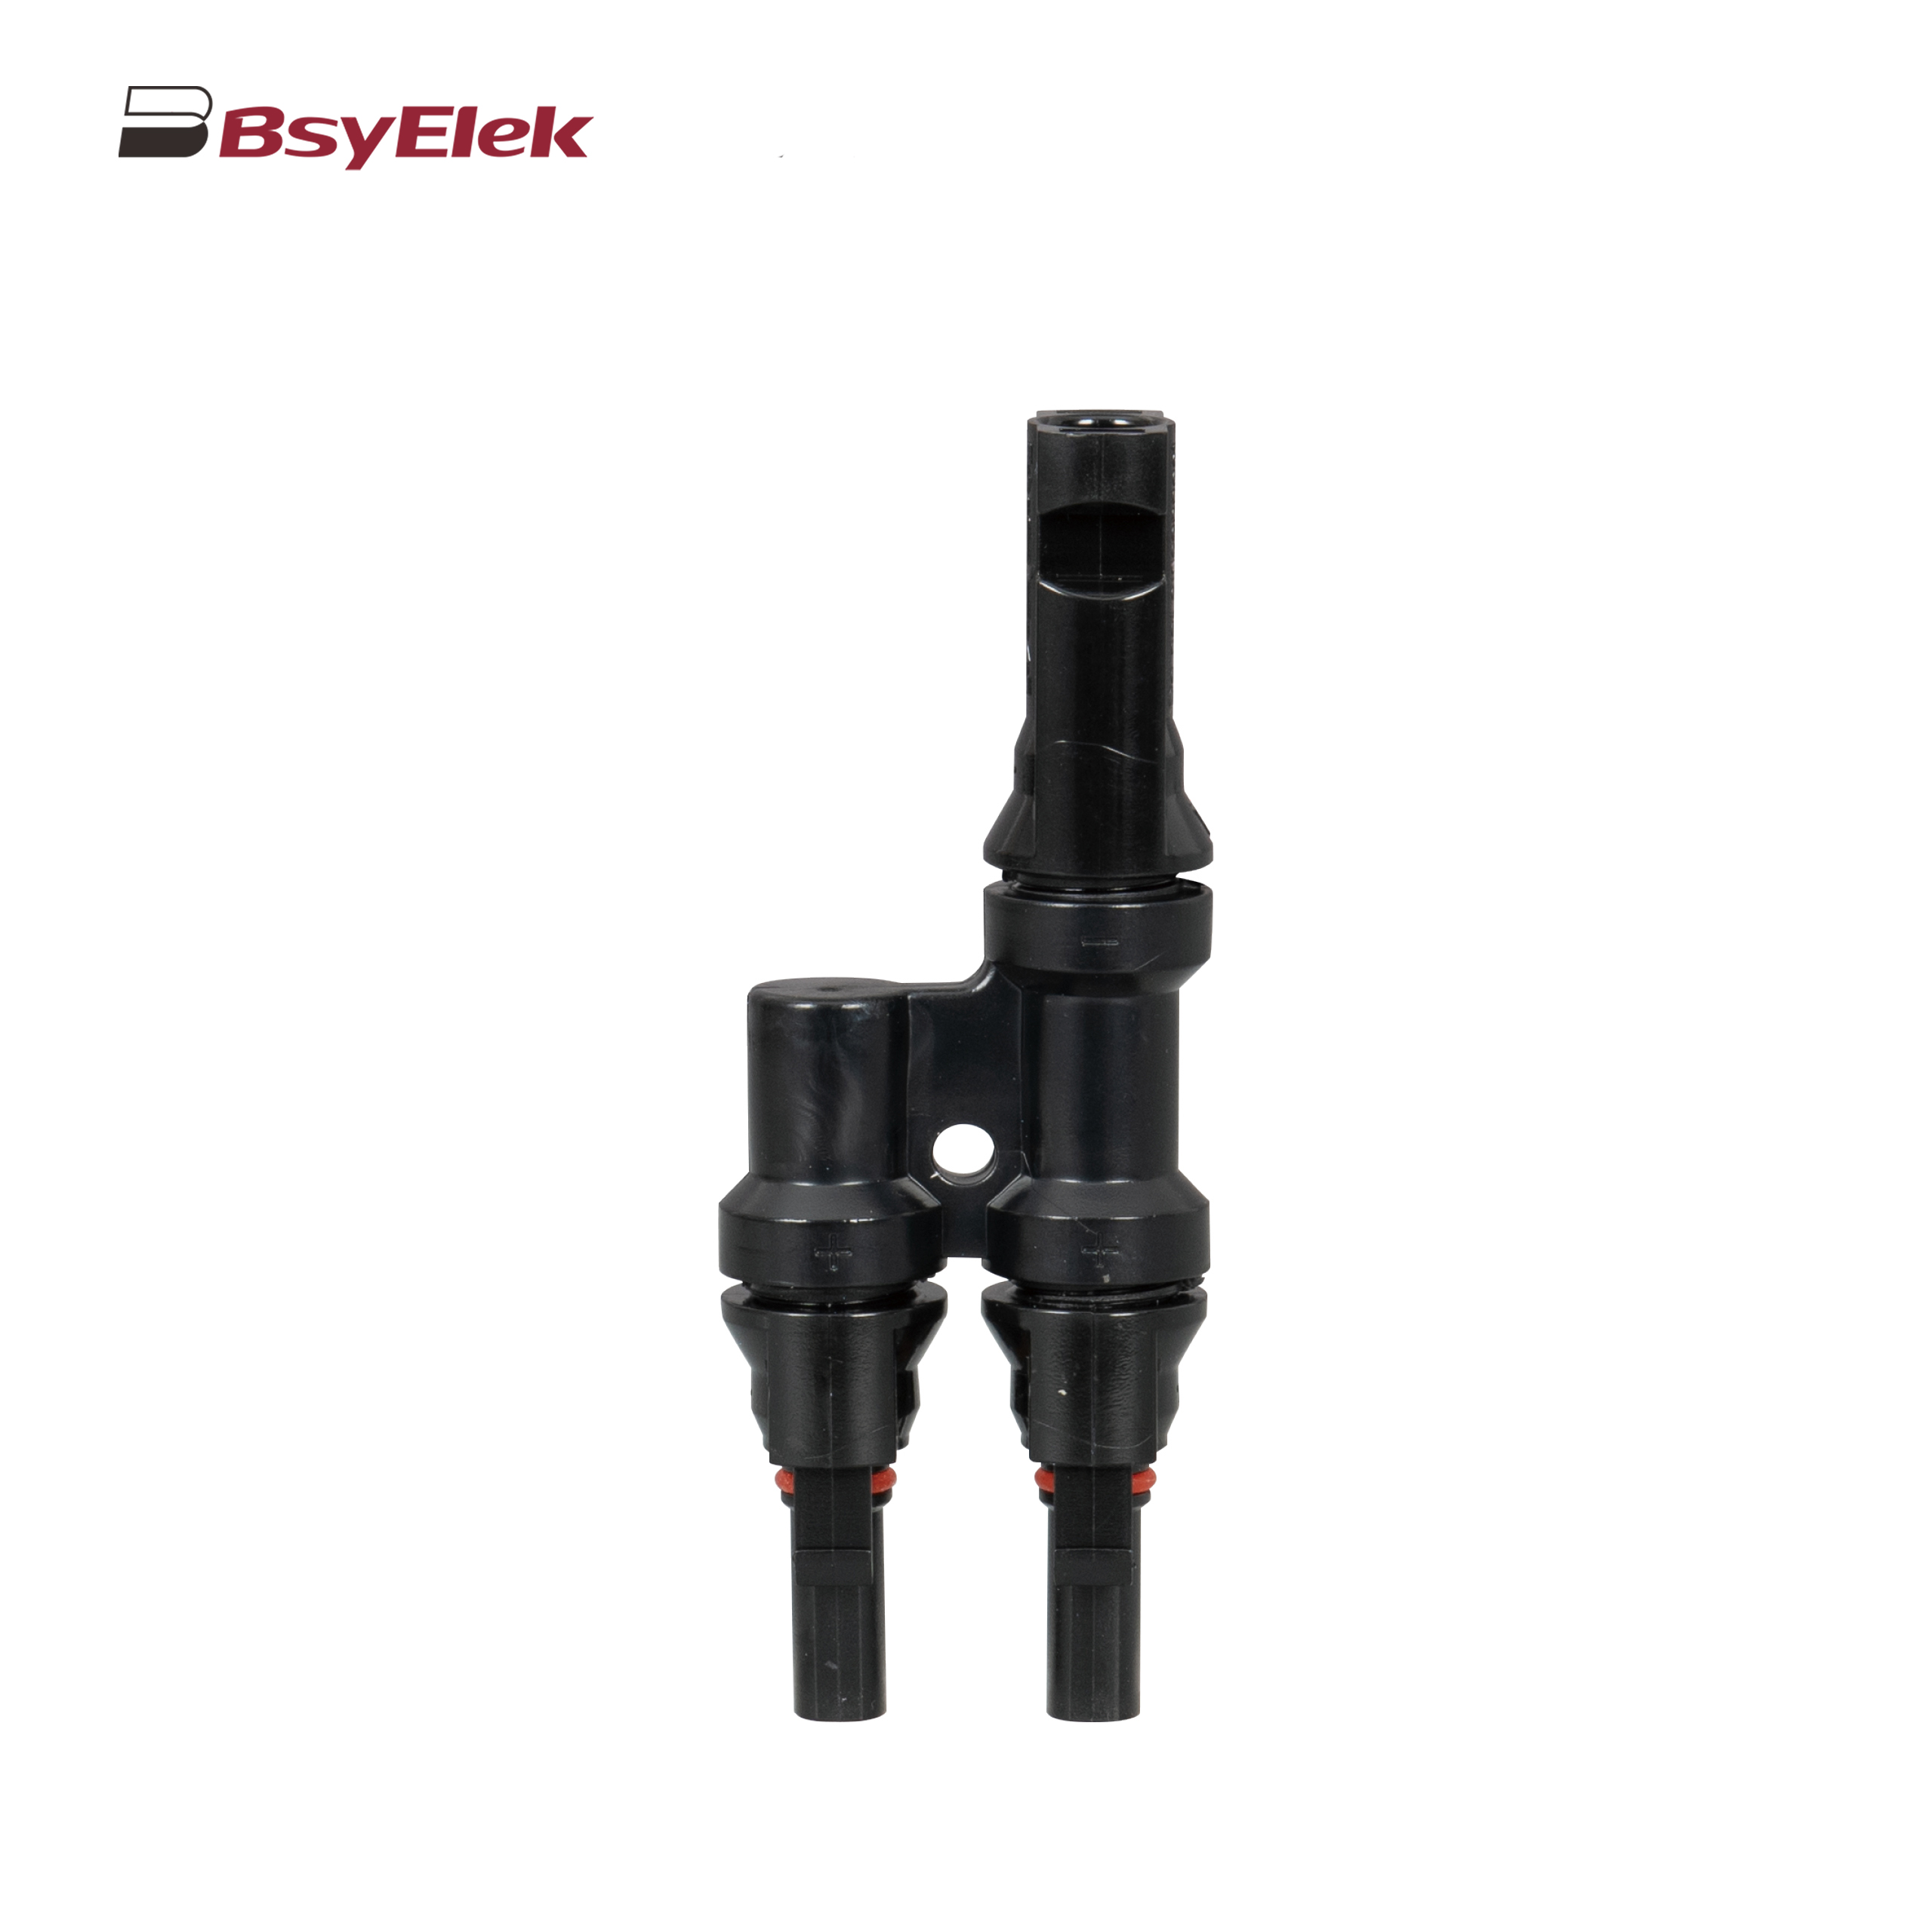 PV-BY-T 50A 1500V T Type Branch Connector
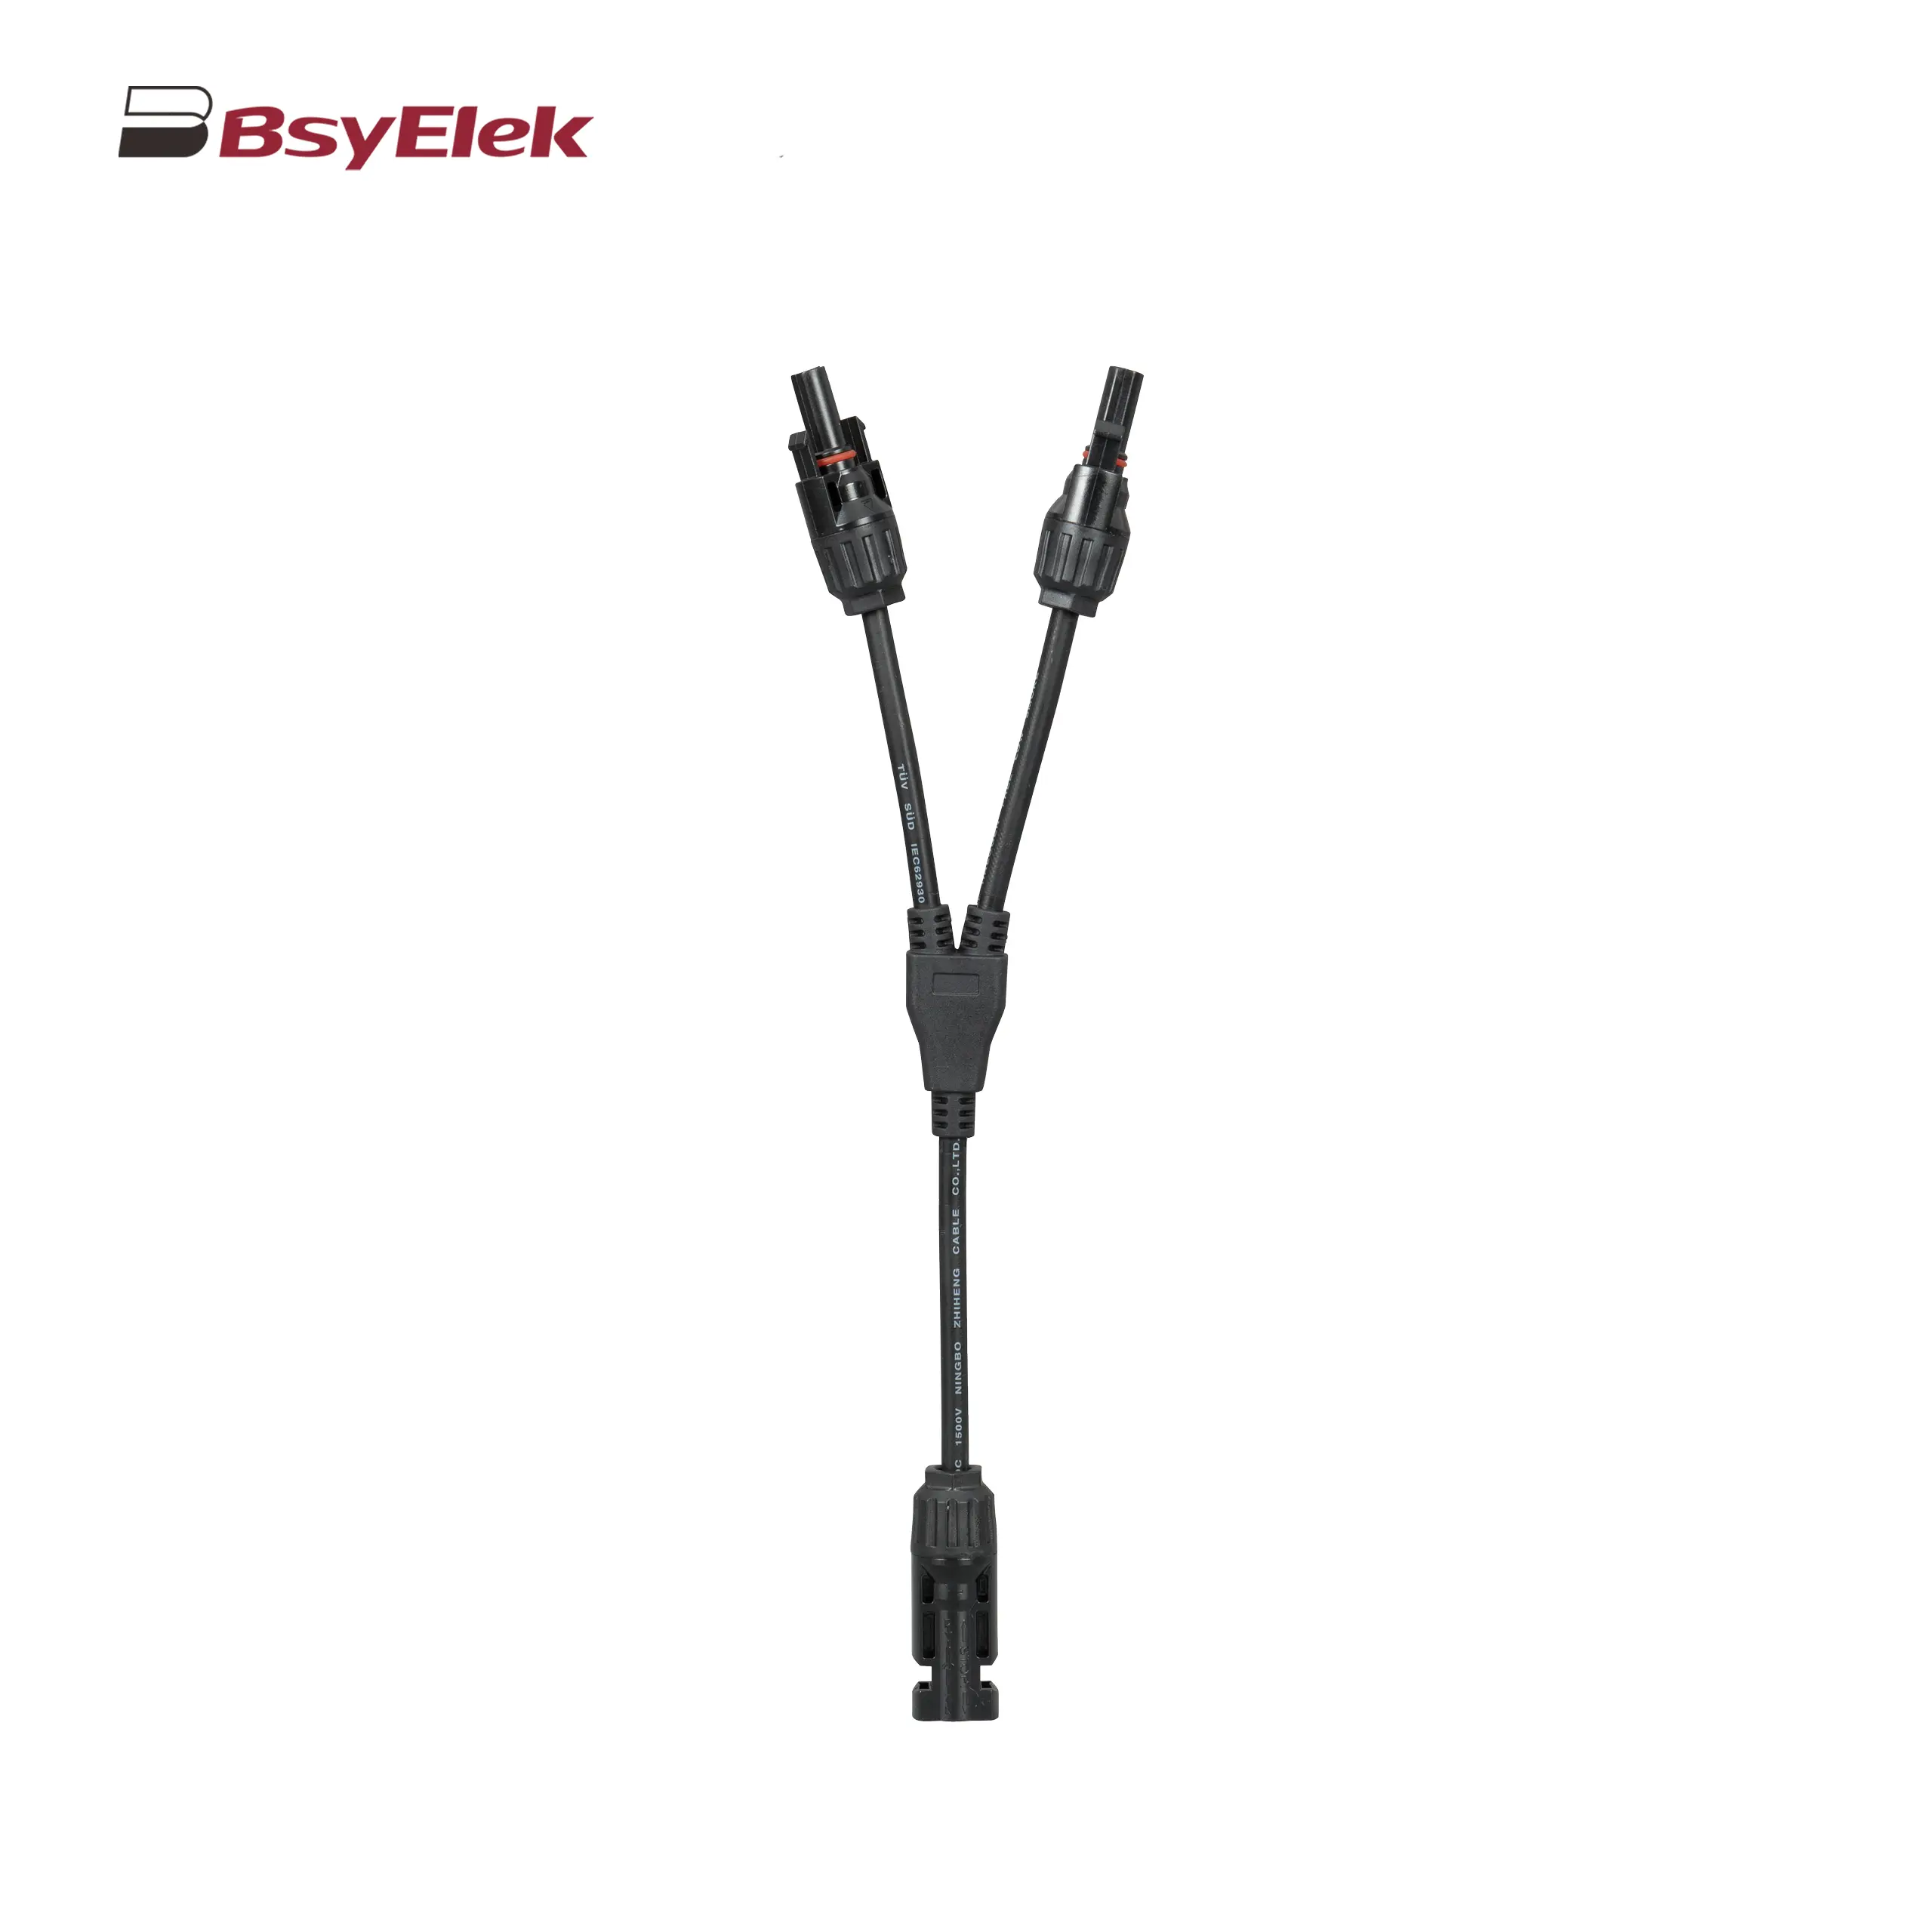 PV-BY-Y 30A 1500V Y Type Branch Connector
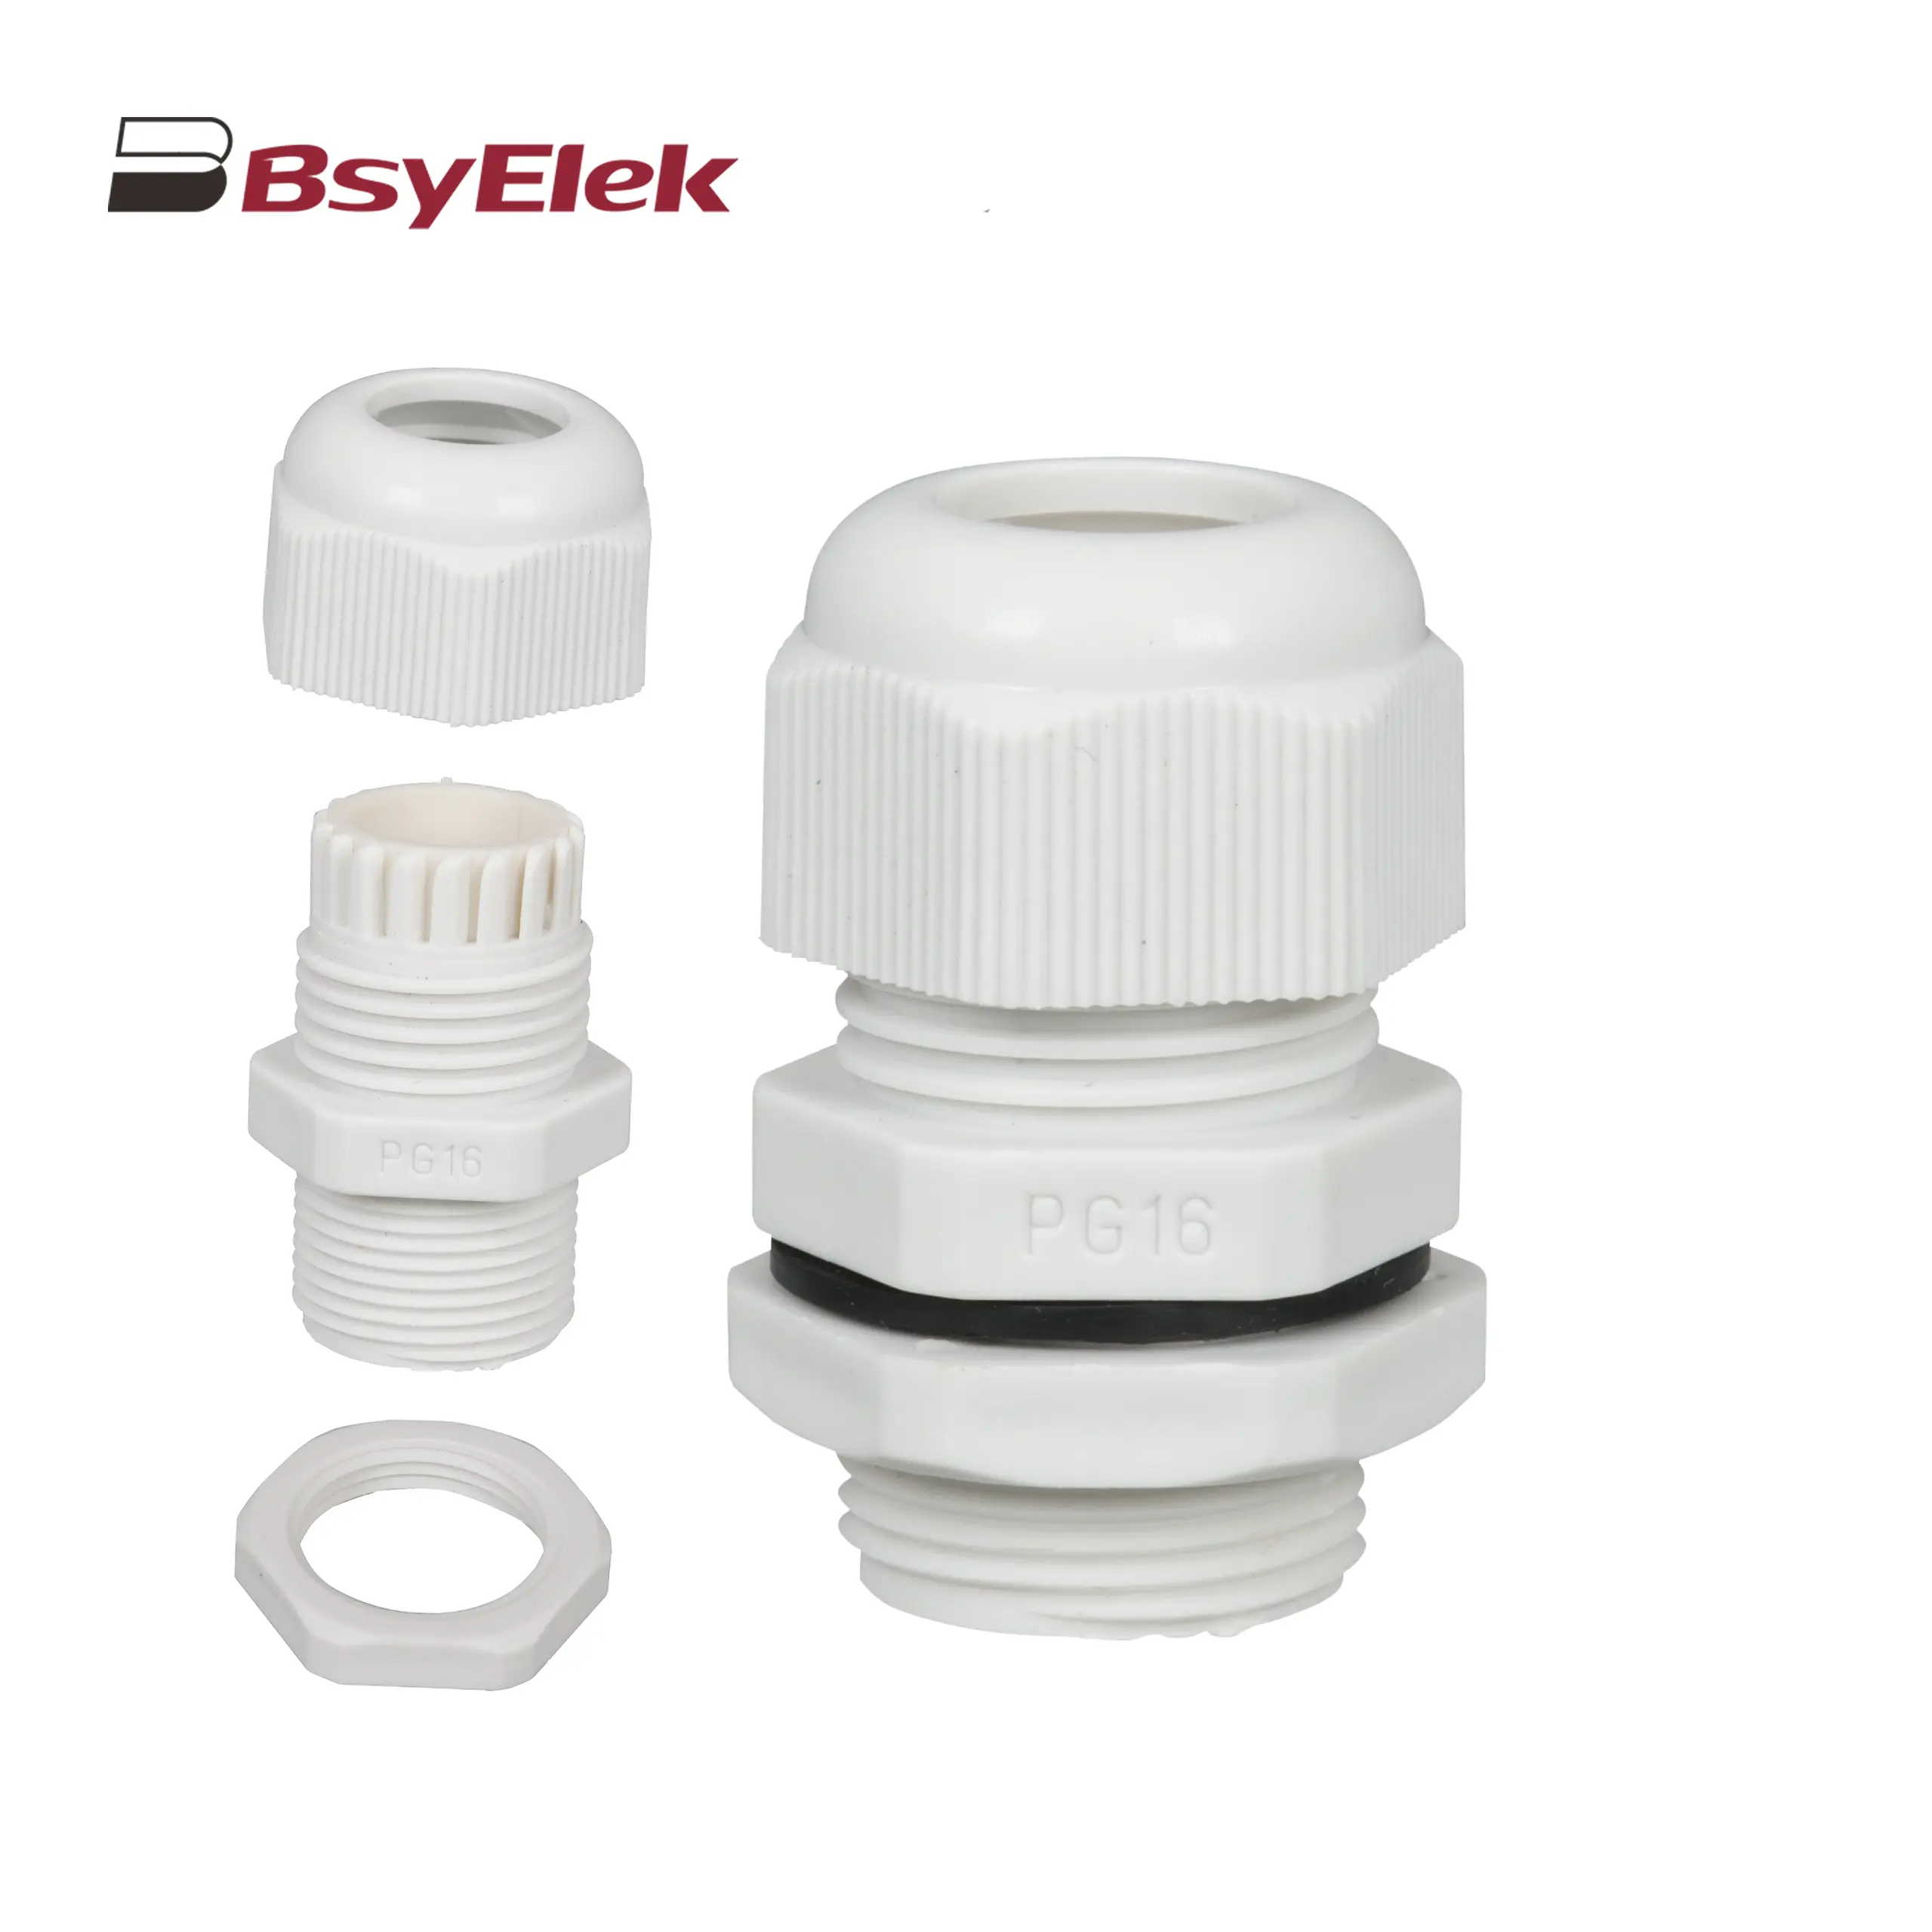 PG Waterproof Cable Gland with Washer
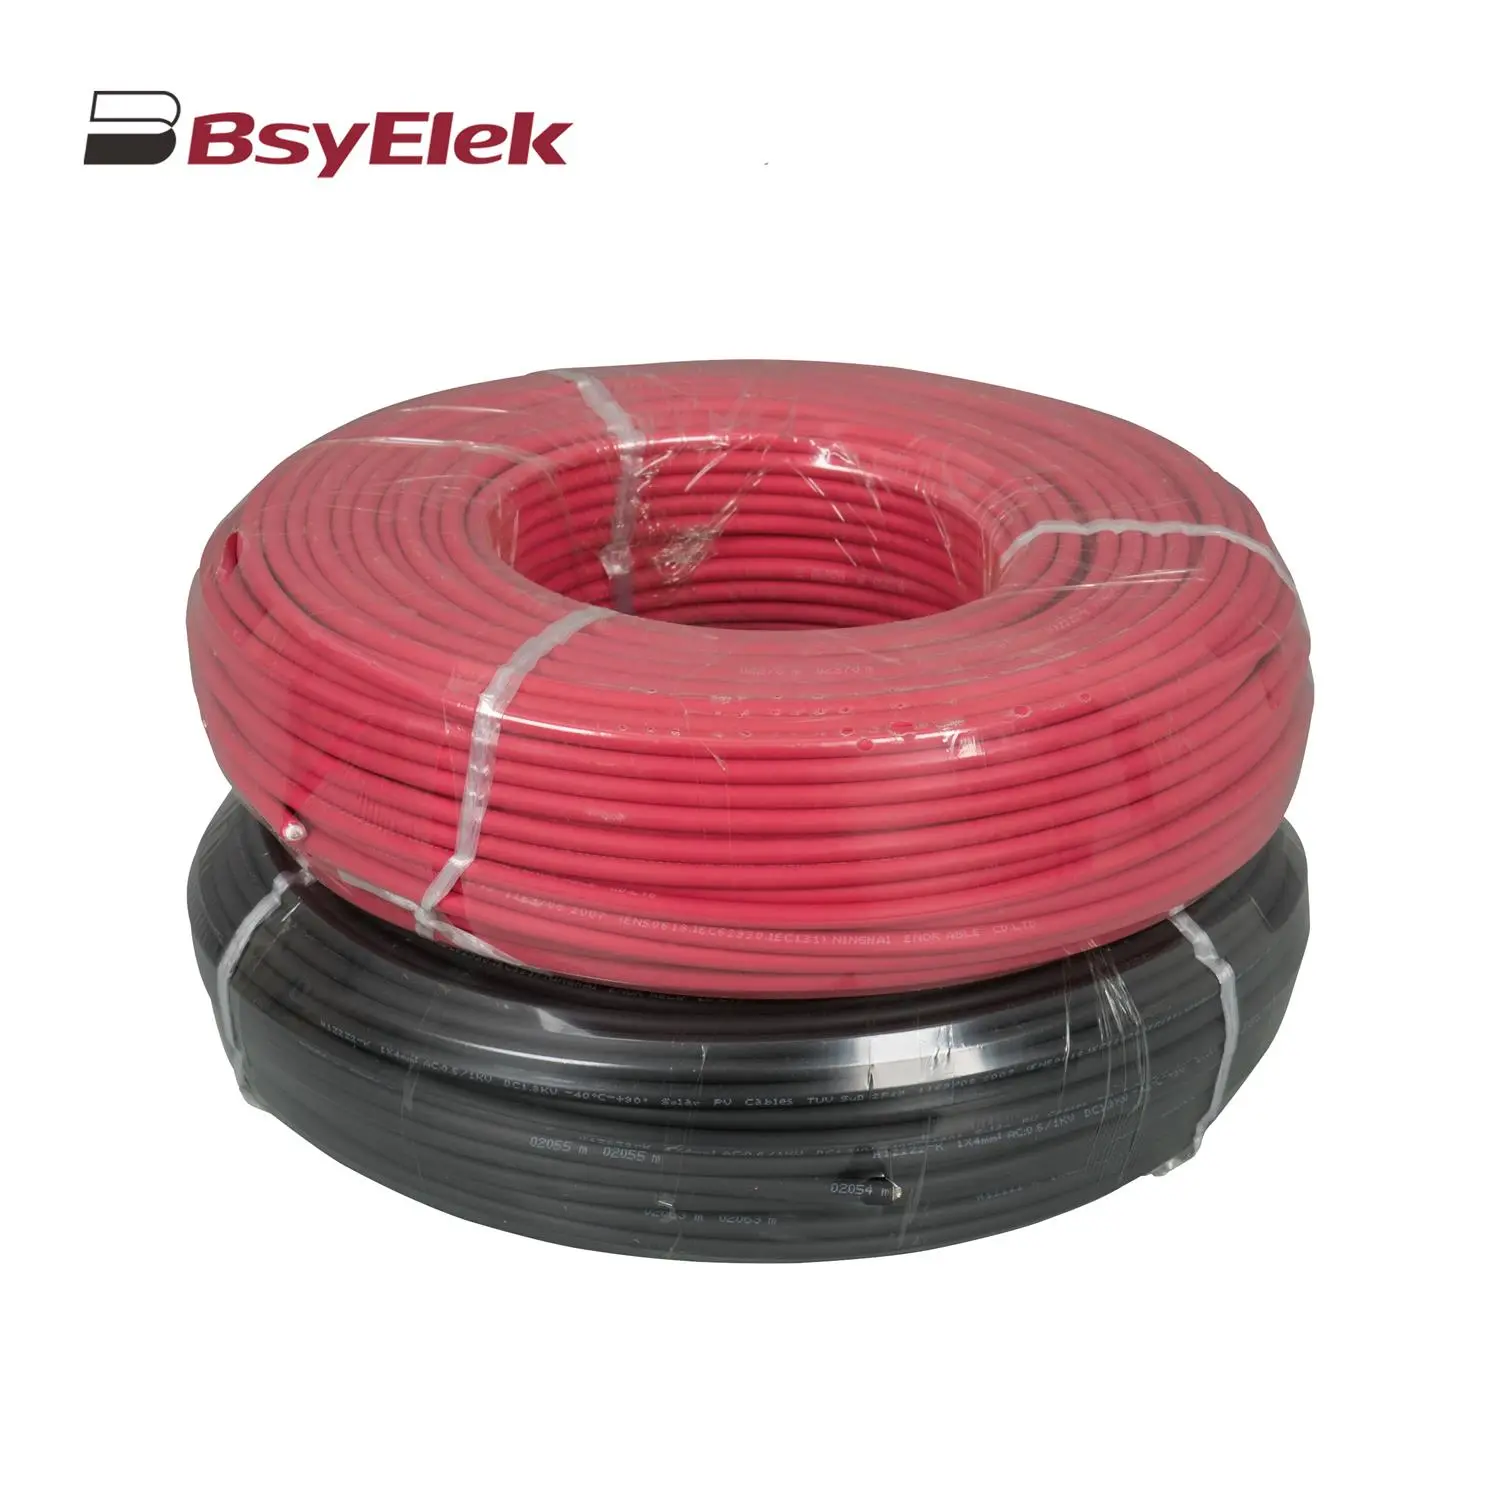 Photovoltaic Cable
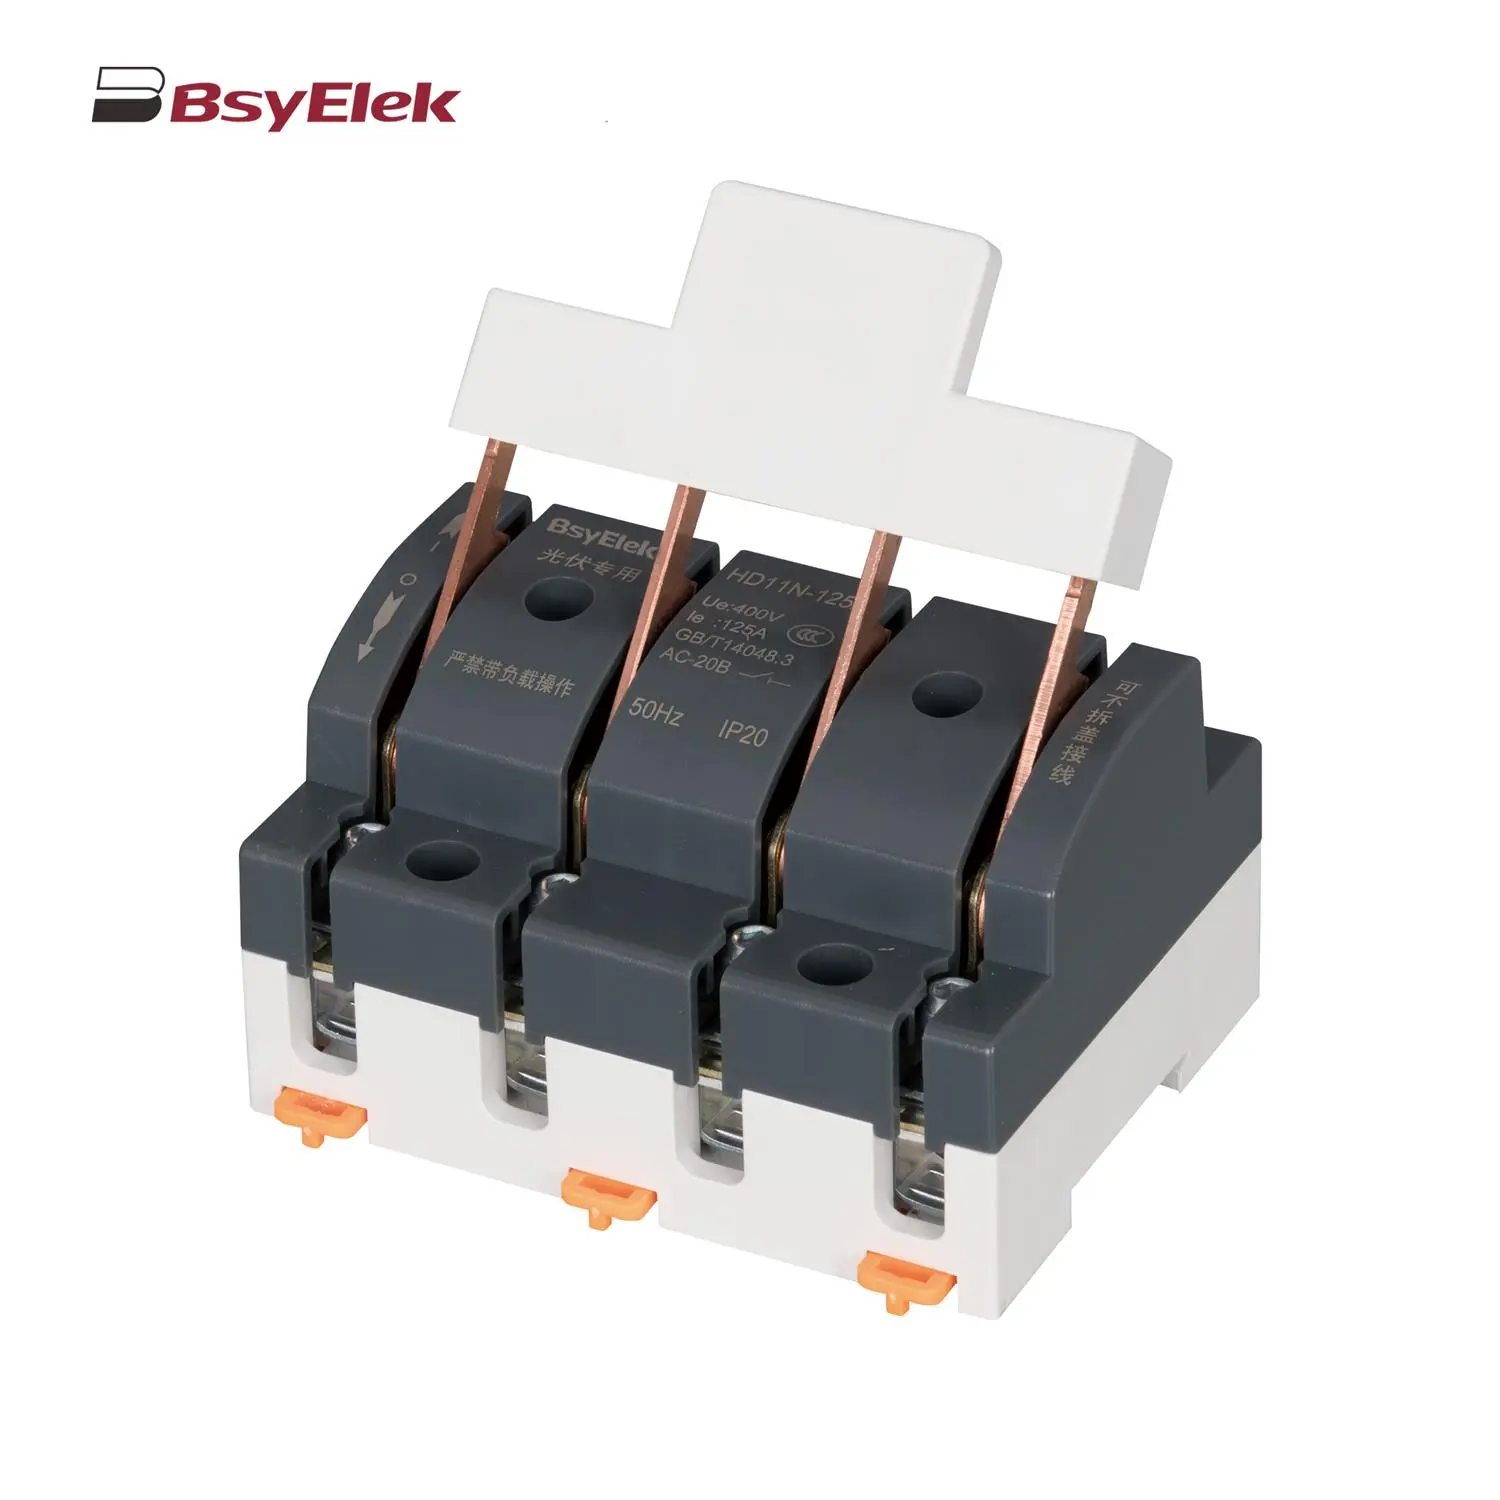 HD11N Photovoltaic Knife Switch
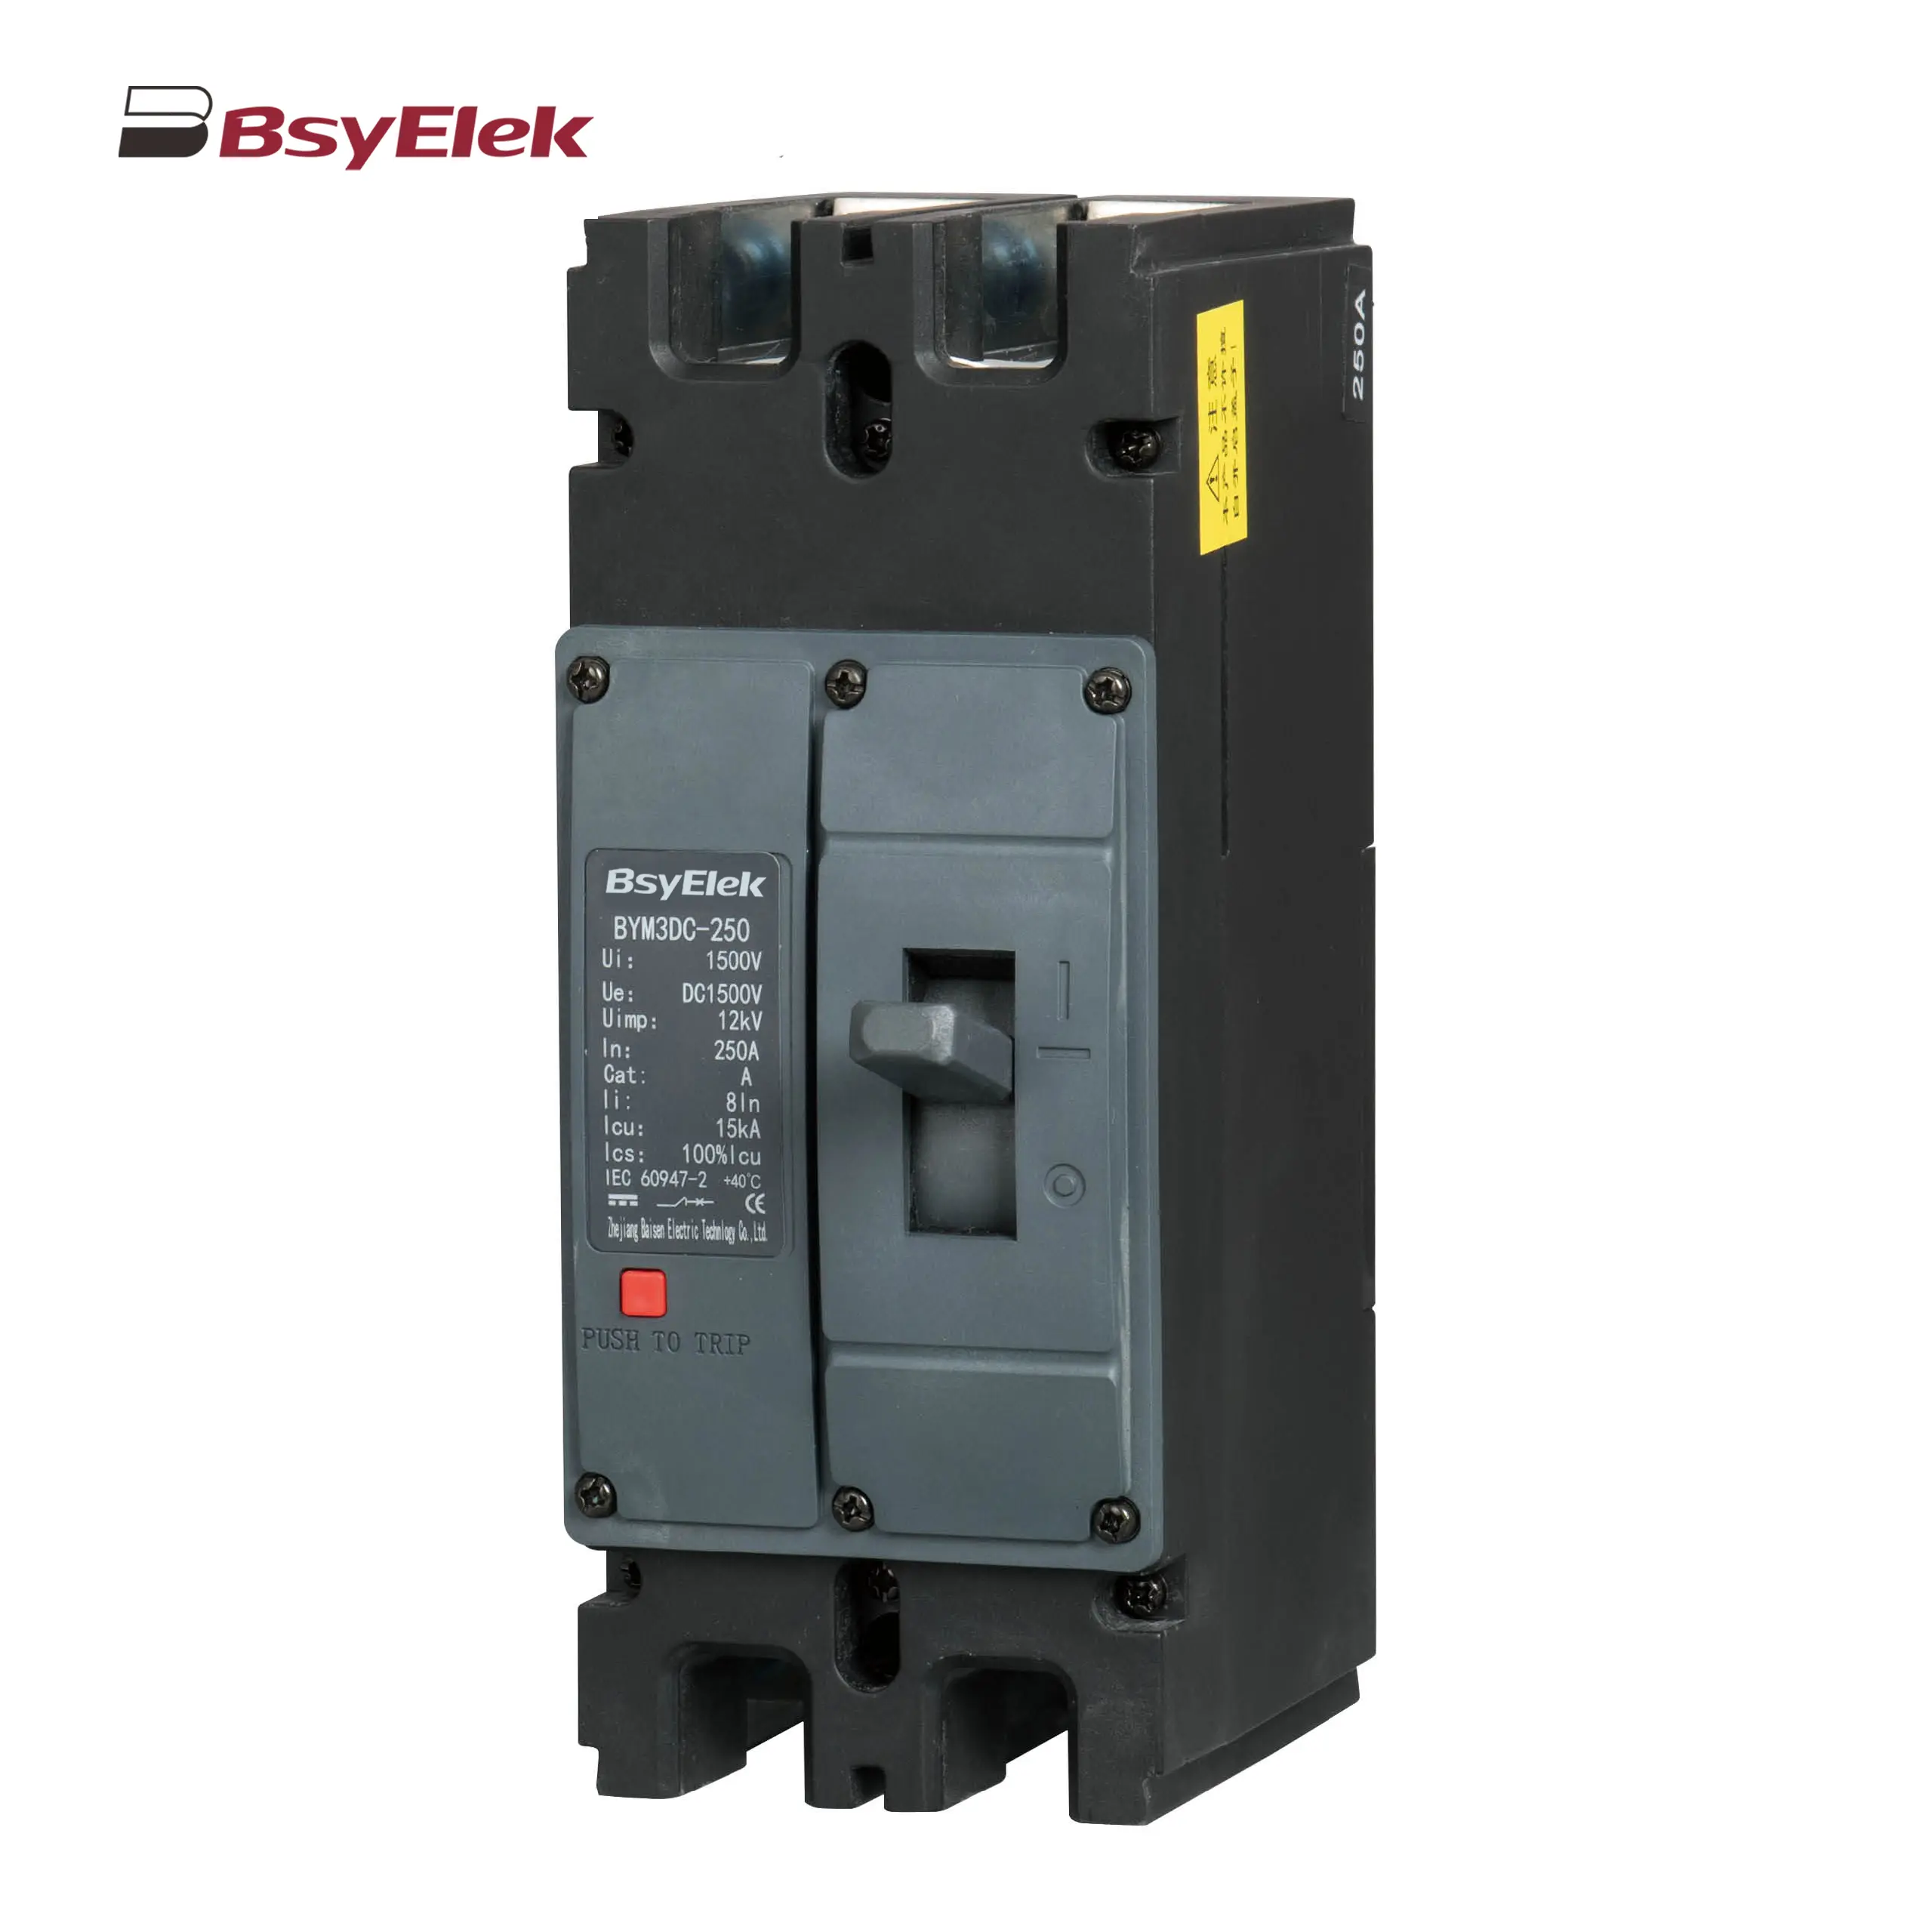 BYM3DC MCCB Photovoltaic DC Molded Case Circuit Breaker
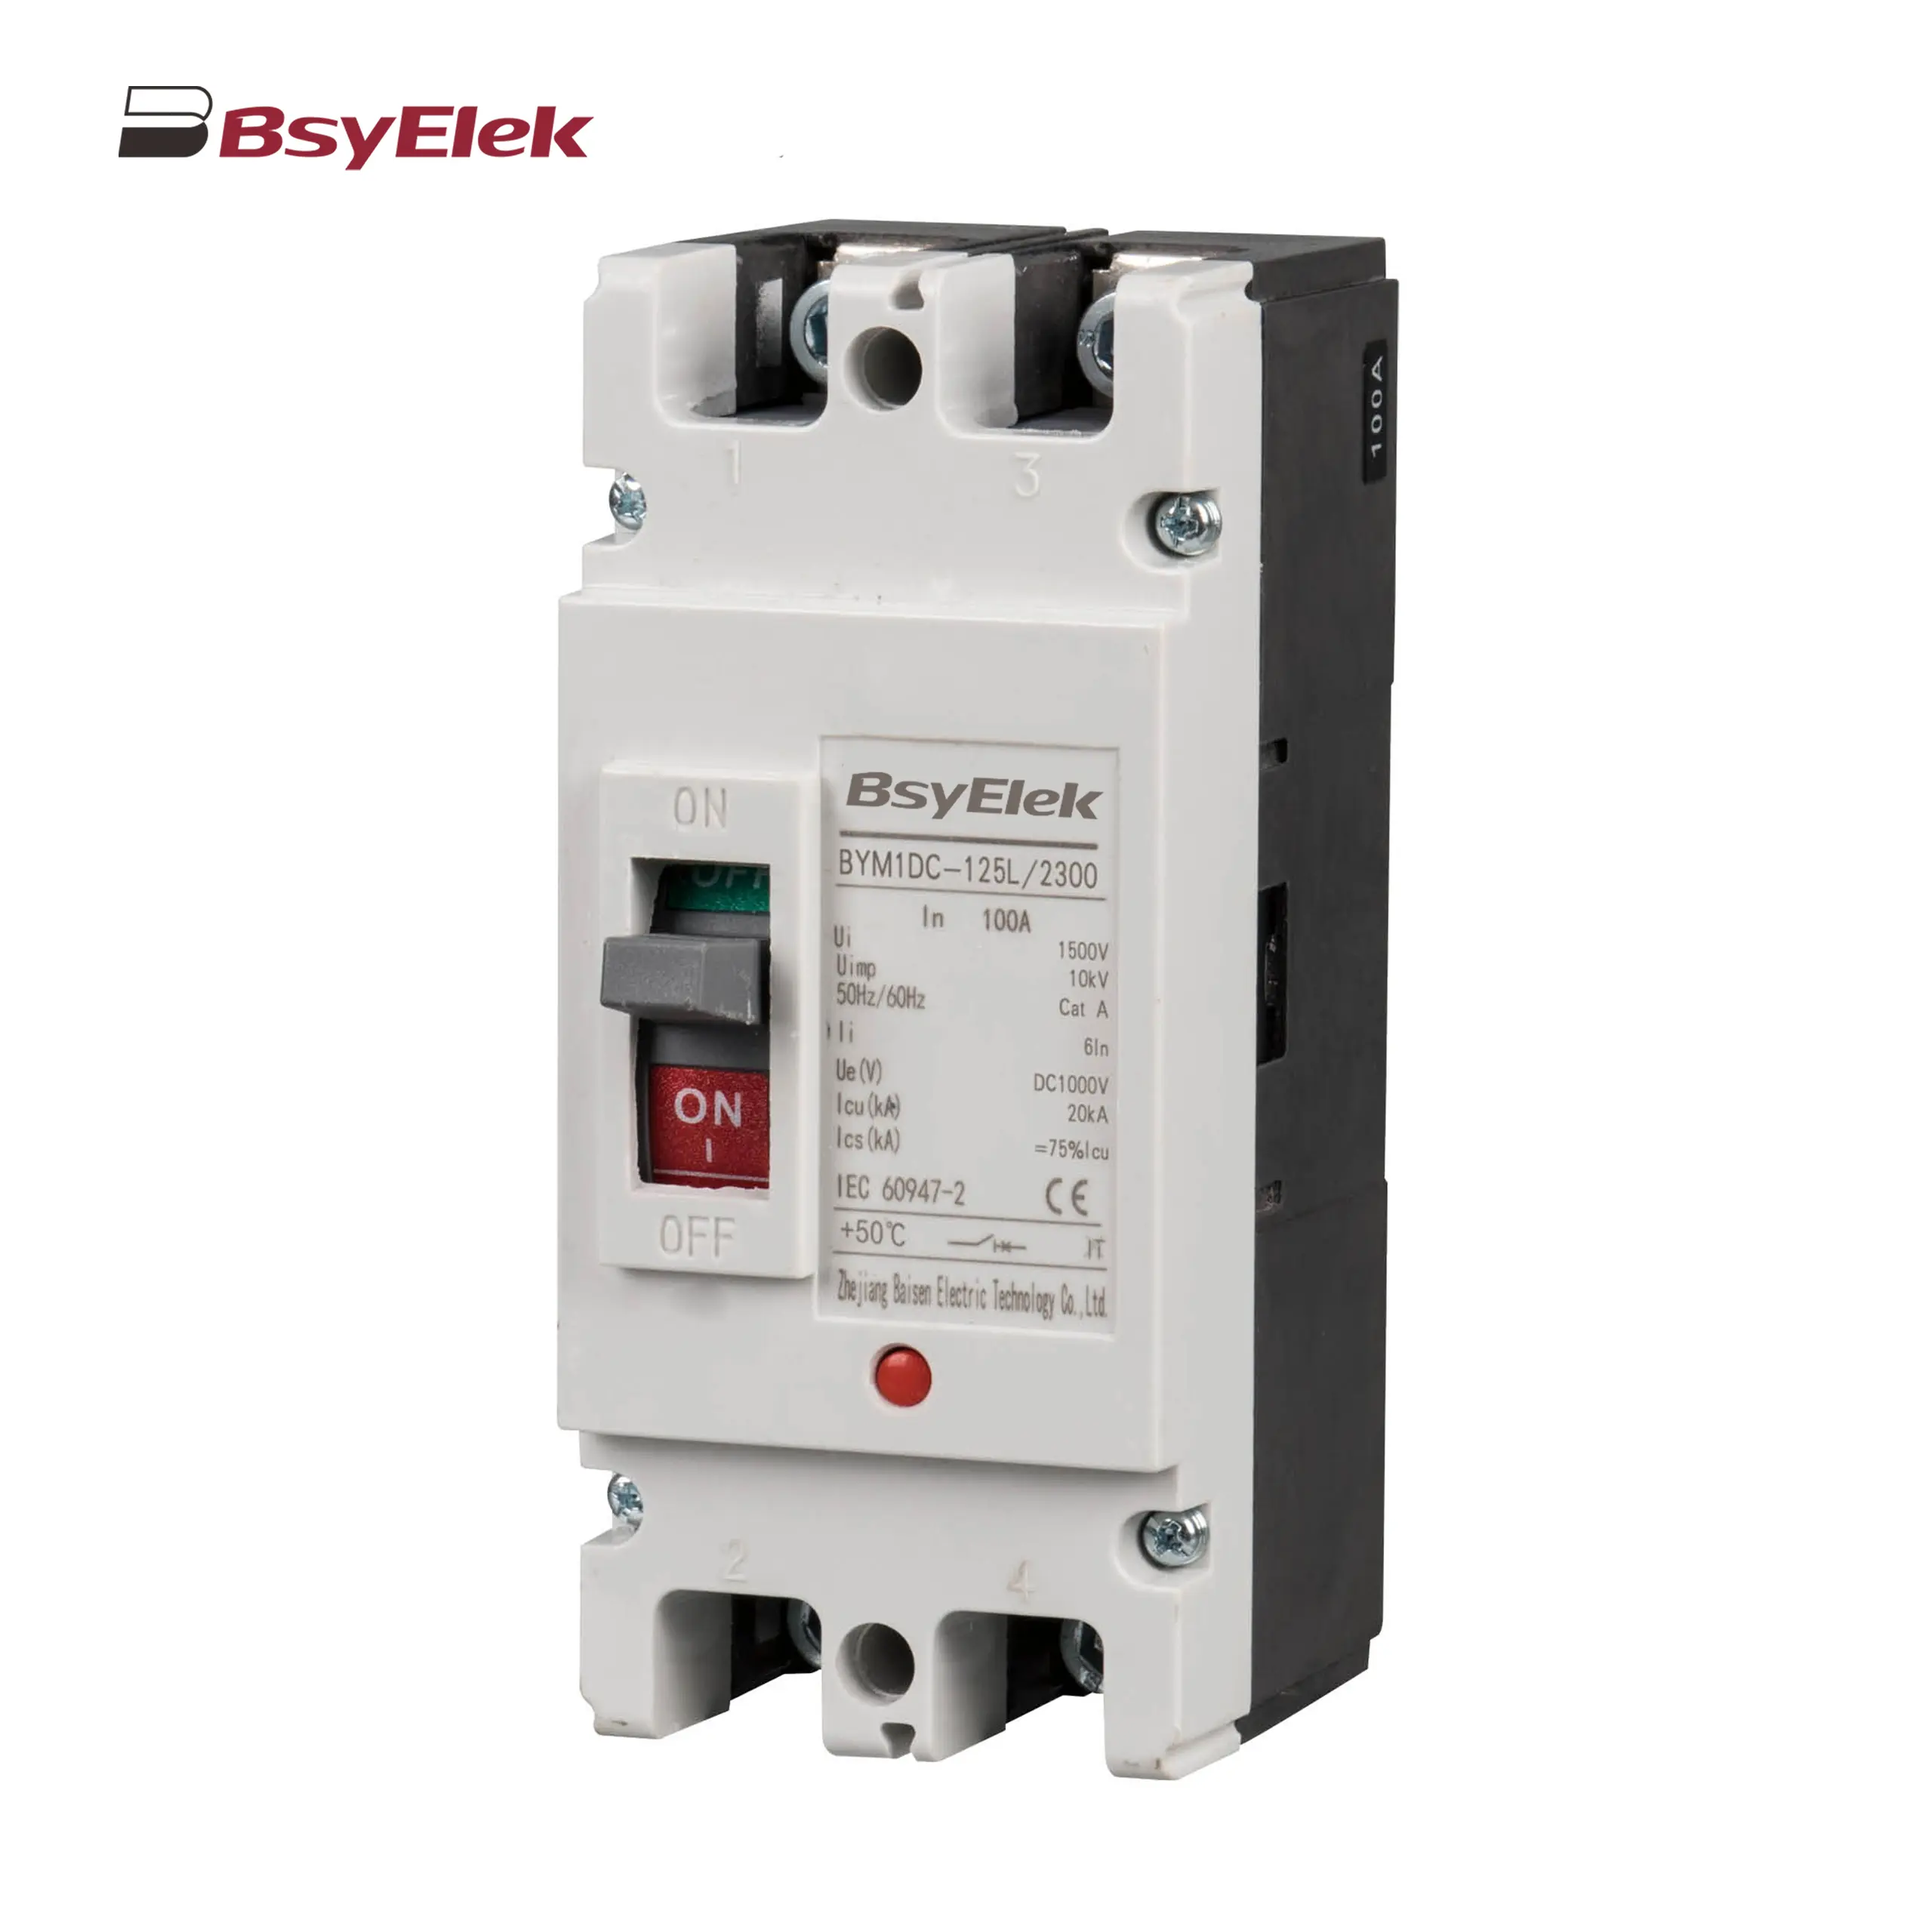 BYM1DC MCCB 1000VDC Thermal Magnetic Type DC Molded Case Circuit Breaker
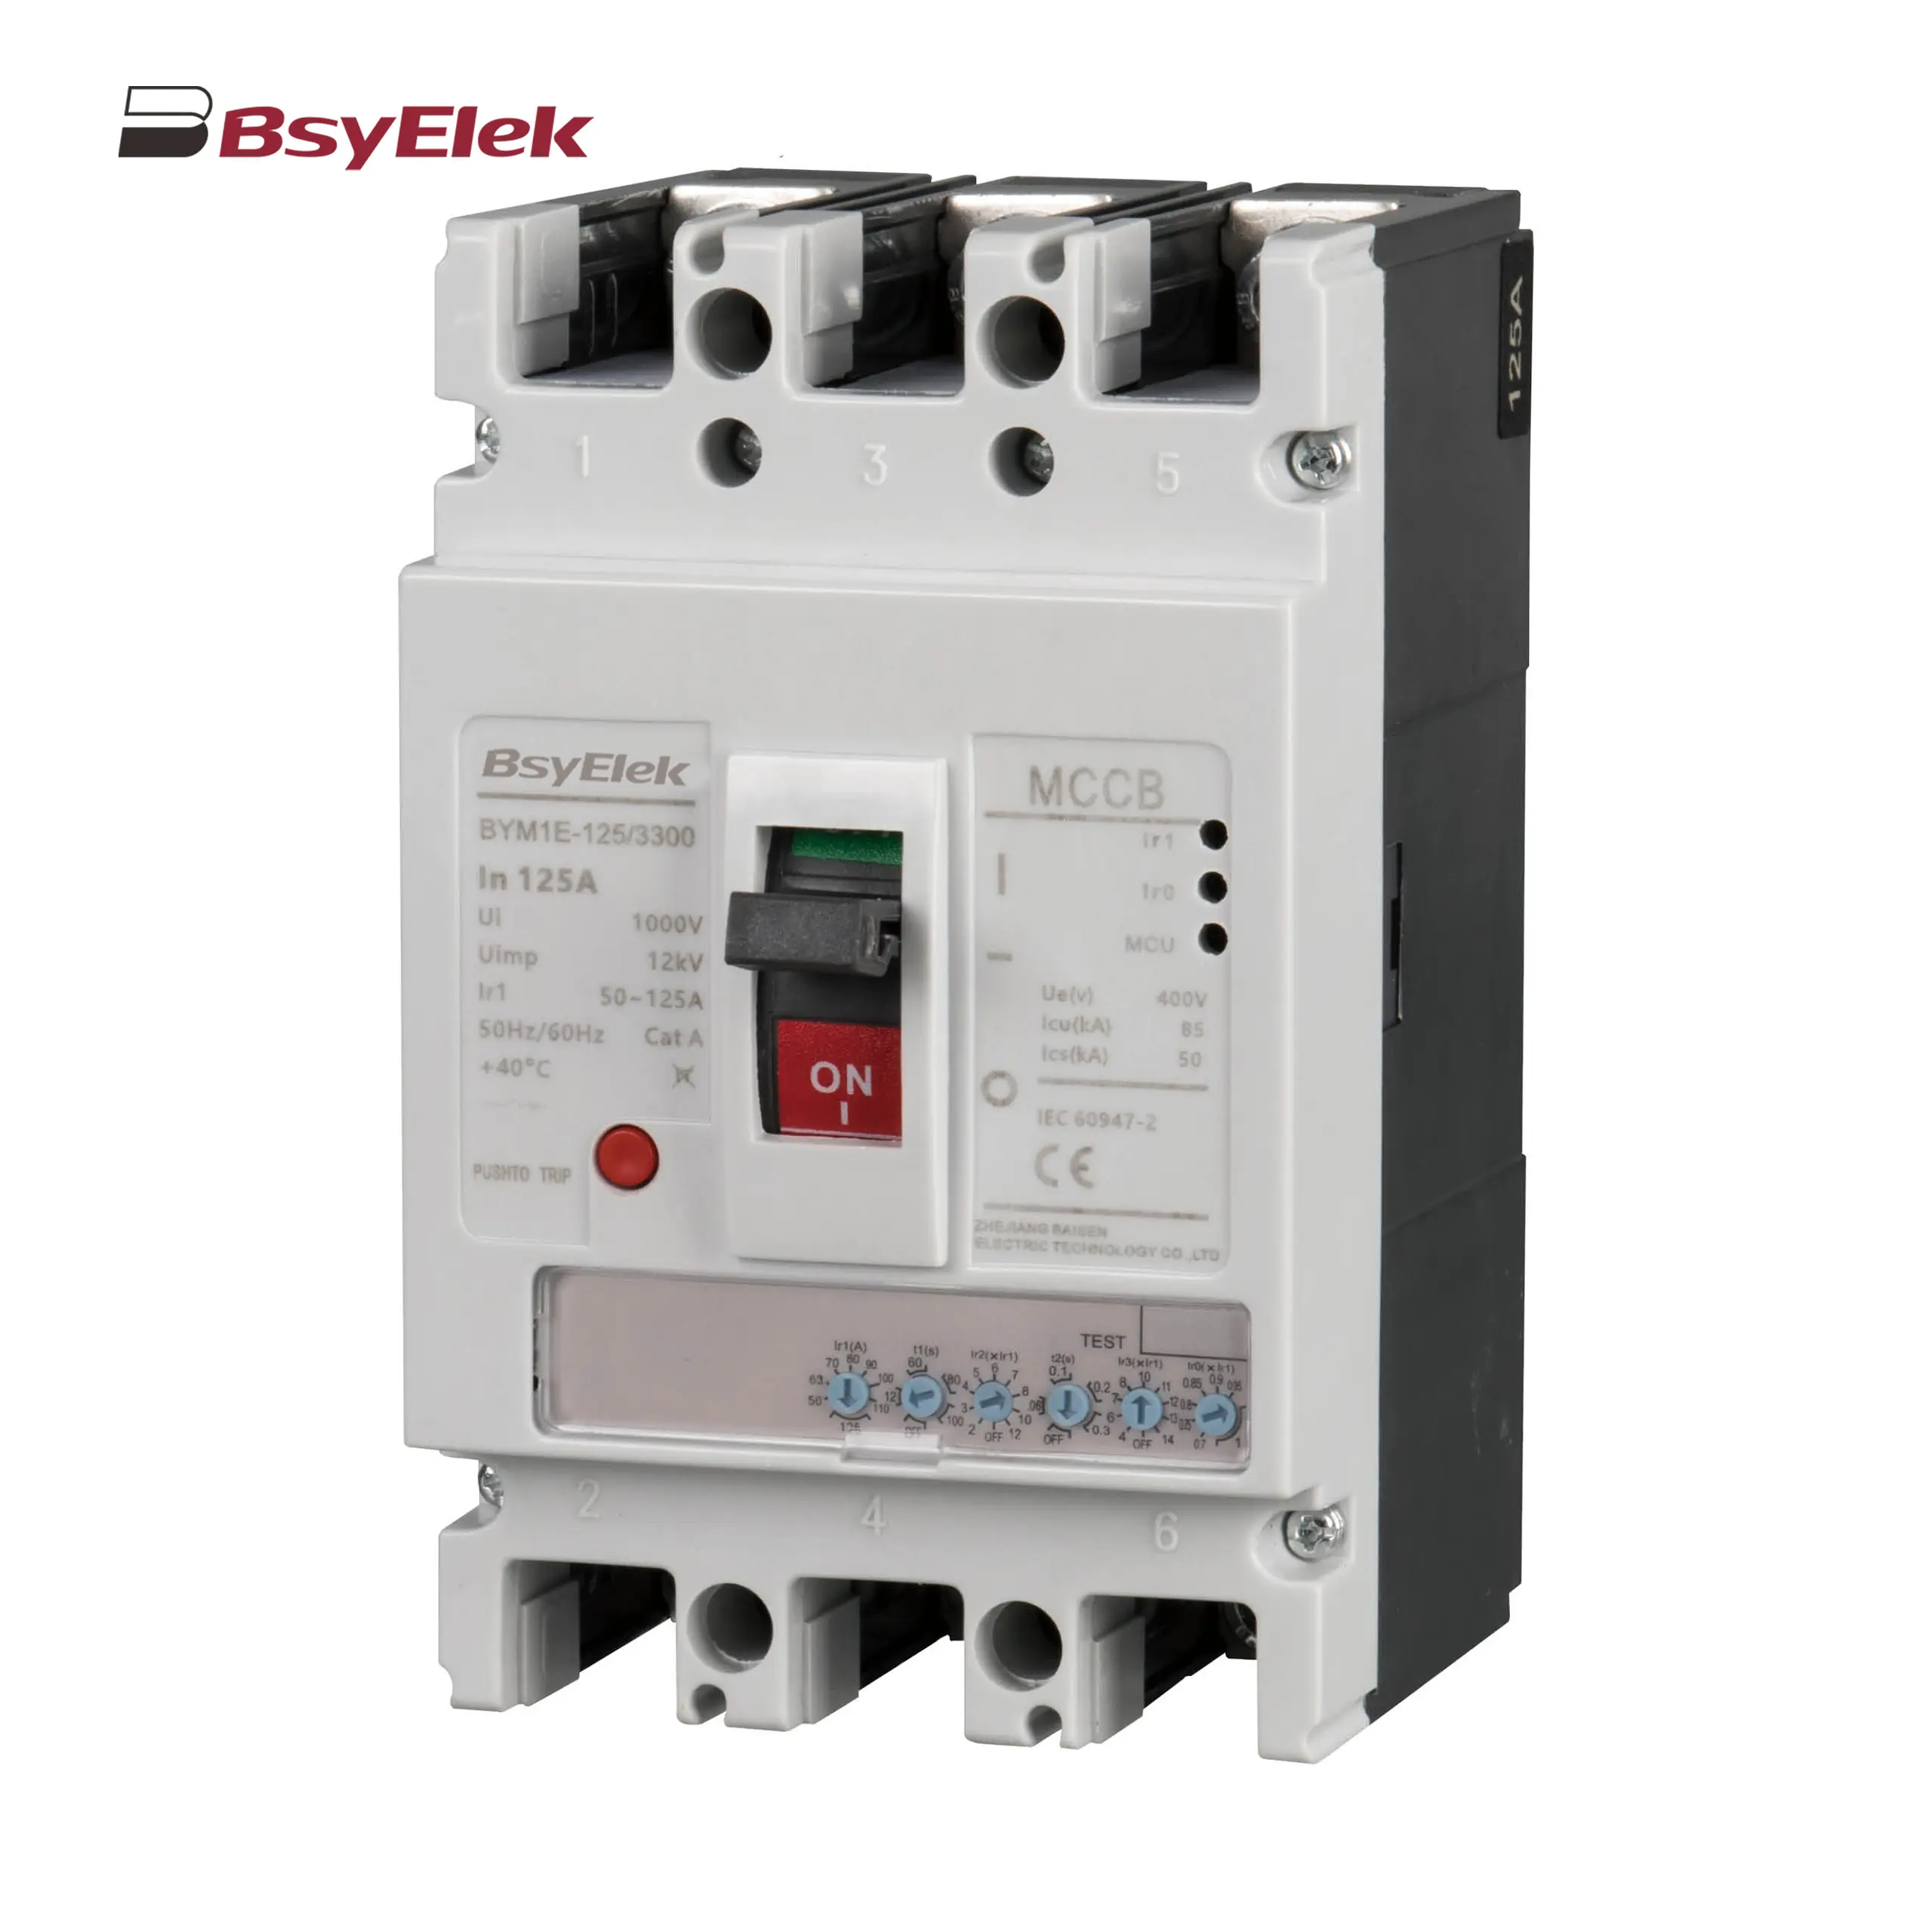 BYM1E MCCB Electronic Type Molded Case Circuit Breaker
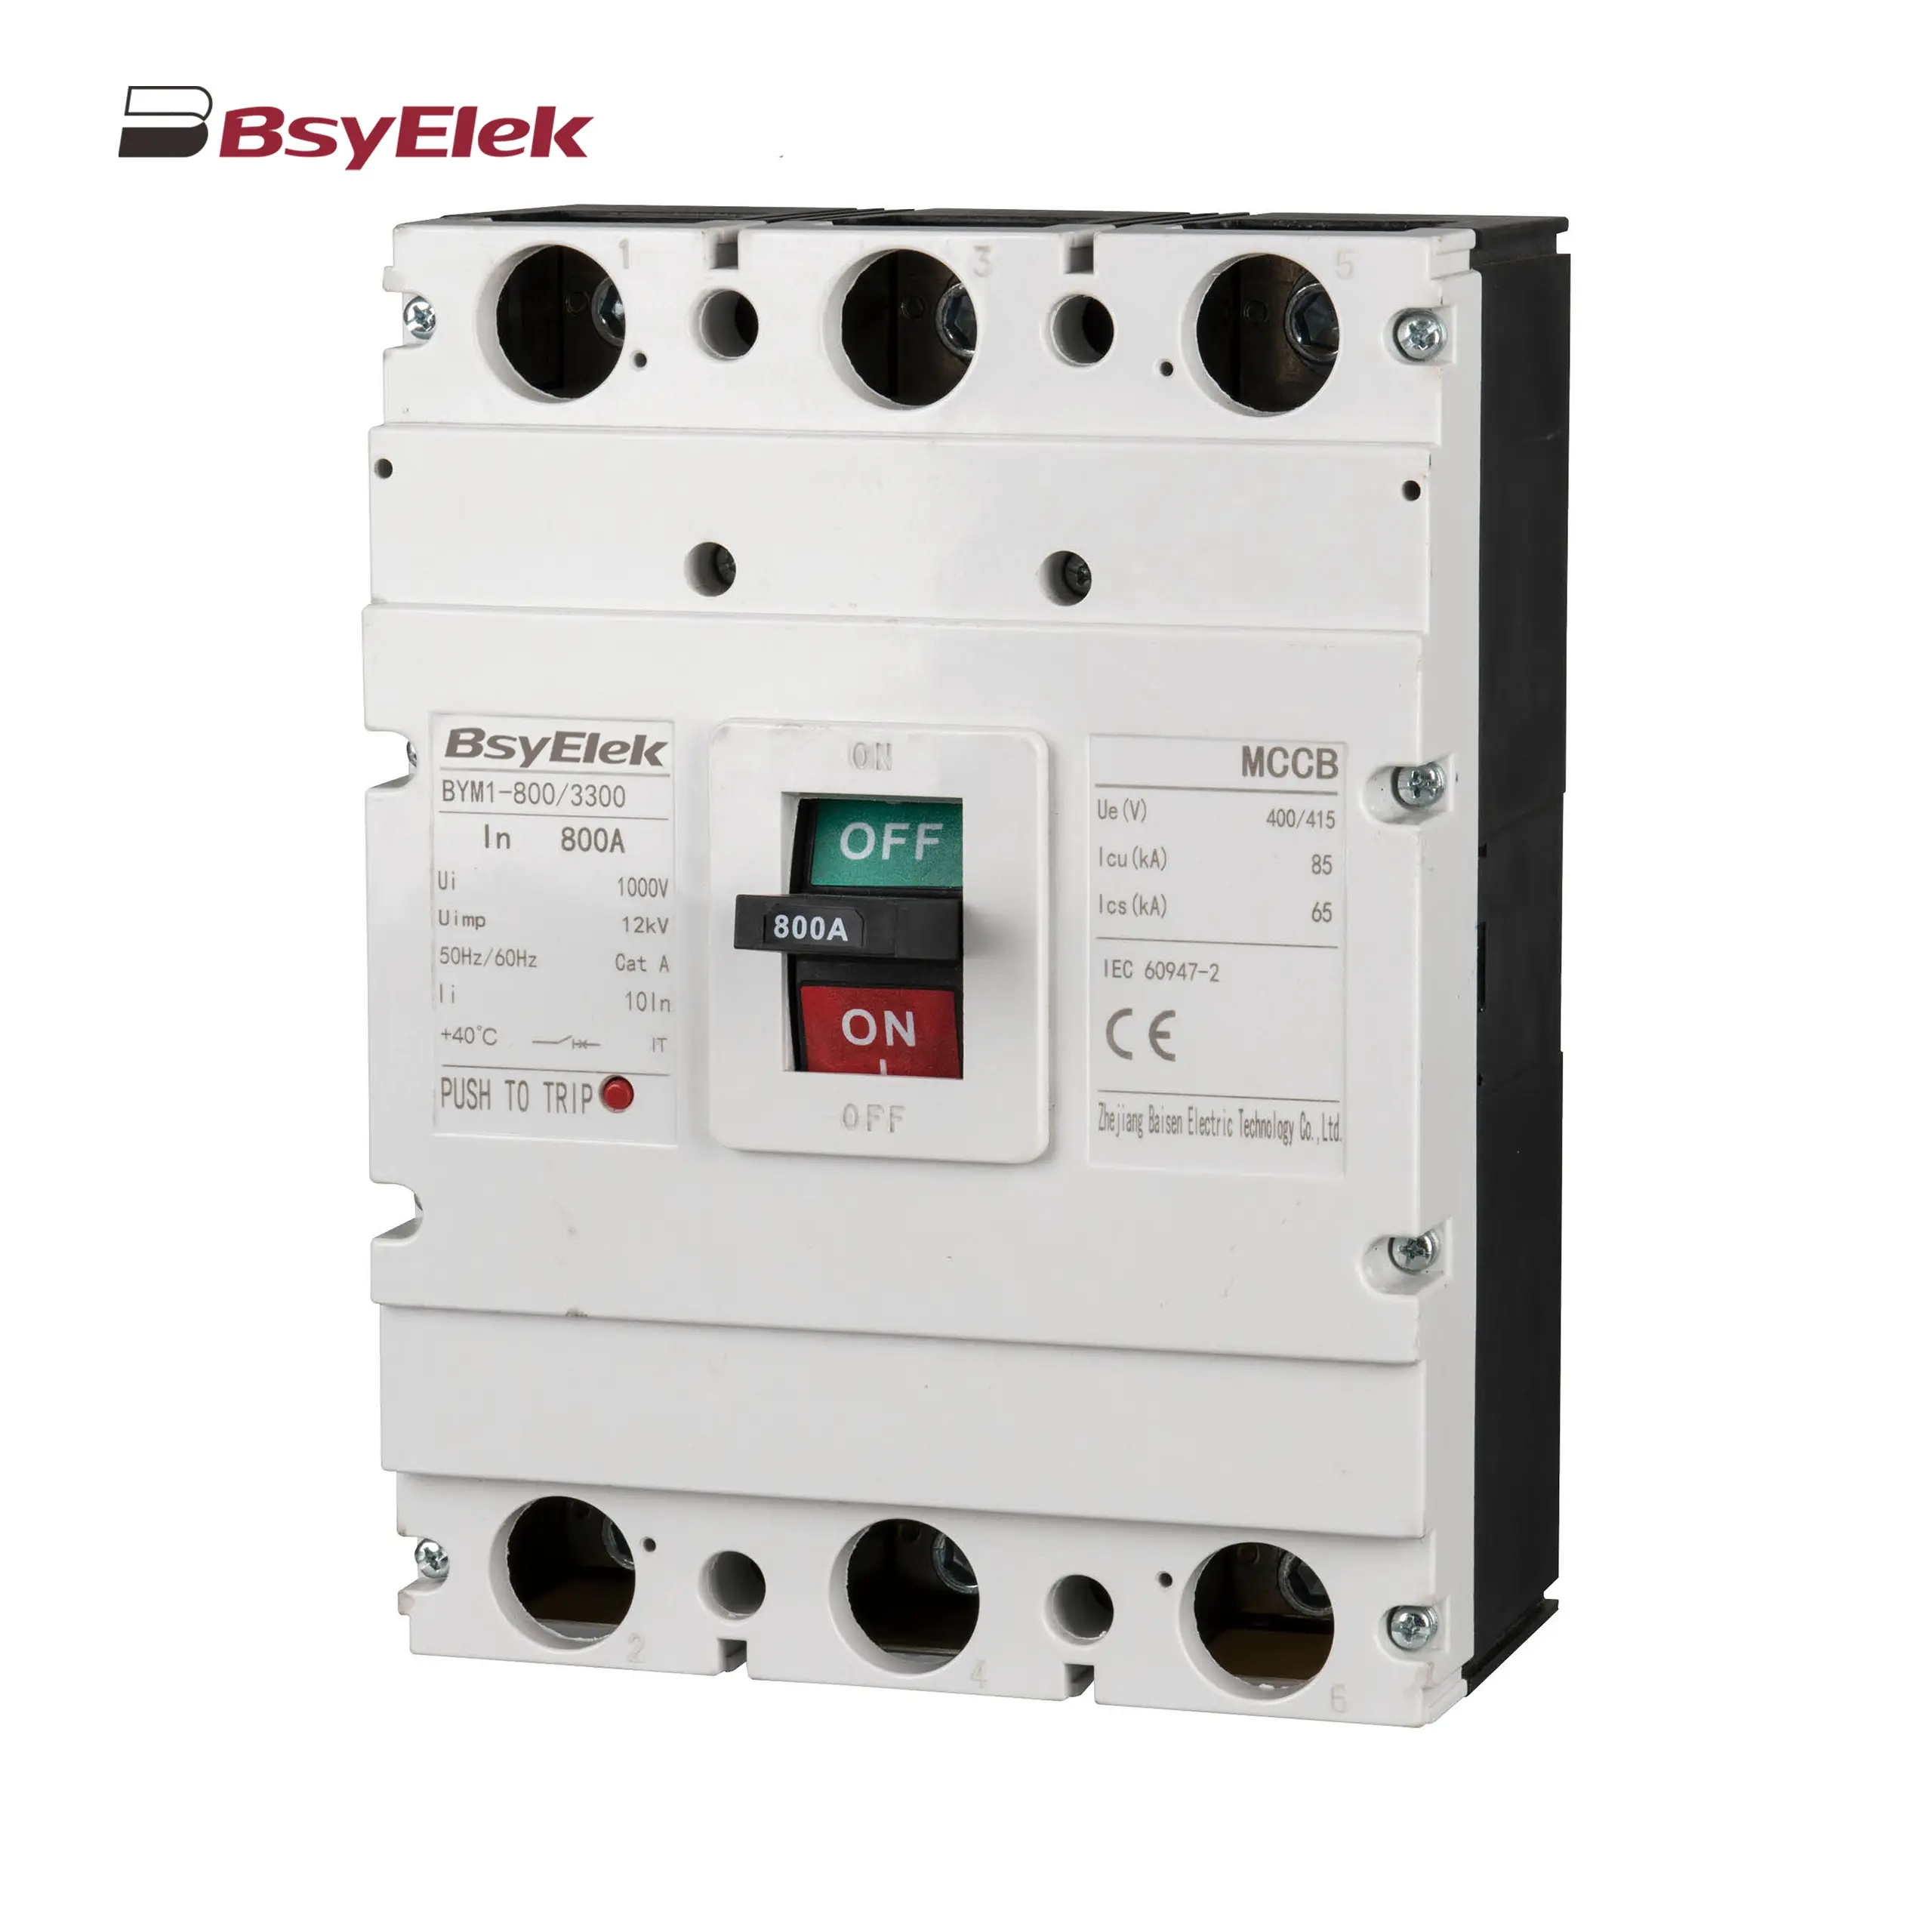 BYM1 MCCB Thermal Magnetic AC Molded Case Circuit Breaker
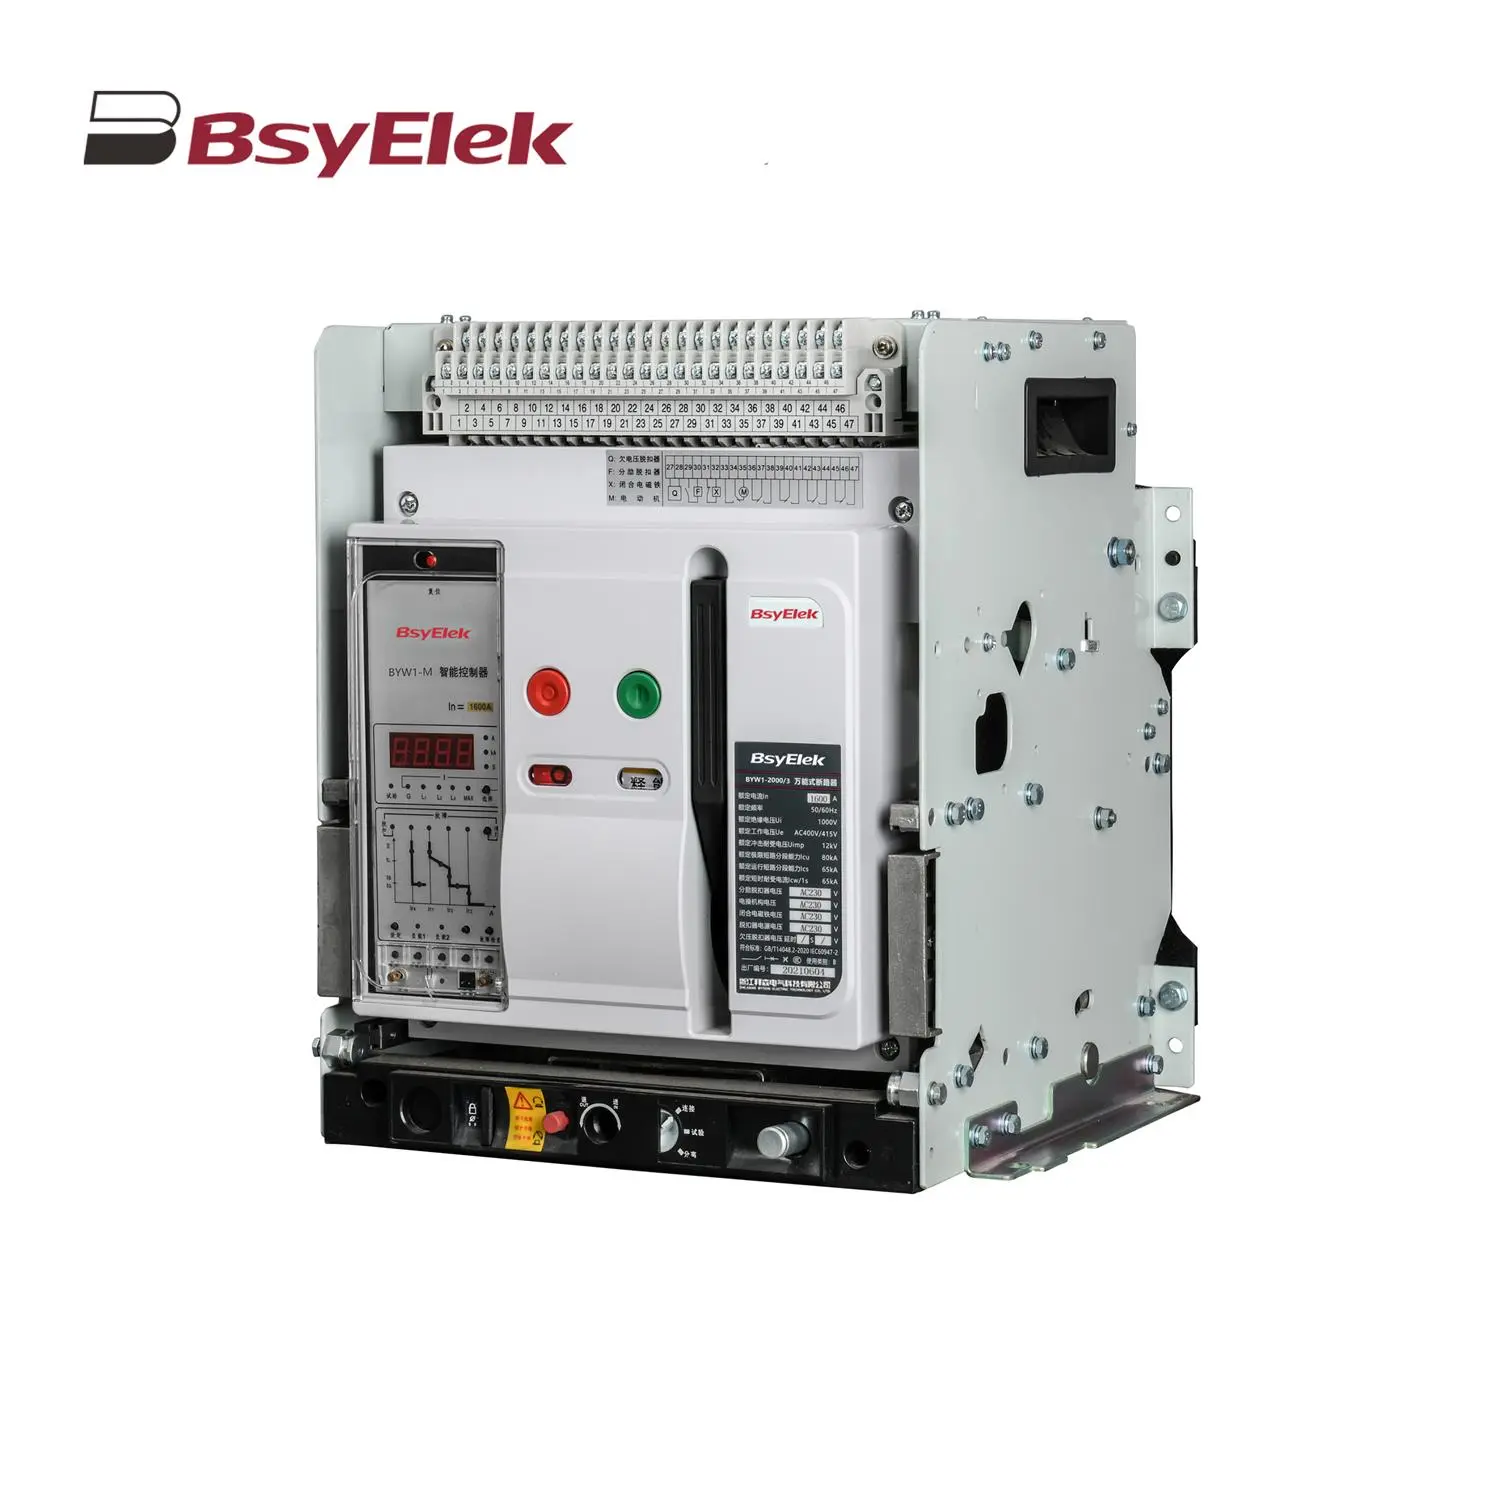 BYW1 ACB Intelligent Universal Air Circuit Breaker
 BYQ1 ATS Isolated Type PC Level Dual Power Automatic Transfer Switch
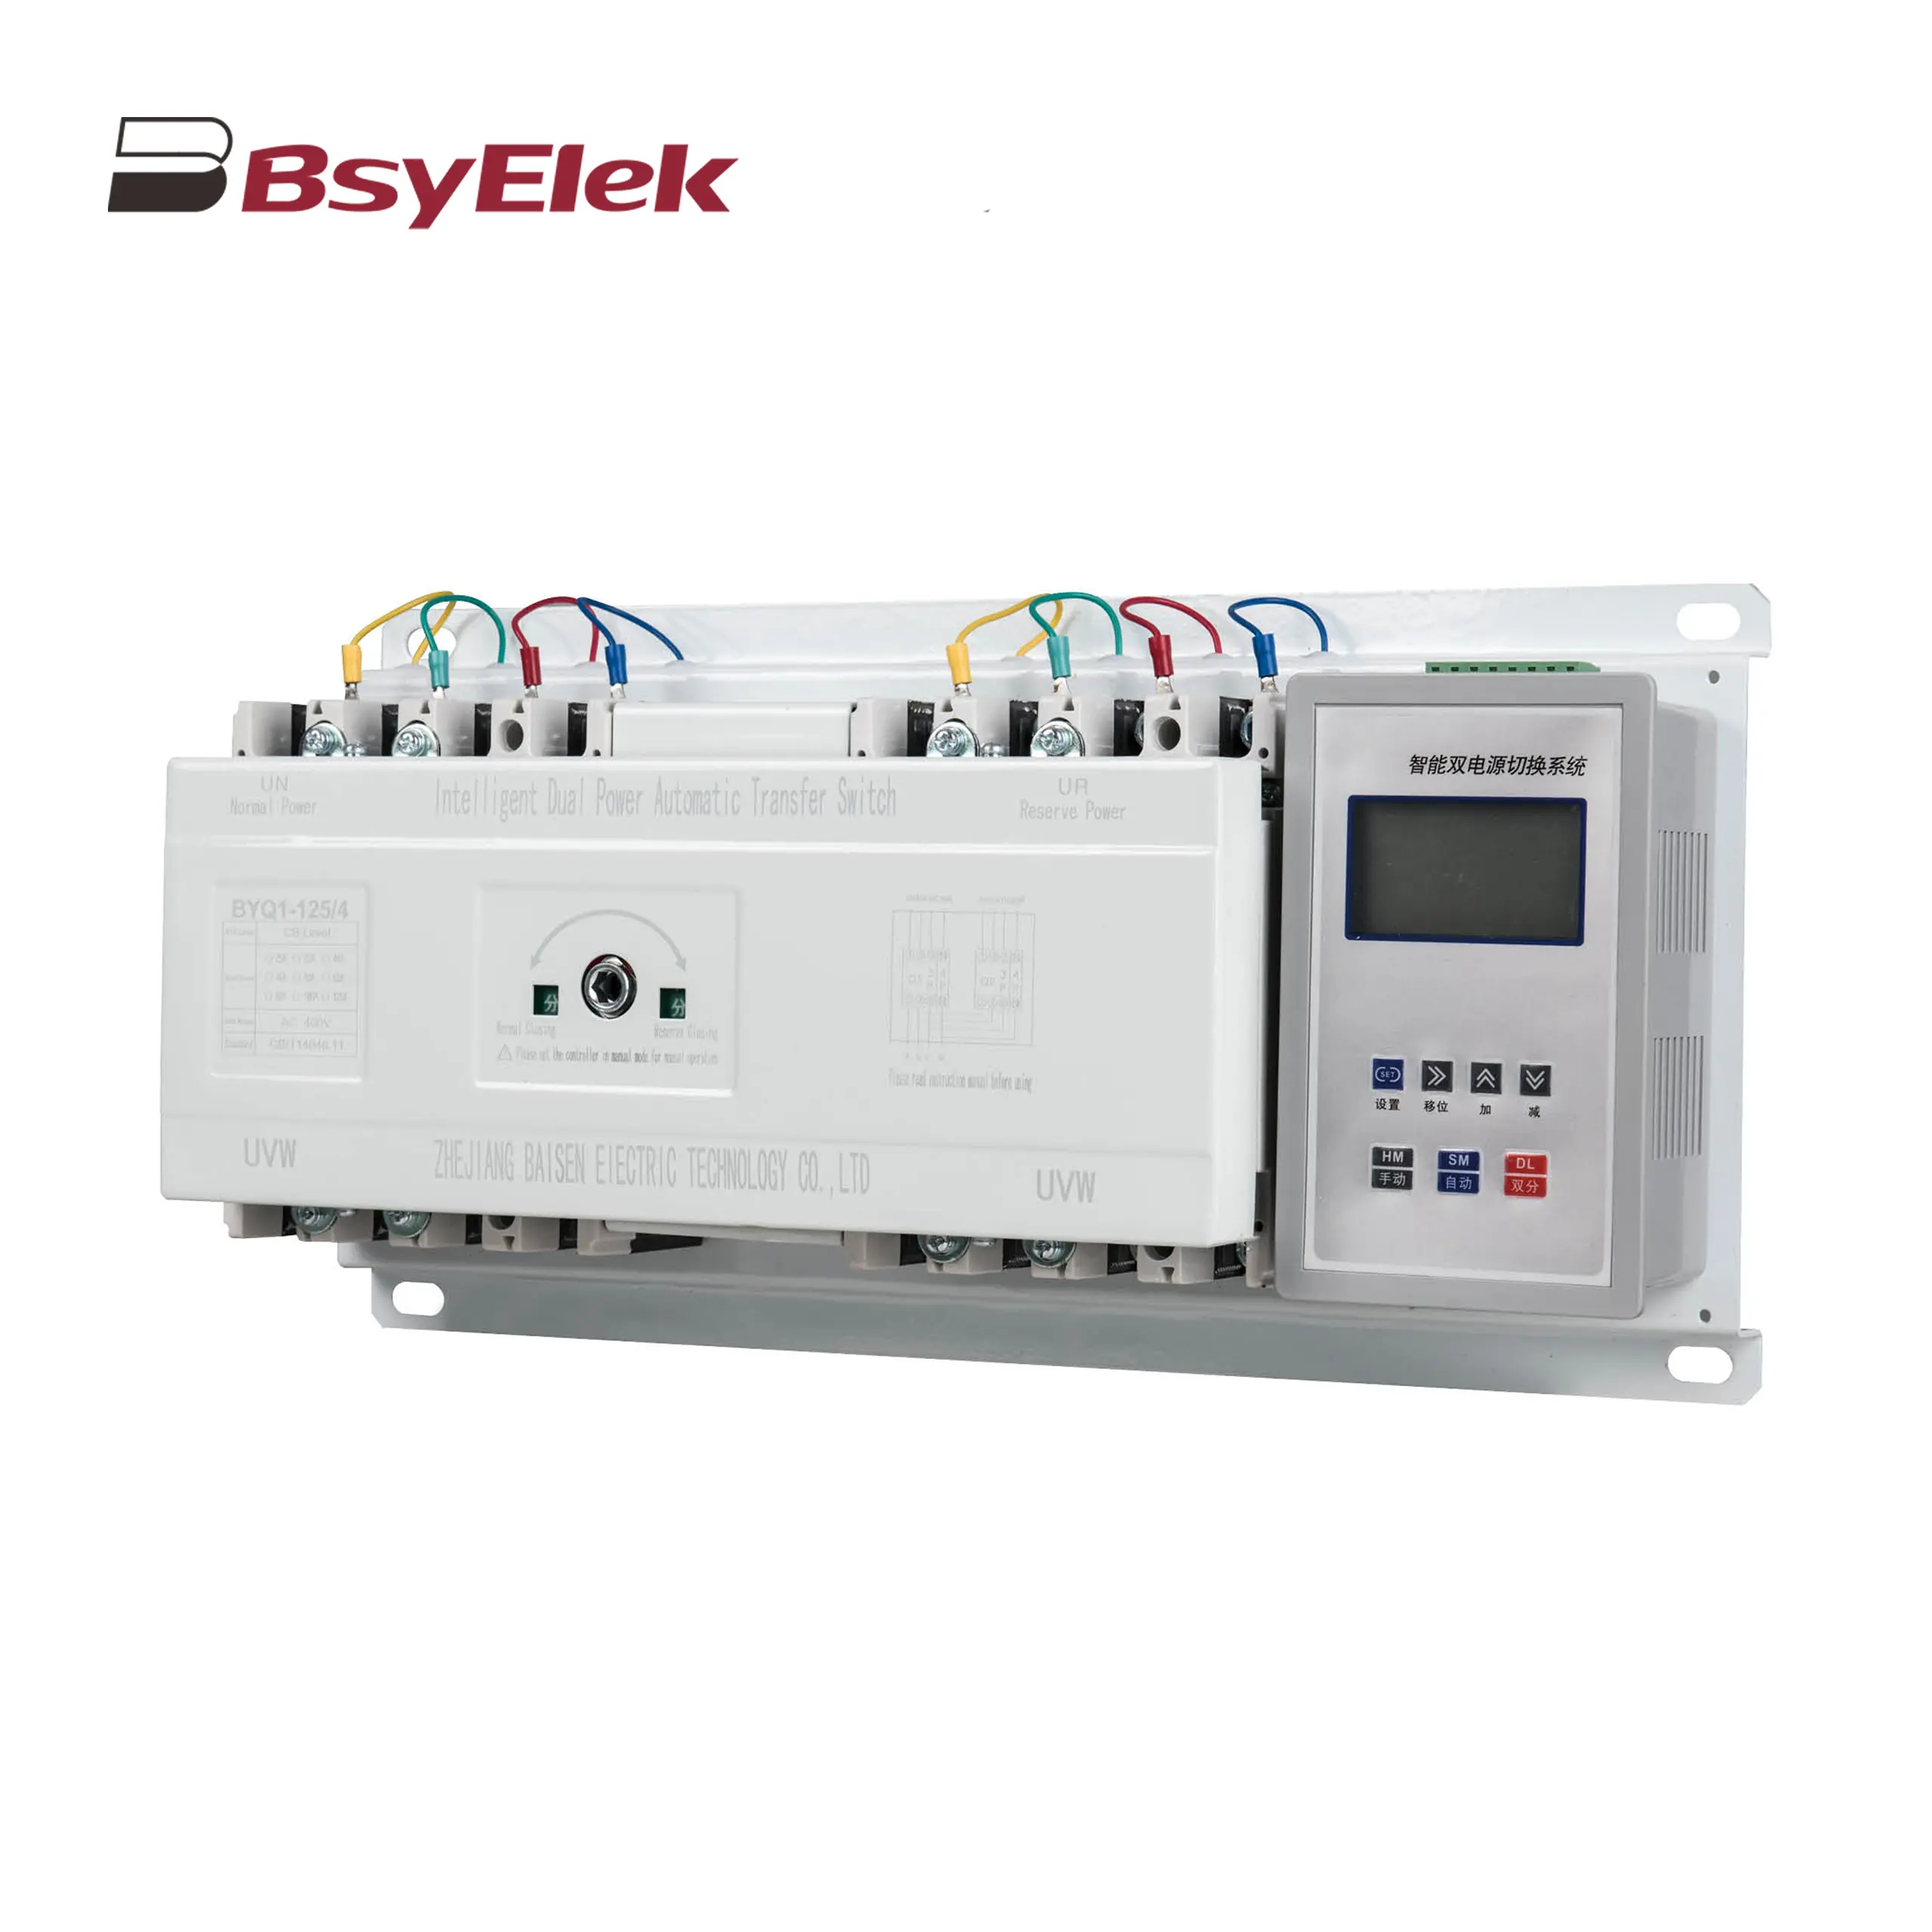 BYQ1 ATS Intelligent Type CB Level Dual Power Automatic Transfer Switch
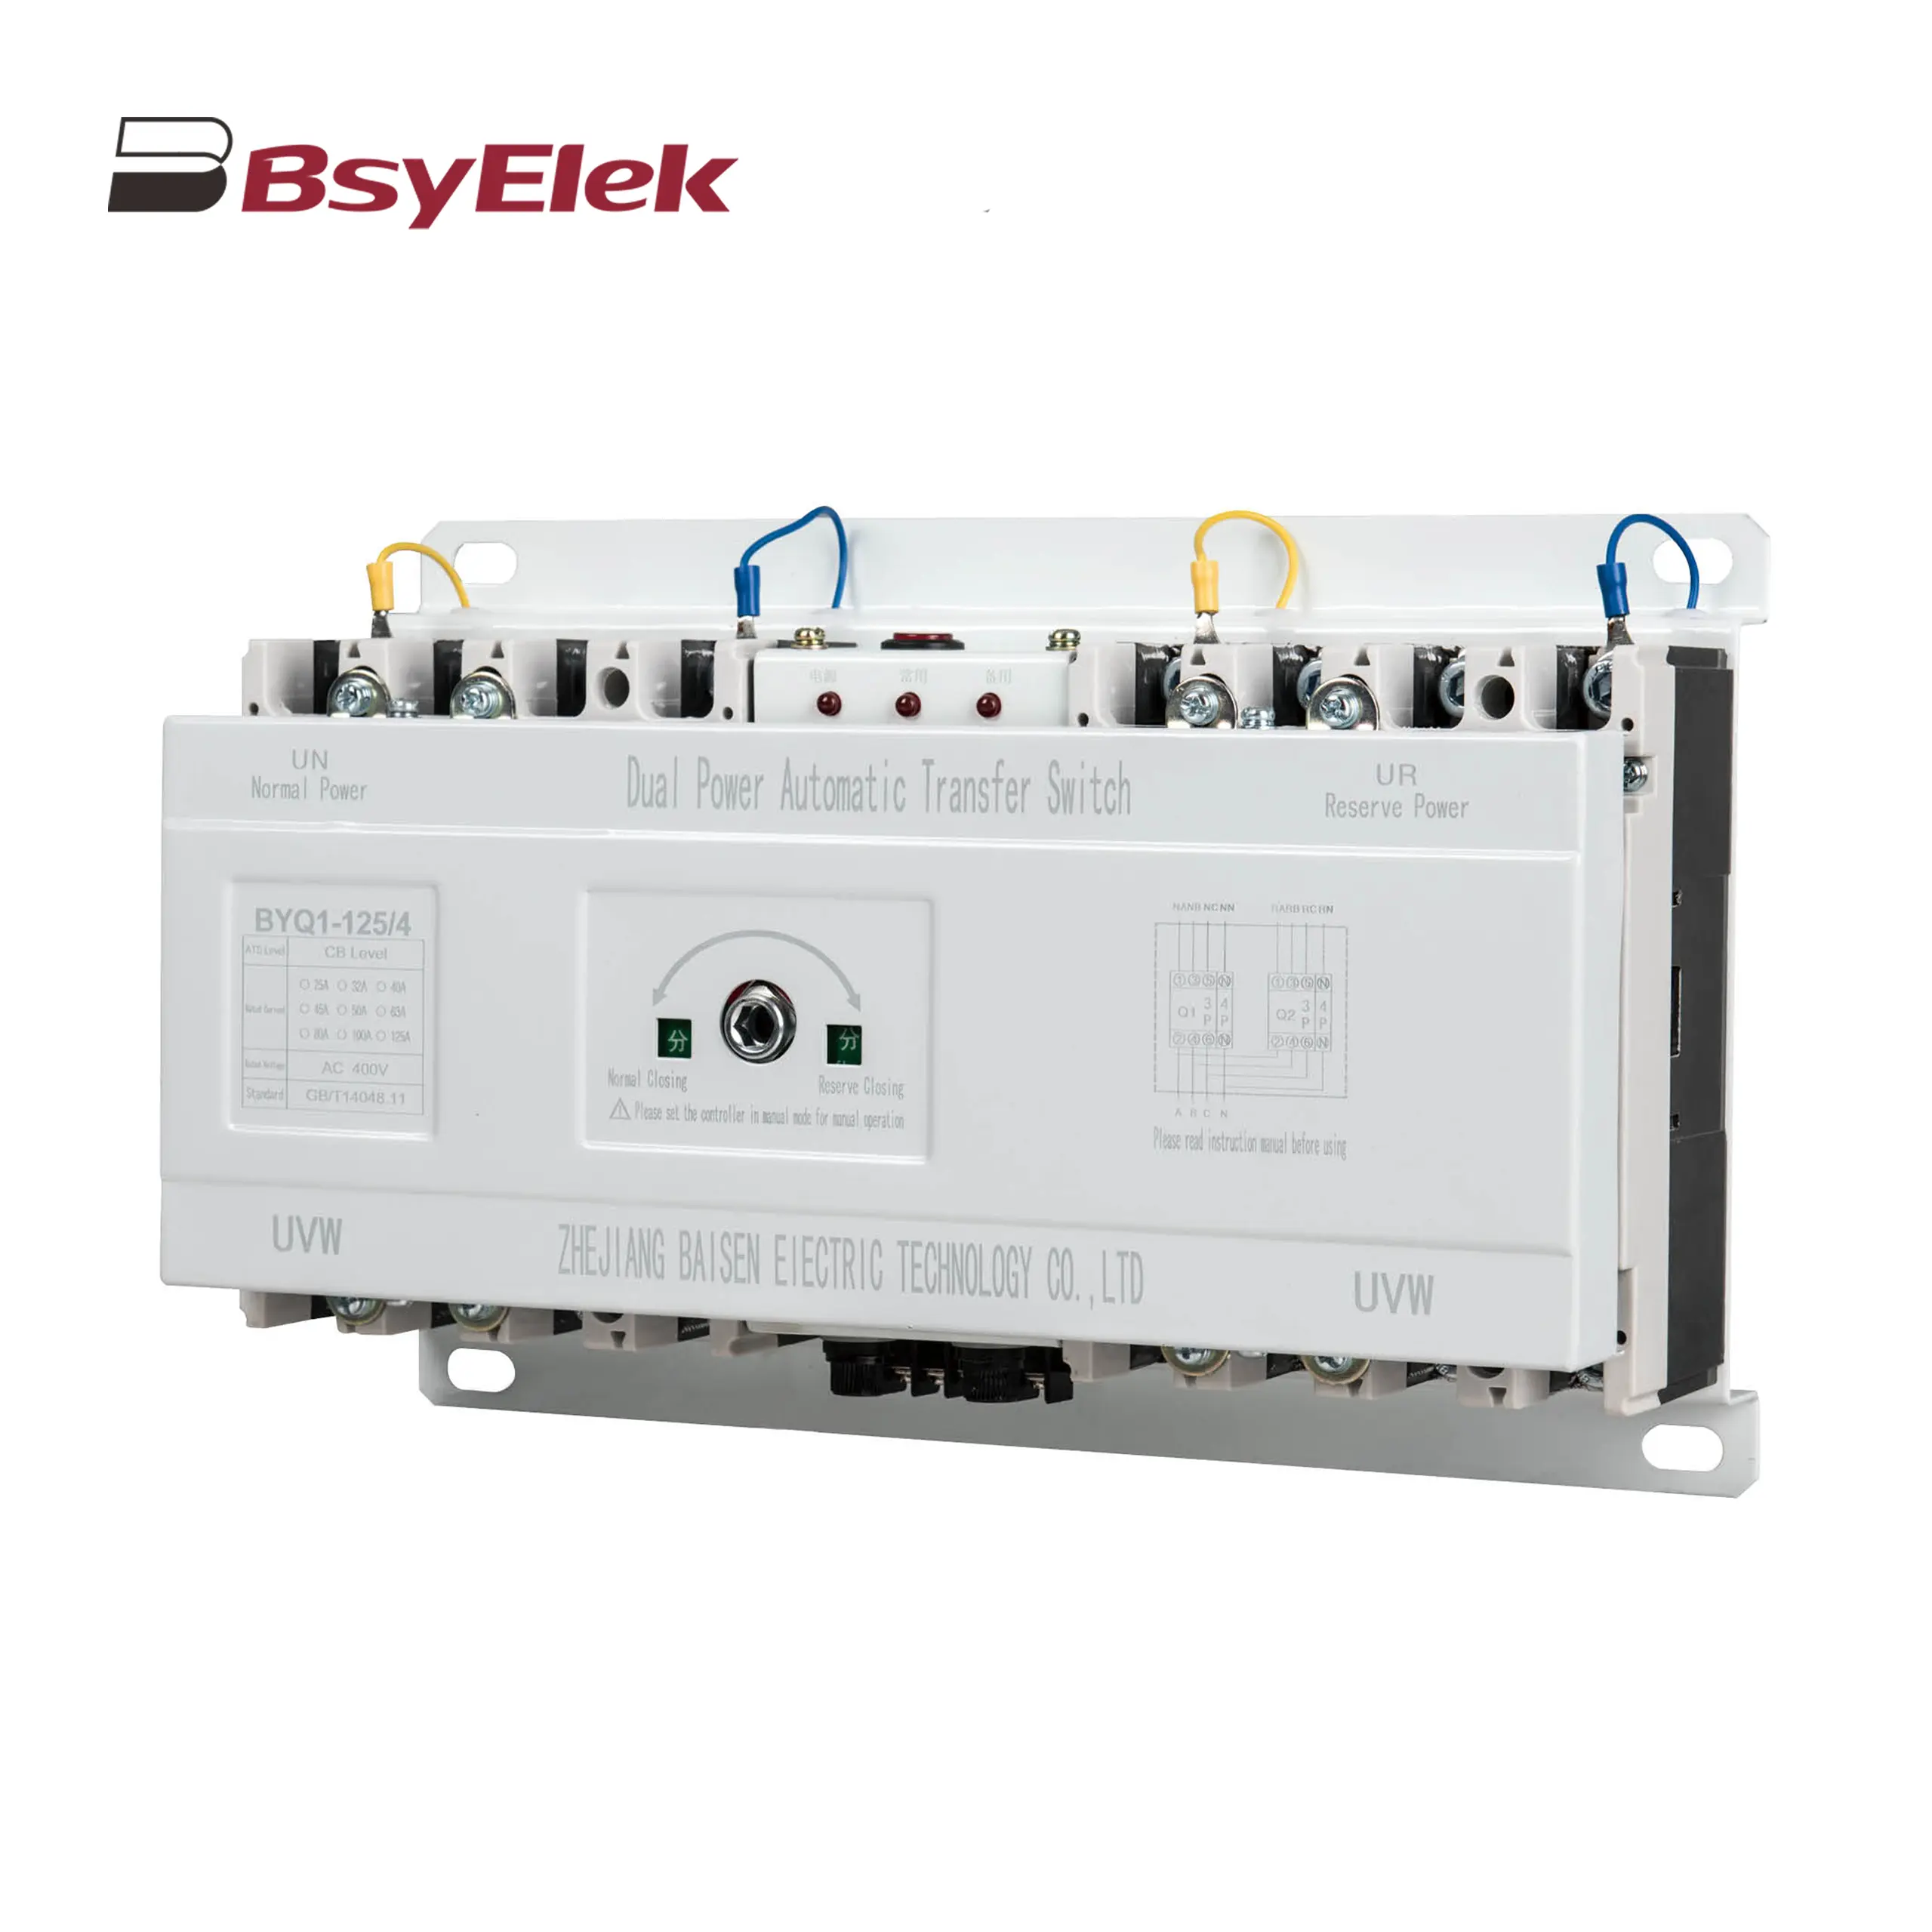 BYQ1 ATS End Type CB Level Dual Power Automatic Transfer Switch
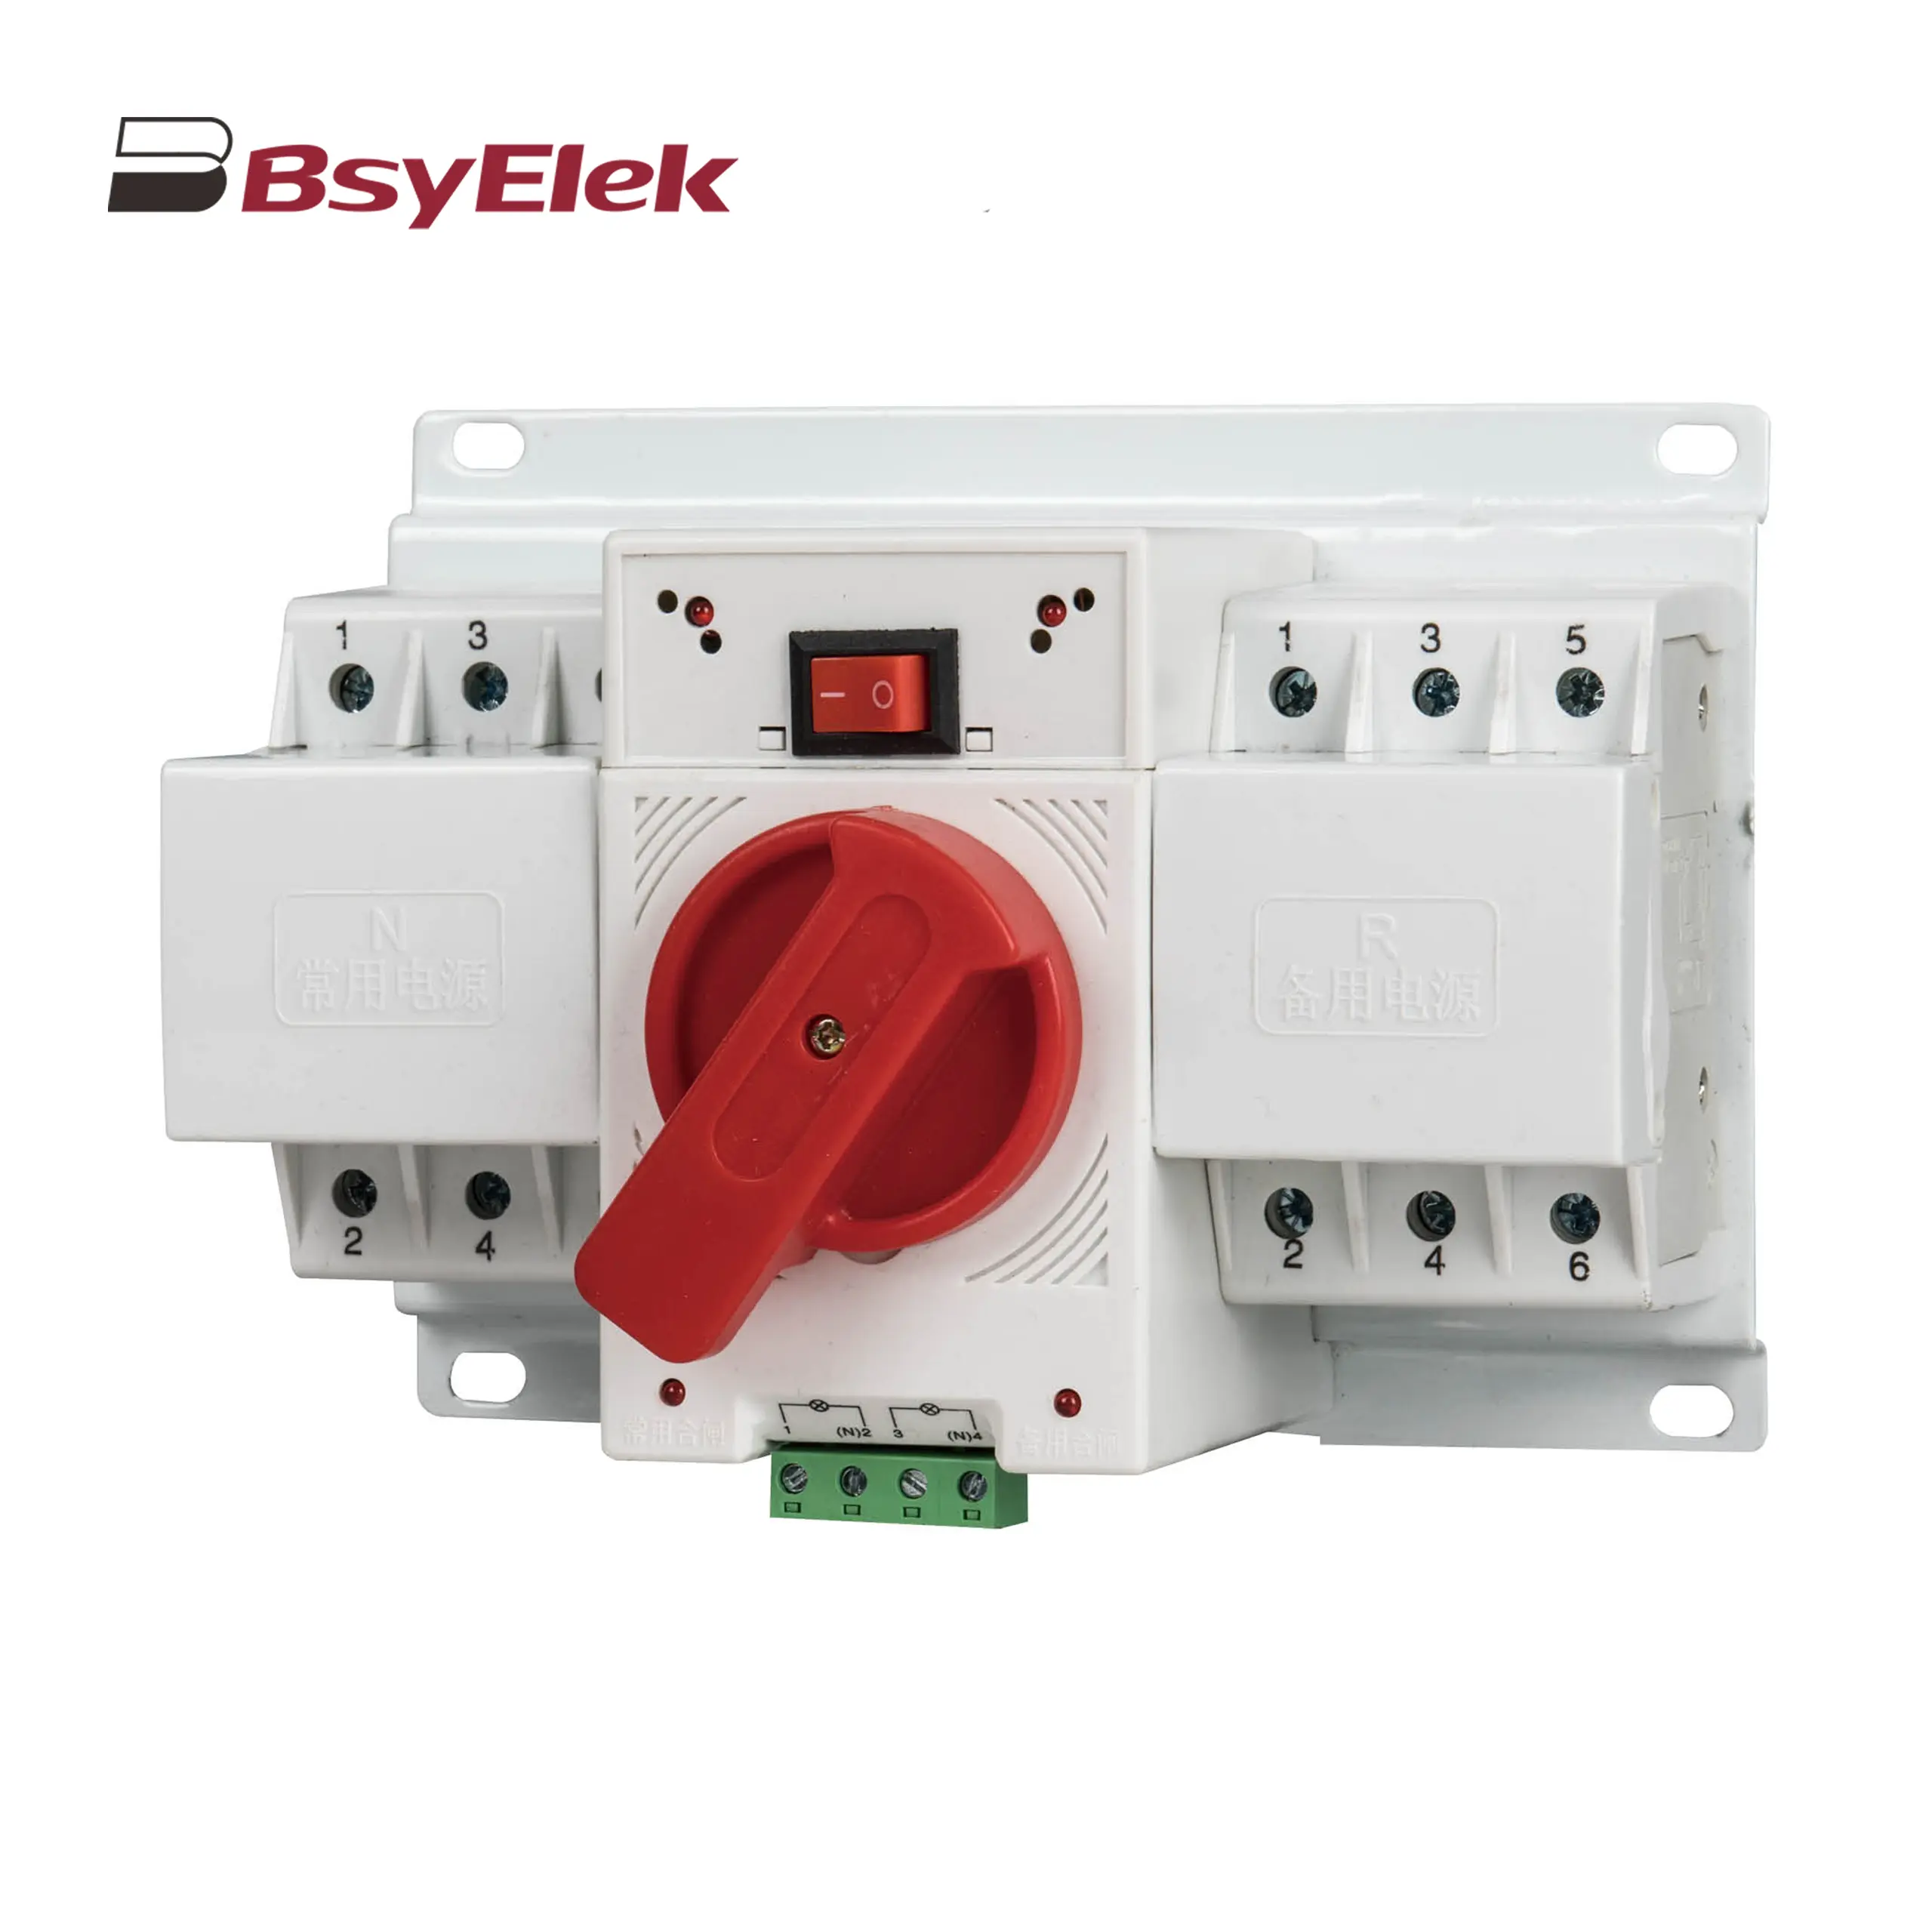 BYQ1 ATS Mini Type CB Level Dual Power Automatic Transfer Switch
 Stainless Steel Hinge Type Electrical Box
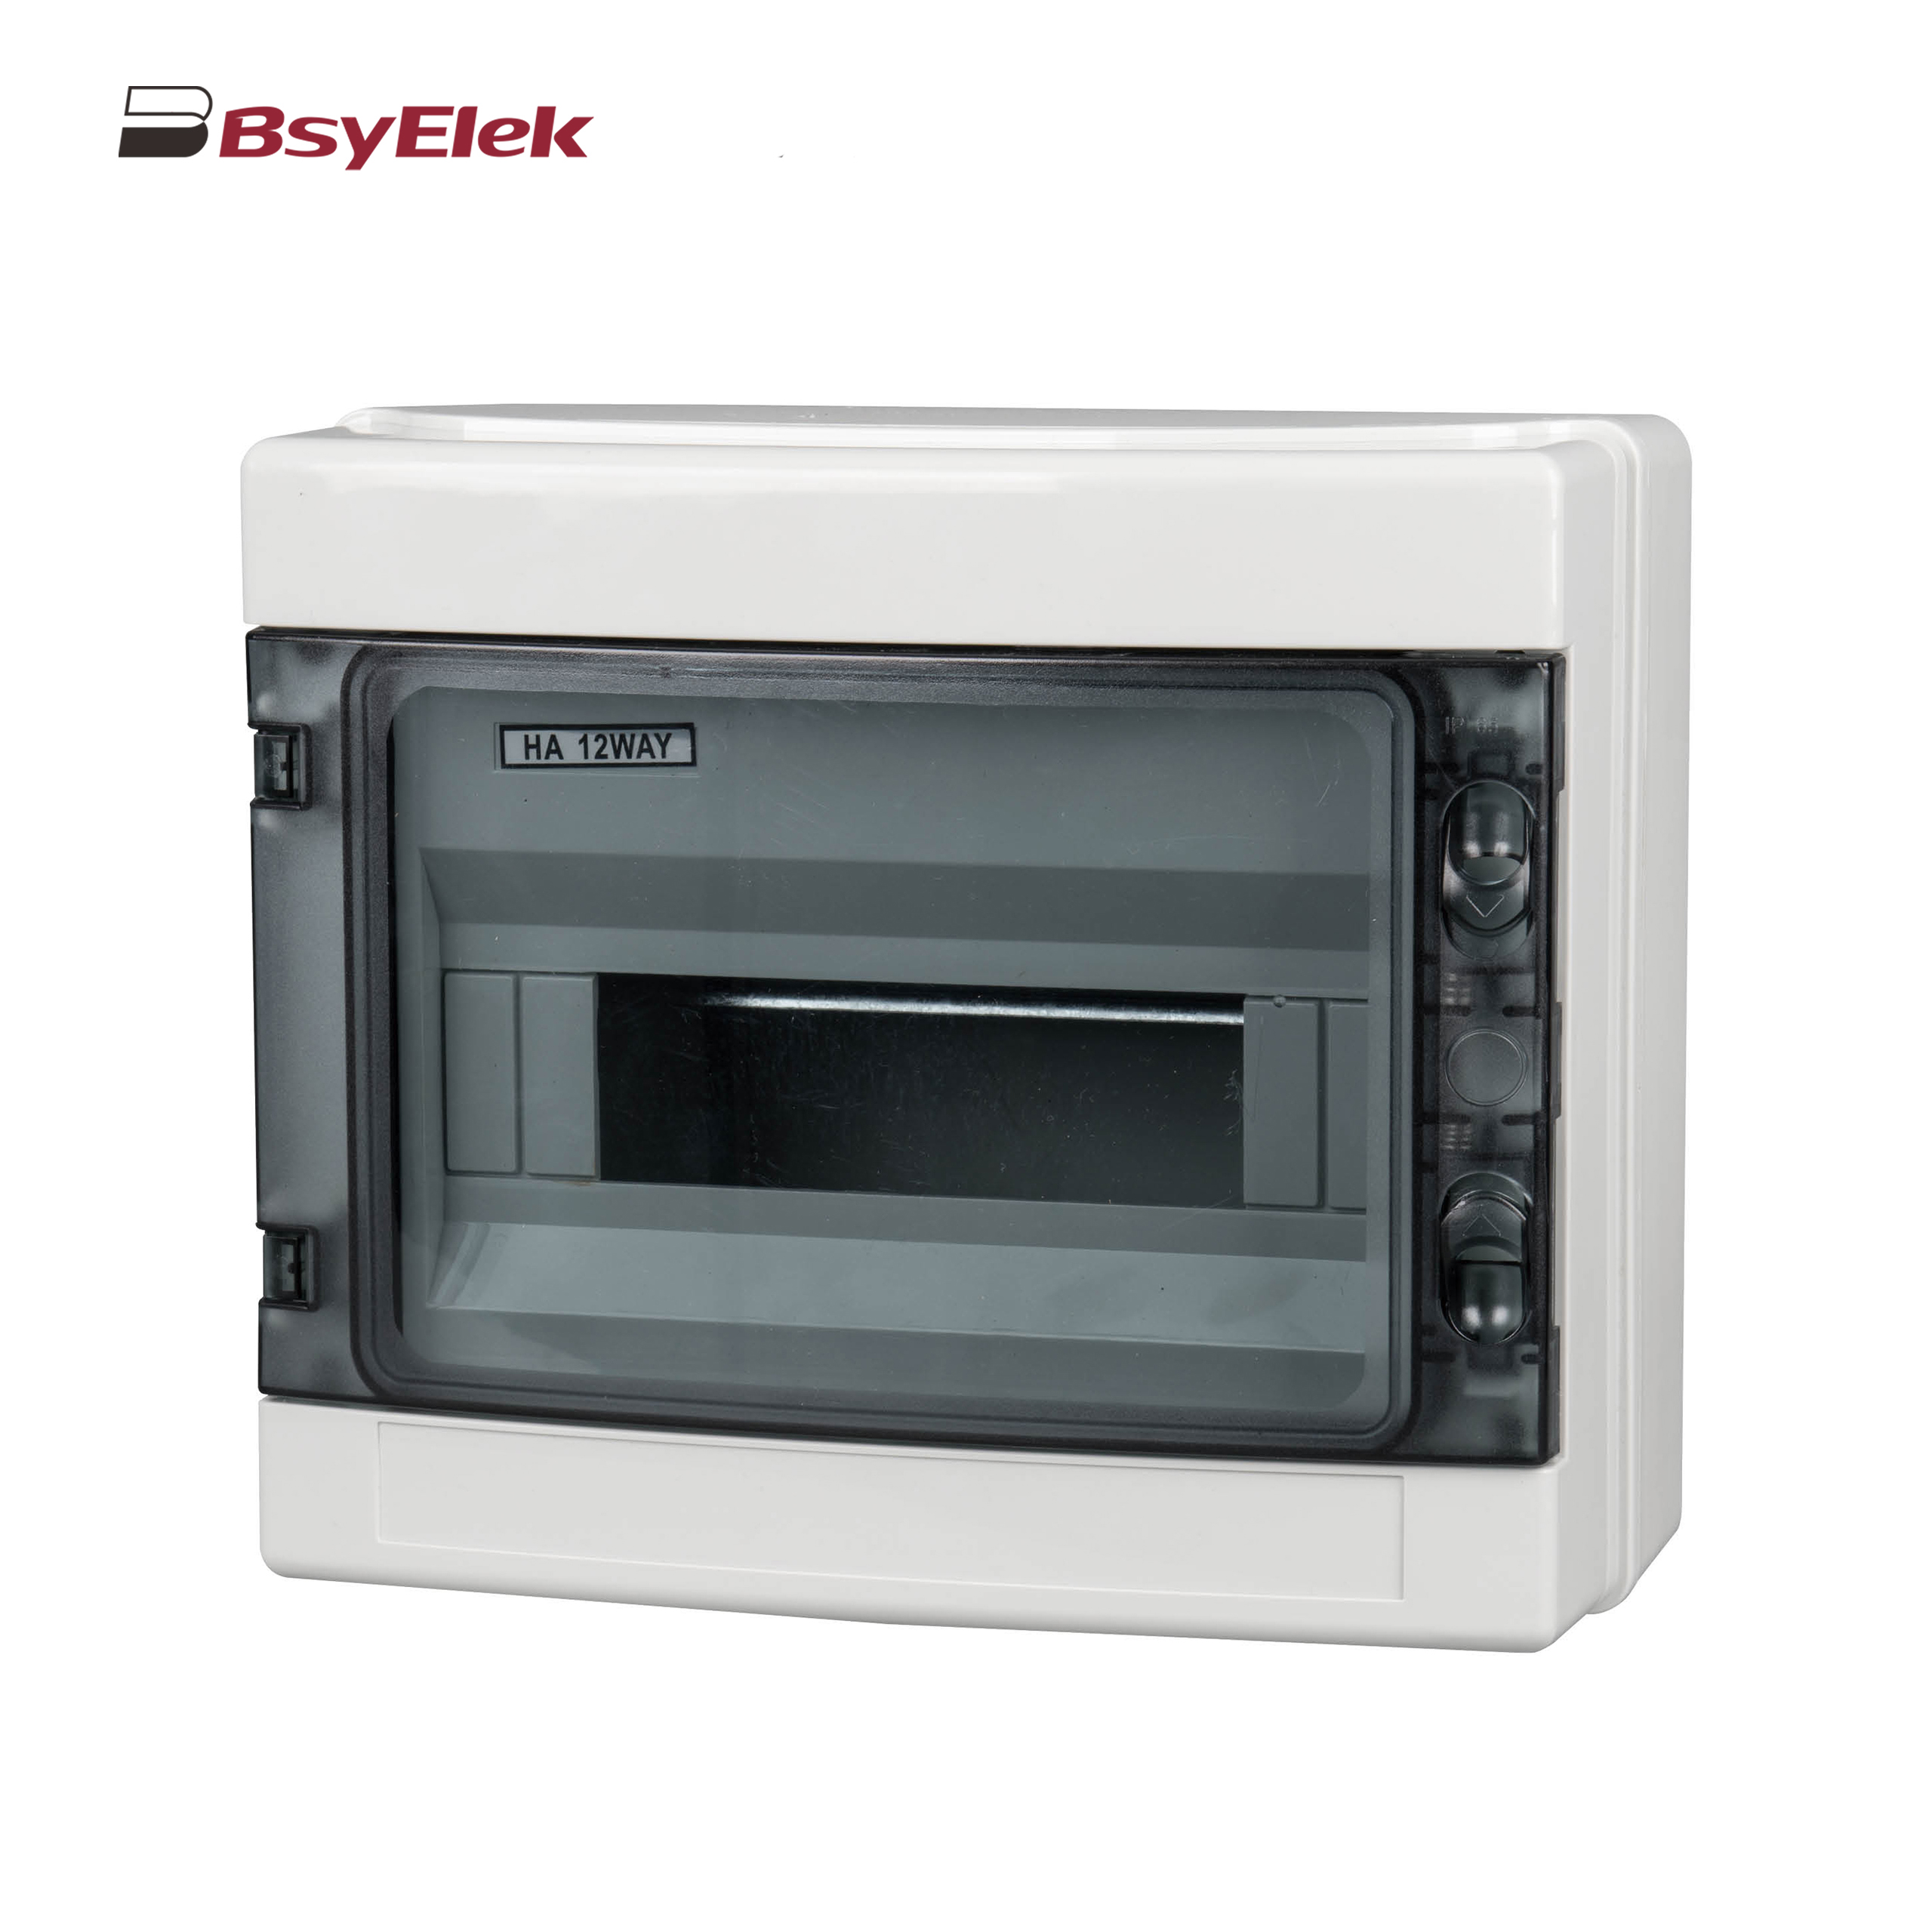 HA Waterproof Distribution Box
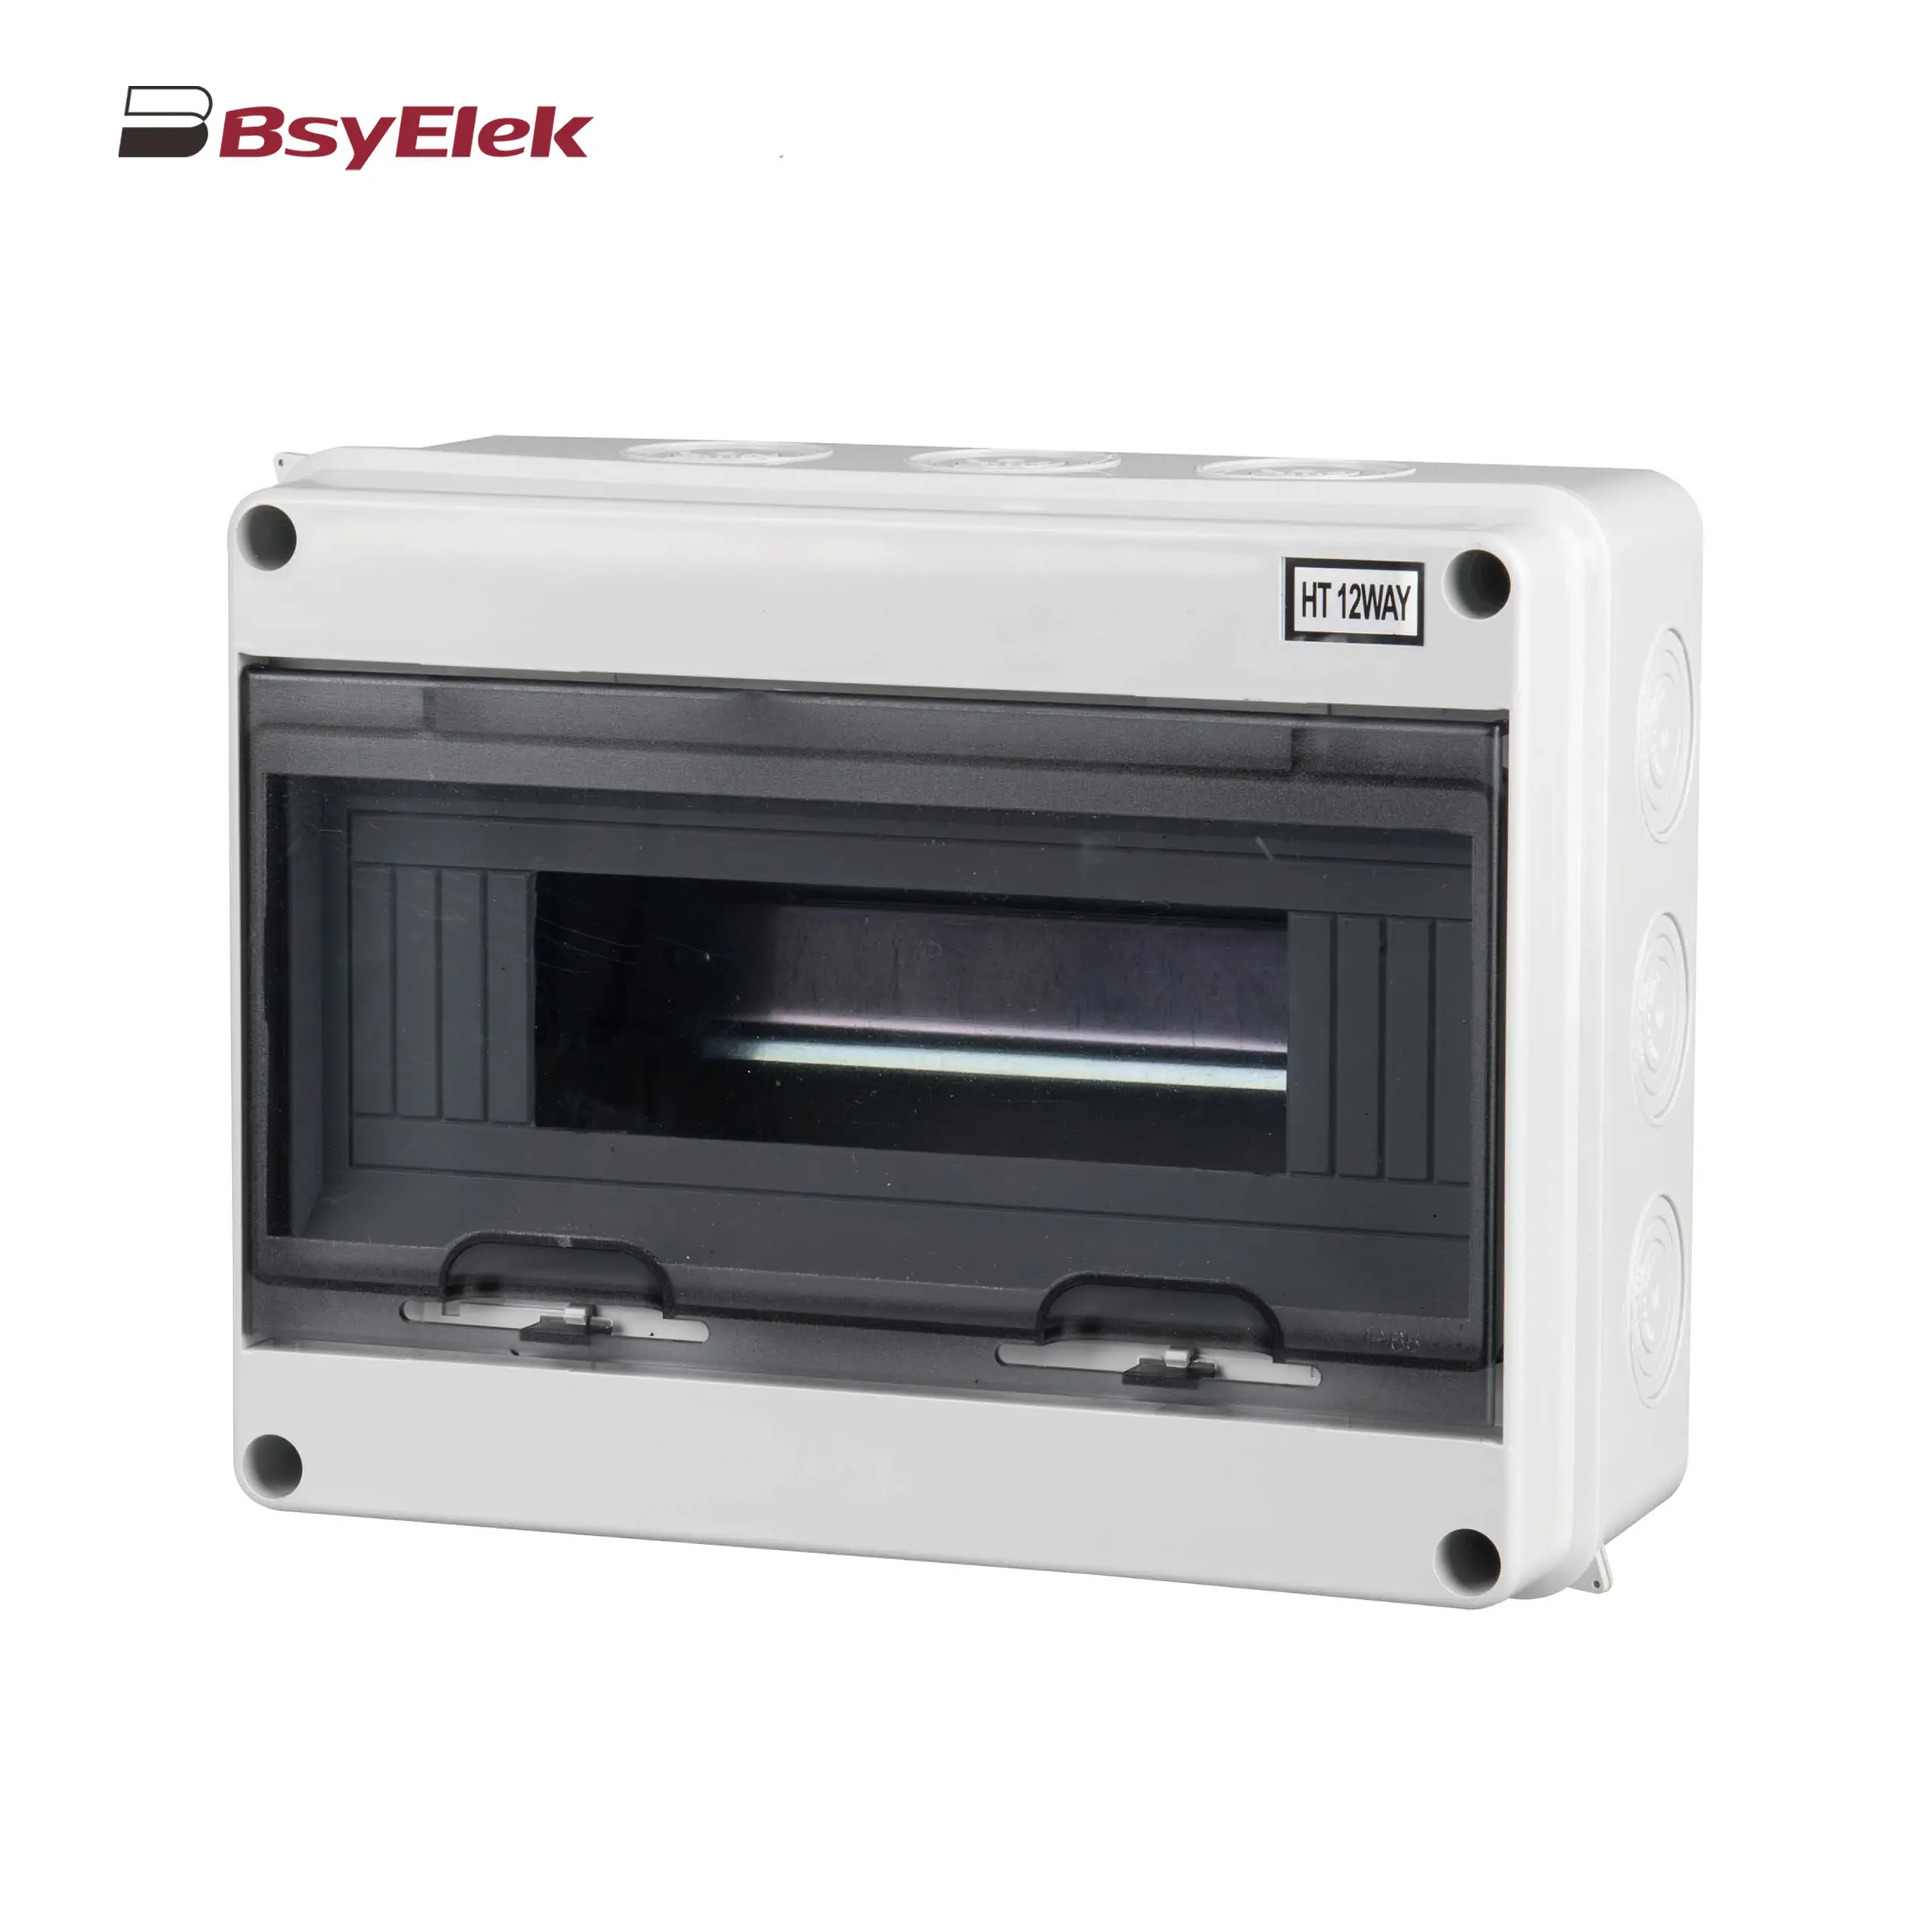 HT Waterproof Distribution Box
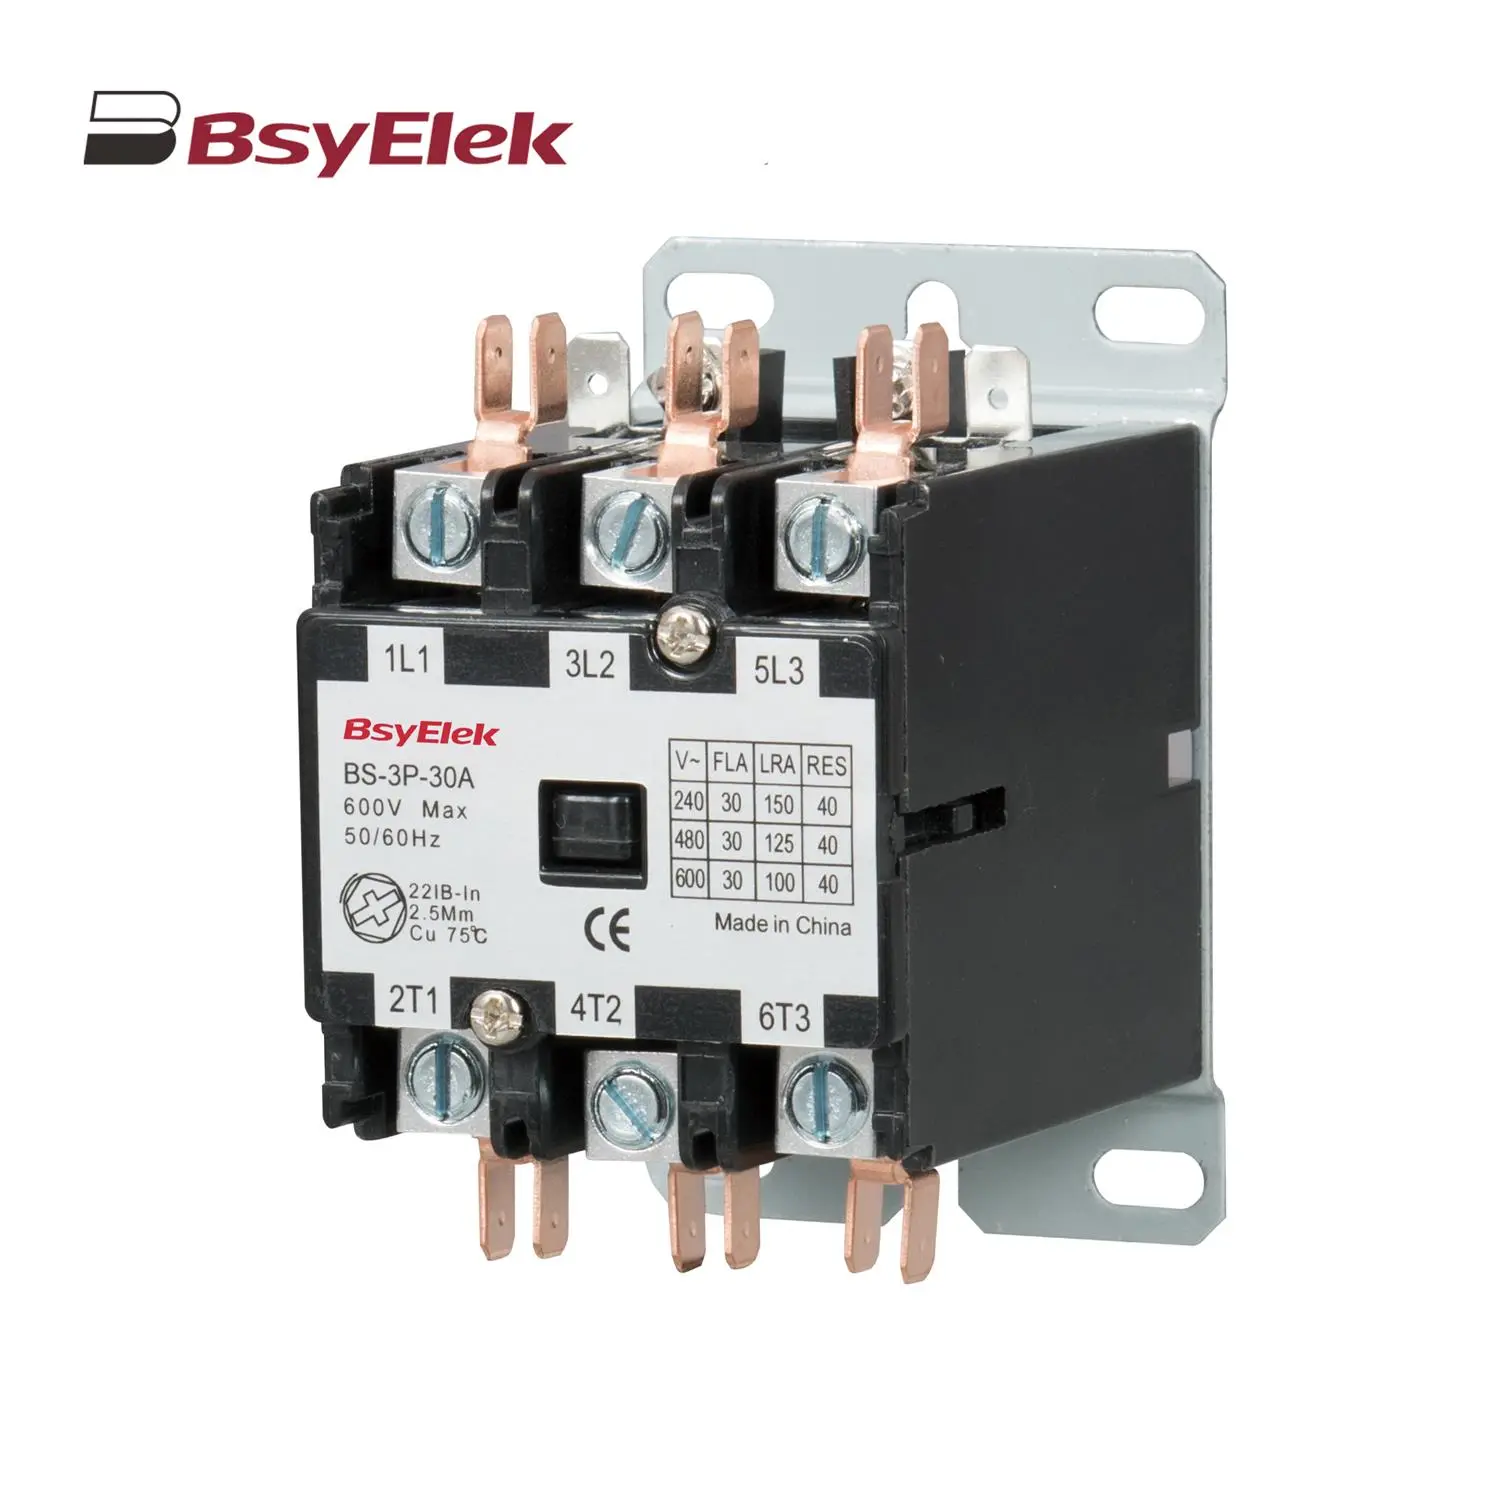 BS Definite Purpose Magnetic AC Contactor
Leave Your Message